How to Clean a Liquid-Cooled PC: Your Ultimate Guide
Learn how to clean a liquid-cooled PC to maximize performance and longevity. Our guide covers everything from dusting radiators to custom loop maintenance, ensuring your rig stays cool and efficient. Keep your system pristine and prevent overheating! ❄️✨
|
Loading tags...

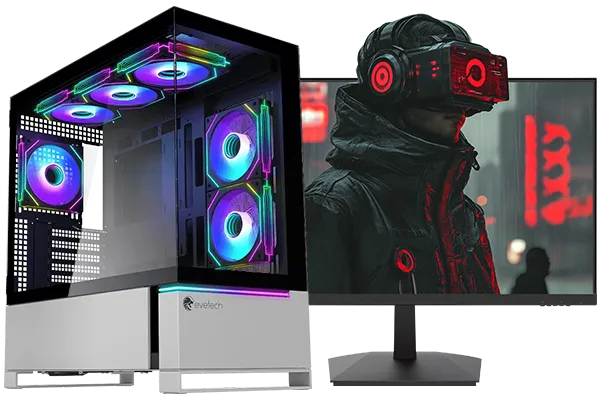
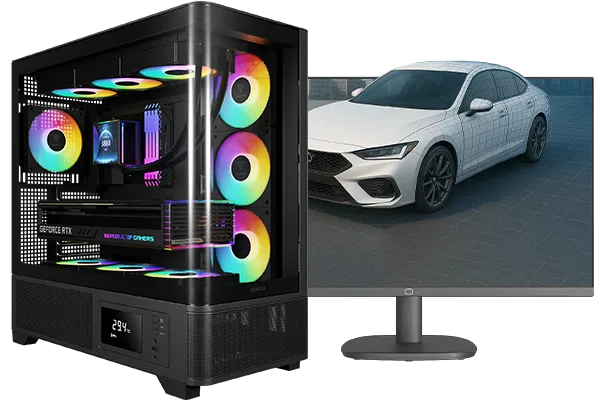
Your liquid-cooled PC is a masterpiece of engineering, but even the best rigs in Mzansi can fall victim to dust and grime. Ignoring it doesn't just look bad; it can throttle performance and shorten your hardware's lifespan. Whether you scored one of the best gaming PC deals or built your own monster, this guide will show you exactly how to clean a liquid-cooled PC safely, keeping your temps low and your frames high.
Why Cleaning Your Liquid-Cooled PC is Crucial
Unlike air coolers, liquid cooling systems rely on radiators to dissipate heat. Think of it like a car's radiator... if it gets clogged with dust, the whole system overheats. In your PC, this means your CPU and GPU will thermal throttle, cutting performance just when you need it most.
Regular cleaning ensures optimal airflow through the radiator fins, allowing the fans to work efficiently. This simple maintenance can prevent performance loss and extend the life of your components, especially in high-performance PCs above R20k where every degree counts.
Intel Core Ultra 7 265K 5.3GHz RTX 5070 12GB DDR5 Gaming PC
R30344.00In Stock
![[Pre Built] Intel Core Ultra 7 265KF RX 9070 XT Gaming PC](https://img.evetech.co.za/repository/ProductImages/intel-core-ultra-7-265-kf-rx-9070-xt-gaming-pc-pbs-main-1600px-v1.webp)
[Pre Built] Intel Core Ultra 7 265KF RX 9070 XT Gaming PC
R42209.00In Stock
RYZEN 5 9600X 5.2GHz GT 710 2GB DDR5 PC
R14489.00In Stock

RYZEN 7 9700X 5.5GHz RX 9070 XT 16GB DDR5 Gaming PC
R37484.00In Stock

Intel Core Ultra 5 225F ARC A380 6GB Gaming PC
R14174.00In Stock
AMD RYZEN 5 3600 RTX 3050 Budget Gaming PC
R11024.00In Stock
Gathering Your Toolkit: What You'll Need
Before you start, get your gear ready. You don’t need a specialised lab, just a few simple items:
- Can of compressed air: Your main weapon against dust.
- Microfibre cloths: For streak-free panel and component wiping.
- Isopropyl alcohol (90%+): Excellent for cleaning stubborn grime without leaving residue.
- Cotton swabs and soft brushes: For getting into tight corners and cleaning fan blades.
- Patience: Don't rush it! A steady hand is your best tool.
The Step-by-Step Cleaning Guide 🔧
Ready to get hands-on? Follow these steps for a thorough and safe clean. This entire process should take about 30-60 minutes.
AMD RYZEN 5 8400F 4.7GHz RX 9060 XT 16GB DDR5 Budget Gaming PC
R19949.00In Stock
![[Pre Built] Intel Core Ultra 9 285K RTX 5080 Gaming PC](https://img.evetech.co.za/repository/ProductImages/intel-core-ultra-9-285-k-rtx-5080-gaming-pc-48-gb-main-1600px-v1.webp)
[Pre Built] Intel Core Ultra 9 285K RTX 5080 Gaming PC
R76649.00In Stock
Intel 14th Gen Core i3 14100F 4.7GHz ARC A380 6GB Gaming PC
R12599.00In Stock
Intel Core Ultra 5 225F ARC A380 6GB Gaming PC
R14174.00In Stock
AMD RYZEN 5 3400G 4.2GHz Radeon Vega PC
R5879.00In Stock
RYZEN 7 9700X 5.5GHz RX 9070 XT 16GB DDR5 Gaming PC
R37484.00In Stock
Step 1: Power Down and Prep
This is non-negotiable. Shut down your PC completely via the operating system. Then, turn off the power supply unit (PSU) using the switch at the back and unplug it from the wall. Disconnect all peripherals and move your PC to a clean, well-lit, and well-ventilated area.
Step 2: Exterior and Panel Wipe-Down
Start with the outside. Remove any dust filters and give them a good clean—some can even be rinsed with water (just make sure they are 100% dry before reinstalling). Wipe down the case panels with a slightly damp microfibre cloth. For glass panels, a dedicated glass cleaner or a touch of isopropyl alcohol on a cloth works wonders.
Step 3: Tackling the Radiators and Fans
This is the most important part of cleaning a water-cooled PC.
- Hold the Fans: Use one finger to gently hold the fan blades in place. Letting them spin freely with compressed air can damage the fan motor.
- Blast the Dust: Use short, controlled bursts of compressed air to blow dust out of the radiator fins. Always blow the air in the opposite direction of the normal airflow. If your fans are pushing air out through the radiator, you should blow air from the outside in.
- Wipe the Blades: Use a cotton swab or a soft brush lightly dampened with isopropyl alcohol to wipe down each fan blade. You'll be amazed at how much grime builds up here.
RYZEN 5 8500G 5.0GHz with Vega Graphics DDR5 PC
R11024.00In Stock
RYZEN 7 5700 4.6GHz RTX 5060 Ti 16GB Budget Gaming PC
R20264.00In Stock
RYZEN 5 9600X 5.4GHz A1000 8GB DDR5 Workstation PC
R25199.00In Stock
AMD RYZEN 9 9900X 5.6GHz RTX 4000 Blackwell 24GB DDR5 Workstation PC
R56174.00In Stock
RYZEN 5 9600X 5.2GHz A400 4GB DDR5 Workstation PC
R18164.00In Stock
RYZEN 7 9700X RTX Pro 2000 DDR5 Workstation PC
R35699.00In Stock
Step 4: Dusting the Interior Components
With the radiators clear, give the rest of the interior a once-over. Gently blow dust off the motherboard, GPU, and RAM. Pay attention to the PSU shroud and any nooks where dust bunnies love to hide. This applies to all builds, from entry-level to the most kitted-out gaming rigs under R20k.
TIP FOR YOU
Pro Tip: Cable Management Matters ✨
cable management isn't just for looks. Tidy cables improve airflow, making your PC run cooler and quieter. More importantly, it makes cleaning much easier because there are fewer places for dust to get trapped. If you hate cable management, that's one of the perks of our [expertly crafted pre-built PCs](https: www.evetech.co.za pre-built-pc-deals x 1663)—we handle the tedious work for you!
Advanced Maintenance: Coolant and Loop Health
For custom loops, you should inspect your coolant every few months for signs of plasticiser leeching (cloudiness) or biological growth. A full flush and coolant replacement is typically recommended every 12-24 months.
RYZEN 7 9800X3D 5.2GHz RTX 5080 16GB DDR5 Gaming PC
R51869.00In Stock
![[Pre Built] AMD Ryzen 7 9800X3D RTX 5080 Gaming PC](https://img.evetech.co.za/repository/ProductImages/ryzen-7-9800-x-3-d-rtx-5080-gaming-pc-48-gb-main-1600px-v1.webp)
[Pre Built] AMD Ryzen 7 9800X3D RTX 5080 Gaming PC
R77699.00In Stock
RYZEN 9 9900X 5.6GHz RTX PRO 6000 96GB DDR5 Next Gen Workstation PC
R210524.00In Stock
AMD RYZEN 9 9950X 5.7GHz Quadro RTX 5000 Ada 32GB DDR5 Workstation PC
R128834.00In Stock
AMD RYZEN 7 5700 4.6GHz A1000 8GB Workstation PC
R20159.00In Stock
RYZEN 7 9700X 5.5GHz RX 9070 XT 16GB DDR5 Gaming PC
R37484.00In Stock
Thankfully, the All-In-One (AIO) coolers found in many budget gaming PCs are sealed units that don't require this level of liquid maintenance. For AIO users, this guide on how to clean a liquid-cooled PC is all you'll ever need to worry about.
By investing a little time every few months, you keep your machine looking and performing its best. A clean rig is a happy rig! 🚀
Time for an Upgrade? Keeping your PC clean is smart, but sometimes you just need more power. If your rig is starting to show its age, browse our massive range of award-winning gaming PC deals and find the perfect machine to conquer your world.
Related Products
AMD RYZEN 5 3400G 4.2GHz Radeon Vega PC
R5879.00In Stock
Ryzen 7 9700X 5.5GHz RTX 5060 Ti 16GB DDR5 Gaming PC
R29399.00In Stock
RYZEN 5 9600X 5.2GHz ARC B580 12GB DDR5 Gaming PC
R21419.00In Stock
RYZEN 5 9600X 5.2GHz A400 4GB DDR5 Workstation PC
R18164.00In Stock
RYZEN 7 7800X3D 5.0GHz RTX 5080 32GB DDR5 Gaming PC
R48719.00In Stock
Intel Core Ultra 5 225F ARC A380 6GB Gaming PC
R14174.00In Stock
For optimal performance, dust radiators and fans monthly. A deep clean, including flushing the loop and changing the fluid in custom loops, should be done every 6 to 12 months.
Yes, but use a low-power setting and a soft brush attachment. The best way to clean radiator fins is with compressed air to avoid bending the delicate fins.
Key signs include rising CPU temperatures, unusual gurgling sounds from the pump, or visible dust buildup on the radiator. Regular AIO cooler maintenance prevents these issues.
No, AIO (All-In-One) coolers are sealed units and are not designed for fluid changes. Custom loops, however, require periodic fluid replacement for peak performance.
For custom loops, you must drain the system and flush it with distilled water. Use a soft tube brush for flexible tubing or a specialized flush kit for hardline tubing.
Maintaining a water-cooled computer is straightforward with a regular schedule. AIOs require minimal effort, while custom loops need more attention but offer better performance.