Is your rig running hotter and louder than a Durban summer? Are your frame rates dropping in the middle of a clutch Warzone match? Before you blame the game, look inside your case. Dust is the silent performance killer for any gaming PC. This step-by-step guide will show you exactly how to clean a gaming PC safely, restoring its power and keeping your components running cool for years to come. Let's get those fans spinning freely again! ✨
Why Cleaning Your Gaming PC is Non-Negotiable
Think of dust as a thick, unwanted blanket for your expensive components. It clogs heatsinks, suffocates fans, and traps heat. This forces your system to work harder, leading to:
- Thermal Throttling: Your CPU and GPU deliberately slow down to avoid overheating, causing stuttering and lower FPS.
- Reduced Lifespan: Constant high temperatures can shorten the life of your precious hardware.
- Noise Pollution: Your fans have to spin at max speed just to keep things cool, turning your sleek rig into a jet engine.
A regular PC cleaning routine isn't just about looks; it's essential maintenance for peak performance.
Gathering Your PC Cleaning Toolkit
You don't need a high-tech lab, just a few key items. Before you start, make sure you have:
- Can of Compressed Air: The number one tool for blasting dust from tight spaces.
- Isopropyl Alcohol (90%+): Perfect for cleaning off stubborn grime without leaving residue.
- Microfibre Cloths: For wiping down surfaces without leaving lint behind.
- Cotton Swabs & Small, Soft Brushes: For detailed work on fan blades and heatsink fins.
- Optional: Anti-static Wrist Strap: A good safety measure to protect your components from static discharge.
Proper maintenance is crucial for any machine's longevity, and that includes taking care of even the most solid budget gaming PCs to get the most value for your money.
Your Step-by-Step PC Cleaning Guide 🔧
Ready to get hands-on? Follow these steps for a safe and effective clean.
Step 1: Preparation is Key
First things first, safety. Completely shut down your PC through the operating system. Turn off the power supply unit (PSU) using the switch at the back, and then unplug it from the wall. Disconnect all peripherals like your monitor, keyboard, and mouse. Move your tower to a well-lit, well-ventilated area... preferably one you don’t mind getting a little dusty.
Step 2: Cleaning the Exterior
Before you open it up, give the outside a good wipe-down. Use a slightly damp microfibre cloth to clean the case panels, top, and front. Pay special attention to any mesh panels or vents where dust loves to gather. Make sure to clean your dust filters—most can be removed, rinsed with water, and left to dry completely before being reinstalled.
Step 3: Tackling the Interior
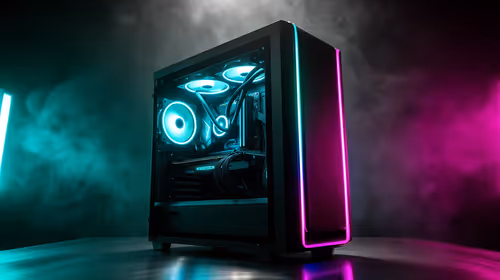
Now for the main event. Remove your side panel(s) to get access to the internals.
- Blast the Dust: Using the can of compressed air, work from the top of the case downwards. Use short, controlled bursts to blow dust out of the case, not just around inside it.
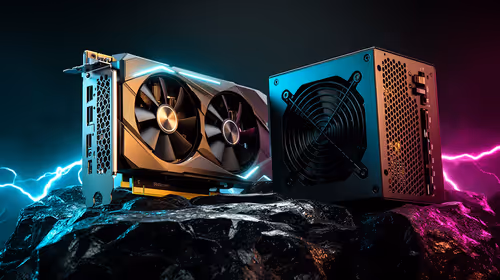
- Focus on Fans & Heatsinks: Target the CPU cooler, the GPU fans and heatsink, and all your case fans. This is where the most performance-choking dust builds up.
- Detail Work: For any stubborn gunk on fan blades, dip a cotton swab in isopropyl alcohol and gently wipe it clean. A soft brush can help dislodge dust from heatsink fins.
This process is a satisfying way to maintain your investment, whether it's one of the many powerful options under R20k or a top-tier custom build.
Crucial Fan Safety Tip ⚡
When using compressed air on your fans (CPU, GPU, or case), gently hold the blades still with a finger. Letting them spin freely can generate a small electrical current that could potentially damage the fan motor or even your motherboard. It's a simple step that prevents a costly mistake.
Advanced Cleaning and Final Checks
For those who want to go the extra mile, you can remove the graphics card and RAM to get better access to the motherboard and other crevices. This is also a good time to inspect your cable management. Tidy cables don't just look good; they improve airflow, which helps keep your PC clean for longer. If you’d rather skip the hassle, many of our great pre-built PC deals come with immaculate cable routing right out of the box.
Once you’re happy with your work, double-check that all internal cables are securely connected before closing up the case. This kind of diligent care is especially important for protecting the investment in high-performance rigs over R20k, where every degree of cooling matters.
How Often Should You Clean Your PC?
There's no single answer, but a good rule of thumb is a light dusting every 3-4 months and a deep clean like this one every 6-12 months. You might need to clean your gaming PC more often if you have pets, if you smoke near your PC, or if your home is particularly dusty.
Regular maintenance is the best way to get years of enjoyment from your machine. And when you're ready for your next powerhouse, you know where to find our best gaming PC deals.
Ready for a Performance Leap? 🚀 Keeping your rig clean is vital, but sometimes... you just need more power. If dust wasn't the only thing holding you back, a modern upgrade might be the answer. Explore our massive range of professionally built gaming PCs and find the perfect machine to conquer your world.