Got a beastly new NVIDIA 40-series GPU? That's brilliant. Now for the slightly intimidating part… that new power connector. Don't stress, connecting a 3x8 pin to 12VHPWR cable is straightforward when you know the secret: a firm, confident click. This guide will walk you through the process step-by-step, ensuring your powerhouse graphics card gets the clean, stable power it deserves, without any drama. Let's get your rig running safely. 🔧
Understanding the 12VHPWR Connector
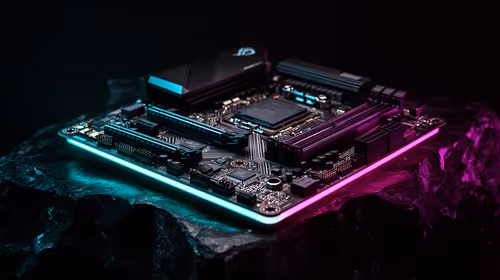
Before we plug anything in, let's quickly cover why this new cable exists. The 12VHPWR (12-Volt High Power) connector is a new standard designed to deliver up to 600W of power over a single, compact cable. It's a must-have for power-hungry GPUs like NVIDIA's RTX 4080 and 4090.
For those of us not running a brand-new ATX 3.0 power supply, a 3x8 pin to 12VHPWR cable adapter is the solution. It takes three standard 8-pin PCIe power connectors from your existing PSU and safely converts them into the single 16-pin plug your new GPU needs.
A Safe Step-by-Step Connection Guide
Getting this right is all about being methodical. Rushing can lead to a poor connection, which can cause major headaches down the line. Follow these steps for a perfect, secure fit.
Step 1: Power Down Completely
This isn't just "shut down Windows." Turn off your PC, then flip the switch on the back of your power supply to the 'O' position. For good measure, unplug it from the wall. Press the power button on your case a few times to discharge any remaining electricity in the components. Safety first, always.
Step 2: Connect the 8-Pin Plugs to Your PSU Cables
Take your 3x8 pin to 12VHPWR cable adapter. You'll see one large 16-pin (12+4) connector and three standard 8-pin female sockets. Now, grab three separate 8-pin PCIe power cables coming from your power supply.
Connect one PSU cable to each of the three sockets on the adapter. Make sure each one clicks firmly into place. Do not use a "daisy-chained" cable (one cable with two 8-pin connectors on the end). Each socket on the adapter needs its own dedicated cable from the PSU for stable power delivery.
The Golden Rule: Listen for the Click ⚡
The locking clip on the 12VHPWR connector must be fully engaged. If you can see a gap between the connector housing and the GPU's power port, it is not seated properly. A loose connection is a primary cause of overheating. Give it a gentle tug after plugging it in to be 100% sure it's locked in tight.
Step 3: Seat the 12VHPWR Connector into the GPU
This is the most crucial step. Align the 12VHPWR connector with the port on your GPU and push it in firmly and evenly. You should hear and feel a distinct "click" as the locking latch engages. As our tip box says, double-check it. There should be no gap. A proper connection ensures all 16 pins are making contact, delivering power safely.
Step 4: Smart Cable Management
With the connection secure, it's time to manage the cables. Avoid putting sharp bends or extreme tension on the 3x8 pin to 12VHPWR cable, especially near the connector head. The general recommendation is to allow at least 3-4 cm of straight cable coming out of the connector before you start to bend it. This prevents strain on the delicate pins inside. For a clean look, consider using premium NZXT individually sleeved premium cables to enhance your build's aesthetics.
Choosing the Right Adapter Cable
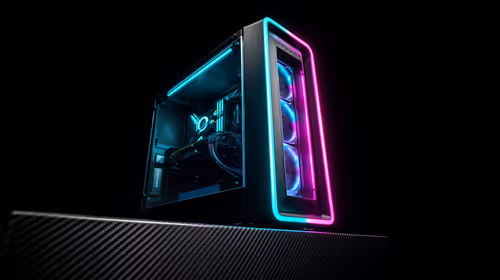
While most high-end GPUs come with a basic adapter, you might want to consider a third-party option for a cleaner look or better materials. A quality adapter ensures a reliable connection and can improve the look of your build. For those wanting to add some extra visual pop, an option like the GameMax 12VHPWR ARGB Extension not only provides a secure connection but also adds customisable RGB lighting to your setup. ✨
Connecting new hardware can feel daunting, but following these steps for your 3x8 pin to 12VHPWR cable connection guarantees a safe, stable, and powerful gaming experience. Now, power it up and enjoy that glorious performance! 🚀
Ready to Power Up Your Build? A secure connection is key to unlocking your GPU's full potential. Whether you need a reliable adapter or want to add some aesthetic flair, having the right cables makes all the difference. Explore our wide range of PC cables and components and give your rig the quality it deserves.