
Best SSD for Gaming in South Africa - Updated July 2026
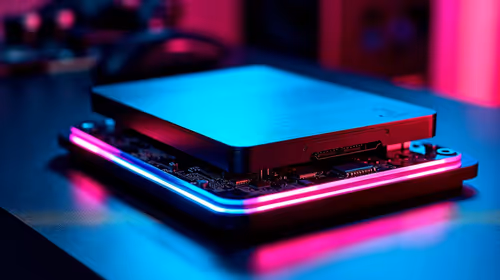
The best SSD for gaming is available at Evetech from R1,599 including VAT, with 58 drives in stock. A PCIe Gen4 NVMe drive at 500GB to 1TB is the recommended pick for most gamers.
Read moreReady to learn how to assemble a budget gaming chair? This easy, step-by-step guide walks you through the entire process, from unboxing to your first sit. We'll cover common pitfalls and share pro tips to get you set up and gaming in no time. Let's build! 🛠️🎮

That massive box has arrived from Evetech. Inside is your new command centre, but there’s one final boss battle: assembly. Don’t stress! Learning how to assemble a budget gaming chair is easier than you think, and far more rewarding. It’s a satisfying DIY project that connects you to your gear. With a bit of patience and this guide, you’ll go from a box of parts to a comfortable throne in under an hour. Ready to build? 🔧
First things first, clear some space. You'll need a decent patch of floor to lay everything out without losing a crucial screw under the couch. Open the box carefully and lay out every component. Take a moment to check the parts list in the instruction manual against what you have. It’s rare, but catching a missing bolt now saves a lot of frustration later.
Most budget gaming chair kits include the only tool you’ll need—usually a single Allen key. While you can use your own tools for a bit more torque, the included one is perfectly fine for the job. Before you dive in, remember that finding the right model is the real first step. Evetech has a wide range of gaming chairs to suit any setup and budget.
Before you tear open the screw packet, take a quick photo of it with your phone. The packaging often has labels (M6, M8, etc.) that correspond to the manual. Having a clear visual reference of which screw is which can prevent a massive headache when the instructions just show a vague diagram.
Alright, let's get this done. Follow these steps, and your gaming chair assembly will be smooth sailing. Don't rush it... take your time and do it right.
This is the easy win that builds momentum. Take the five-star base and the caster wheels. Line up the peg on each wheel with a hole on the end of a base leg and push down firmly. You should feel or hear a solid "click" as it snaps into place. Repeat for all five wheels, then flip the base over so it's standing correctly.
Next, grab the gas lift cylinder. This is the part that lets your chair go up and down. Simply slot the wider end into the hole in the centre of the base. It will just rest in there for now. Slide the plastic telescopic cover over it, and that's it. Step two, complete.
Now for the main event. Place the seat cushion upside down on a soft surface (like the shipping box) to avoid scratches. The control mechanism is the metal plate with all the levers. Align its holes with the pre-drilled holes on the bottom of the seat, making sure the height adjustment lever is positioned correctly (usually on the right-hand side).
Loosely thread all four bolts by hand first to ensure everything is aligned, then tighten them securely with the Allen key. The mechanism is a key area where cost is saved on budget models. Most great gaming chairs under R4000 use a reliable, standard tilt function, whereas more premium options often feature advanced multi-functional mechanisms for greater control.
Line up the metal brackets on the backrest with the hinges on the seat cushion. This can be a bit awkward to do alone, so if you have a friend nearby, now is the time to ask for a hand. If not, use one hand to hold the backrest steady while you use the other to insert the bolts. Again, get all the bolts threaded loosely before you tighten them completely. Once secure, pop the plastic covers over the hinges.
Look for small 'L' and 'R' indicators on the armrests to ensure you put them on the correct sides—it's a classic rookie mistake to mix them up! Bolt them onto the underside of the seat. Your chair is starting to look like a chair!
This is the moment of truth. Carefully lift the entire top assembly of the chair (the seat, backrest, and arms) and align the hole in the centre of the mechanism with the top of the gas lift cylinder you installed earlier. Lower it down and give it a firm push. Sit in the chair and wiggle a bit to make sure it's fully seated and secure.
Congratulations! You just learned how to assemble a budget gaming chair.
See? That wasn't so bad. Building your own gaming chair gives you a better appreciation for your hardware and the satisfaction of a job well done. Now that you know how simple the setup process is, the only thing left is choosing the right model for your marathon gaming sessions. To get started, why not check out some of the best gaming chair deals in South Africa right now?
Ready to Build Your Ultimate Comfort Zone? Now that you know how to assemble a budget gaming chair, the first step is choosing the perfect one. From entry-level racers to ergonomic powerhouses, we've got the seat that'll have your back for years to come. Explore our massive range of gaming chairs and build your command centre today.
For most people, it takes 20 to 45 minutes to assemble a new gaming chair. Having a second person to help hold parts can speed up the process significantly.
Most gaming chairs come with all the necessary tools, usually an Allen wrench. It can be helpful to have a Phillips head screwdriver on hand, but it's rarely required.
No, it's not typically hard. The most challenging part is often attaching the backrest to the seat base, but our guide provides tips to make this step much easier.
The first step is always to unpack all components and check them against the parts list in the manual. This ensures you have everything you need before you start building.
To install casters on a gaming chair, simply push the metal peg on each wheel firmly into the corresponding hole on the five-star base until it clicks securely into place.
Common mistakes include installing armrests on the wrong sides, over-tightening screws which can strip them, and not properly securing the gas lift before placing the seat on.
The best SSD for gaming is available at Evetech from R1,599 including VAT, with 58 drives in stock. A PCIe Gen4 NVMe drive at 500GB to 1TB is the recommended pick for most gamers.
Read more
The best streaming PC range is available at Evetech from R20,684 including VAT, with 22 models in stock. Every build pairs a multi-core CPU with an NVENC or Quick Sync capable GPU, so streaming and gaming can run on one machine without stealing frame rate.
Read more
The RTX 5070 is available at Evetech from R11,899 including VAT, with 18 models in stock and most cards priced between R11,899 and R14,000. It is the current 1440p value pick in the NVIDIA 50-series.
Read more
16GB DDR5 RAM is available at Evetech from R3,799 including VAT, with 22 modules in stock. It is the sensible baseline for budget and esports builds.
Read more
The cheapest 1TB NVMe SSD is available at Evetech from R2,599 including VAT, with 21 drives in stock. 1TB PCIe Gen4 is the current sensible default for a gaming or work PC.
Read more
The cheapest 2TB NVMe SSD is available at Evetech from R4,999 including VAT, with 21 drives in stock. 2TB is now the comfortable capacity for a real gaming library.
Read more
Wi-Fi 7 vs Wi-Fi 6e for cinematic story games comes down to router support, latency goals, device compatibility, and coverage. SA buyers should match the choice to the real network setup.
The real world difference between PCIe 5.0 and PCIe 4.0 for MMO and live-service games is usually about loading, patches, and headroom. SA players should weigh NVMe speed, GPU lanes, CPU limits, and platform cost.
Windows 11 gaming laptop dead pixel checks begin with a full-screen colour test. This how to fix dead pixel windows 11 gaming laptop guide helps SA users compare settings, drivers, external screens, and warranty routes.
AM5 motherboard stuck pixel fixes in South Africa start with panel, cable, GPU output, and Windows checks. Use a clean test path before blaming the motherboard or replacing screen hardware.

FPS drops blamed on a wireless mouse often point to input, driver, USB, network, or system-load checks. Use a quick SA-friendly troubleshooting flow to isolate software, firmware, thermals, storage, and game settings before replacing hardware.

How to fix fps drops on steam deck starts with power profile, shader cache, storage health, and per-game settings. For South Africa, check charger quality, heat, and download stability before assuming the handheld needs repair. Retest after updates.

How to fix low FPS after an RTX 5080 build upgrade starts with driver cleanup, display settings, thermals, and power mode. For SA gamers, verify GPU usage, PCIe speed, RAM profile, and CPU limits before changing parts.

Hollow Knight Silksong at 4K needs a GPU matched to settings, VRAM, CPU balance, and monitor goals. Use this SA guide to compare tiers without treating FPS target or prices as fixed.
The best SSD for gaming is available at Evetech from R1,599 including VAT, with 58 drives in stock. A PCIe Gen4 NVMe drive at 500GB to 1TB is the recommended pick for most gamers.
The best streaming PC range is available at Evetech from R20,684 including VAT, with 22 models in stock. Every build pairs a multi-core CPU with an NVENC or Quick Sync capable GPU, so streaming and gaming can run on one machine without stealing frame rate.
The RTX 5070 is available at Evetech from R11,899 including VAT, with 18 models in stock and most cards priced between R11,899 and R14,000. It is the current 1440p value pick in the NVIDIA 50-series.
16GB DDR5 RAM is available at Evetech from R3,799 including VAT, with 22 modules in stock. It is the sensible baseline for budget and esports builds.