Staring at a stuttering frame rate in the latest game can be seriously frustrating, especially when your wallet is feeling a bit light. Before you start pricing new graphics cards, what if you could unlock extra performance for free? Learning how to safely overclock a budget PC can squeeze out those crucial extra frames per second (FPS), turning choppy gameplay into a smooth, winning experience. It’s the ultimate PC enthusiast tweak, and we’ll show you how to do it right. 🚀
First, What is Overclocking, Really?
In simple terms, overclocking is pushing your computer's components—usually the processor (CPU) or graphics card (GPU)—to run faster than their official factory speed rating. Think of it like tuning a car's engine. The manufacturer sets a reliable, safe speed that works for everyone, but there's often some extra performance potential left on the table.
By carefully adjusting settings in your PC's BIOS, you can tap into that potential. The reward? Higher clock speeds, which can directly translate to more FPS in games. Of course, this process generates more heat and uses more power, which is why doing it safely is key. For a look at what professionally tuned systems offer, check out some of the best gaming PC deals available in South Africa.
The Pre-Flight Checklist for a Safe Overclock 🔧
Before you dive into your BIOS, preparation is everything. Attempting to overclock a budget PC without the right foundation can lead to system instability or, in the worst case, damaged hardware.
Check Your Hardware's Potential
Not all components are built to be overclocked.
- CPU: For Intel, you'll need a "K" or "X" series processor (e.g., Core i5-13600K). For AMD, most modern Ryzen CPUs are unlocked and ready to go.
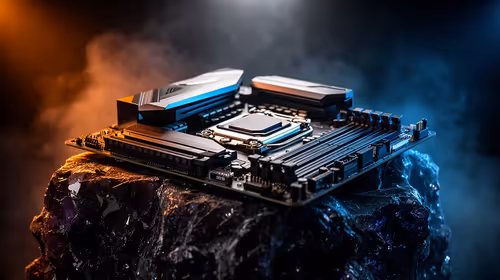
- Motherboard: Your motherboard also needs to support overclocking. For Intel, this usually means a Z-series chipset (e.g., Z790). For AMD, B-series and X-series chipsets (e.g., B650, X670) typically allow it.
Cooling is Non-Negotiable
The number one enemy of a stable overclock is heat. The stock cooler that came with your CPU is designed for stock speeds, not the extra thermal load from overclocking. Even a modest aftermarket air cooler can make a massive difference, keeping your temperatures in a safe range and allowing for a more stable result. Many great budget gaming PCs can be made even better with a simple cooler upgrade.
Get Your Software Ready
You'll need a few free tools to monitor your progress and test for stability:
- Monitoring: HWMonitor or HWiNFO64 to check temperatures, clock speeds, and voltages in real-time.
- Benchmarking: Cinebench R23 (for CPU) or an in-game benchmark to measure performance gains.
- Stress Testing: Prime95 or AIDA64 Extreme to push your CPU to its absolute limit and ensure it's 100% stable under heavy load.
A Gentle Step-by-Step Guide
The golden rule of overclocking is to make small, incremental changes and test thoroughly after each one.
- Establish a Baseline: Before changing anything, run your benchmark and a 15-minute stress test. Write down your score and your maximum CPU temperature. This is your starting point.
- Enter the BIOS/UEFI: Restart your PC and press the appropriate key during boot-up (usually
Del,F2, orF12) to enter the BIOS setup. - Find the CPU Settings: Look for terms like "CPU Frequency," "CPU Ratio," or "Multiplier." This is what you'll be adjusting.
- Increase Slightly: Raise the CPU multiplier by a small amount. For example, if it's at 42 (representing 4.2GHz), try increasing it to 43 (4.3GHz). Leave the voltage on "Auto" for now.
- Save and Test: Save your changes, exit the BIOS, and boot back into Windows. Run your stress test again. If it passes without crashing or overheating, you've got a stable overclock!
- Repeat or Refine: You can repeat the process, bumping the multiplier up by one step at a time and testing each time. If your system crashes, you can either go back to the last stable setting or try adding a tiny bit of extra voltage... but be careful. This process of trial and error is what makes overclocking a rewarding challenge for those with PCs under the R20k mark.
A Critical Warning on Voltage ⚡
Increasing voltage is the most dangerous part of overclocking. Only add more voltage in tiny increments (e.g., 0.01v) if your system is unstable at a higher clock speed. Too much voltage is the fastest way to permanently damage your CPU. When in doubt, leave it on Auto or dial back your clock speed instead.
The Real-World FPS Payoff ✨
So, after all that tweaking, what can you realistically expect? A successful, safe PC overclock on a budget system might net you a 5-15% performance boost. This could be the difference between a choppy 50 FPS and a smooth 60 FPS in a demanding title.
However, it won't magically turn an entry-level PC into a high-end beast. Sometimes, the best performance boost is a strategic upgrade. If you've pushed your current hardware to its limits, exploring more powerful pre-built PC deals or even looking at systems above the R20k price point might be your next logical step for a truly massive leap in gaming power.
Ready for Guaranteed Performance? Overclocking is a rewarding challenge, but it's not for everyone. If you'd rather spend your time gaming than tweaking BIOS settings, a professionally built and tested PC is the answer. Explore our best gaming PC deals and get guaranteed performance right out of the box.