You’ve dropped a cool R30,000 on a powerful new editing PC. The timeline is smooth, but DaVinci Resolve still chugs during 4K exports. Frustrating, right? What if you could unlock extra performance for free? This overclocking guide is for you. We'll show you how to safely boost your R30k editing PC, squeeze out more power, and get your projects finished faster. Let's get that render bar moving. 🚀
What is Overclocking, Really?
In simple terms, overclocking is the process of telling your computer's components—primarily your CPU—to run faster than their official factory speed rating. Think of it like tuning a car engine. The manufacturer sets a safe, reliable speed, but there's often extra performance potential waiting to be unlocked.
For a content creator, a successful overclock can mean:
- Faster video renders: Shaving minutes, or even hours, off your export times.
- Smoother timeline scrubbing: Less stuttering when working with high-resolution footage.
- Quicker application response: A generally snappier feel across your entire workflow.
Of course, pushing hardware has potential risks, like increased heat and potential instability if done incorrectly. But with a careful approach, it's a fantastic way to maximise the value of your investment.
Is Your R30k Editing PC Ready for a Boost?
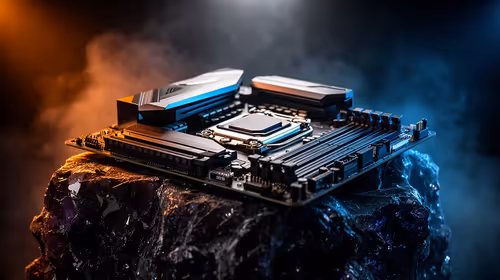
Before you dive into your PC's BIOS, you need to confirm you have the right gear. Pushing components harder generates more heat, so having a system built for it is key. Most powerful PCs over R20k are prime candidates for this kind of performance tuning.
Here’s a quick checklist:
- An Unlocked CPU: For Intel, this means a processor with a 'K' at the end of its model name (e.g., Core i7-14700K). For AMD, almost all modern Ryzen CPUs are unlocked.
- A Capable Motherboard: You'll need a motherboard chipset that supports overclocking. For Intel, that's a Z-series board (like a Z790). For AMD, B-series or X-series boards (like a B650 or X670) are what you need.
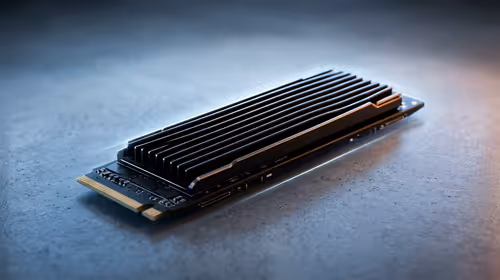
- Sufficient Cooling: This is non-negotiable. The stock cooler that might come with your CPU won't cut it. You need a robust tower air cooler or, ideally, an All-In-One (AIO) liquid cooler to handle the extra heat. Even some well-configured PCs under R20k can manage a mild boost if the cooling is upgraded.
A Simple Guide to CPU Overclocking 🔧
This overclocking guide focuses on a safe, incremental approach. We won't be pushing for world records, just stable, real-world performance gains for your editing rig.
Step 1: Establish a Baseline
Before you change anything, you need to know your starting point. Download and run a benchmarking tool like Cinebench R23. Let it run the multi-core test and write down your score. This is your "before" picture. While it's running, monitor your CPU temperature.
Step 2: Enter the BIOS/UEFI
Restart your computer and press the key to enter the BIOS (usually DEL, F2, or F12). This is your PC's command centre. It might look intimidating, but we're only changing a couple of settings.
Monitoring Pro Tip ⚡
Use free tools like HWMonitor or CPU-Z to keep a close eye on your temperatures and clock speeds during stress tests. If your CPU hits 95°C under load, it's time to pull back on your overclock. Safety first!
Step 3: The Gentle Push
Find the "CPU Ratio" or "CPU Core Ratio" setting. It will likely be set to "Auto". Change it to manual control and increase the value by one. For example, if your CPU's stock speed is 4.5GHz (a ratio of 45), try changing it to 46 for 4.6GHz. Don't touch the voltage settings yet. Save your changes and reboot.
Step 4: Test for Stability
If your PC boots into Windows successfully, that's a great sign! Now, run the Cinebench R23 stress test again for at least 10 minutes. Watch your temperatures. If it completes without crashing and temps are under 95°C, you have a stable overclock. Compare your new score to your baseline... nice one! This process is viable on many systems, from high-end machines to carefully selected budget gaming PCs, as long as cooling is adequate.
Rinse and repeat steps 3 and 4, increasing the ratio by one each time until you either experience a crash (instability) or your temperatures get too high. When that happens, dial it back to the last stable setting. ✨
Don't Forget Your RAM!
Often, the easiest performance boost comes from your RAM. Most modern memory kits have built-in overclocking settings called XMP (for Intel) or EXPO (for AMD). Many of our pre-built PC deals ship with high-speed RAM, but you need to enable its profile in the BIOS to unlock its full potential. It's usually a single-click setting that provides a noticeable and stable performance uplift.
Tinkering in the BIOS isn't for everyone. If you'd rather spend your time creating than stress-testing, a professionally assembled and optimised rig is your best bet. Exploring the best gaming PC deals in SA means you get guaranteed performance and stability right out of the box, with a full warranty.
Ready for a Guaranteed Performance Boost? Overclocking is a rewarding journey, but for mission-critical work, nothing beats the peace of mind of a professionally built and tested system. Explore our massive range of custom gaming and editing PCs and find the perfect machine to conquer your creative world, hassle-free.