So, you've invested your hard-earned cash into a brilliant R10,000 gaming rig. It's crushing your favourite titles, but a little voice in your head is asking... is there more? Could you squeeze extra frames out of your system in Warzone or get smoother gameplay in Baldur's Gate 3 without spending another Rand? That's the promise of overclocking. This safe overclocking guide is built for your R10000 gaming PC, helping you unlock that hidden performance—the right way.
First Things First: Is Your PC Ready to Overclock?
Before you dive into your PC's BIOS, let's check if your hardware is even up for the task. Overclocking isn't a feature on every component; it's a premium one. Pushing your hardware means generating more heat, so a solid foundation is non-negotiable.
Key Hardware Checks:
- CPU: For Intel, you'll need a "K" or "KF" series processor (e.g., Core i5-13600K). For AMD, most modern Ryzen CPUs (e.g., Ryzen 5 5600X) are unlocked and ready to go. The components found in many budget gaming PCs are often capable, but it's crucial to check your specific model.
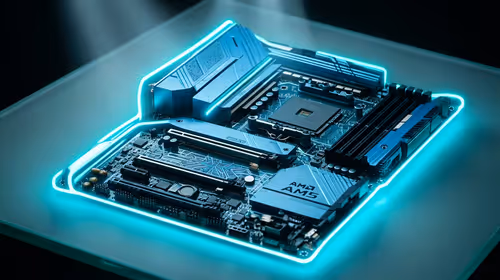
- Motherboard: Your motherboard needs a chipset that supports overclocking. For Intel, that's a Z-series board (e.g., Z790). For AMD, B-series (e.g., B550) or X-series (e.g., X570) boards will do the trick.
- Cooling: This is the most important part! The stock cooler that came with your CPU is designed for stock speeds. Overclocking adds heat, and if your CPU gets too hot, it will slow itself down (thermal throttle) or even shut off. An aftermarket air cooler or an All-in-One (AIO) liquid cooler is highly recommended.
Your Safe Overclocking Toolkit 🔧
You don't need much, just a few free, reliable pieces of software to monitor your progress and test for stability. Download these before you begin.
- CPU-Z: A lightweight tool to verify your clock speeds and voltage in real-time.
- HWiNFO64 or HWMonitor: Essential for monitoring your CPU temperatures, core by core. This is your safety gauge.
- Cinebench R23: A great real-world benchmark and stability test. It pushes your CPU to its limits and gives you a performance score, so you can see the actual improvement.
Many of our custom gaming rigs under R20k are built with these principles in mind, balancing performance with reliable components.
A Step-by-Step Guide to a Safe CPU Overclock
Patience is key. The goal is a stable, everyday performance boost, not a world-record attempt that lasts five minutes. We'll make small, incremental changes and test thoroughly at each step.
Step 1: Establish Your Baseline
Before changing anything, run Cinebench R23 for 10 minutes. While it's running, watch your temperatures in HWiNFO64. Note down your max temperature and your final Cinebench score. This is your starting point.
Step 2: Enter the BIOS/UEFI
Restart your PC and press the designated key to enter the BIOS (usually DEL, F2, or F12). Every BIOS looks different, but you're looking for settings like "CPU Core Ratio," "CPU Clock Ratio," or "CPU Multiplier."
Step 3: Make a Small Adjustment
Your CPU's speed is its Base Clock (usually 100MHz) multiplied by the Core Ratio. If your ratio is 42, your speed is 4.2GHz (100MHz x 42). Change the setting from "Auto" to "Sync All Cores" and increase the ratio by 1. So, if it was 42, change it to 43. That's it. Don't touch the voltage yet! Save your changes and reboot.
Voltage Warning! ⚡
Increasing voltage is the main source of heat and risk. Only raise your CPU Core Voltage in tiny increments (e.g., 0.01v) if your new clock speed isn't stable. Never exceed the manufacturer's recommended safe voltage for your specific CPU. A quick Google search for your CPU model + "safe voltage" is your best friend.
Step 4: Test for Stability
Once back in Windows, run Cinebench R23 again for 10-20 minutes. Watch your temperatures closely.
- If it's stable and temps are below 90°C: Success! You can go back to the BIOS and try increasing the ratio by another 1.
- If your PC crashes or freezes: You have two options. Go back to the BIOS and either return to the last stable ratio or slightly increase the CPU Core Voltage to stabilise the current one.
Repeat this process of small bumps and tests. You'll eventually hit a wall where you need too much voltage for a tiny speed increase, or your temperatures get too high. That's your limit. Dial it back to the last perfectly stable setting. This careful process is how we ensure stability in our great pre-built PC deals.
Knowing When an Upgrade is the Real Answer
Overclocking is a fantastic way to get more value from your R10,000 PC. However, every component has its limits. Pushing a budget CPU to its absolute edge won't magically transform it into a top-tier chip, and you'll never match the raw power of dedicated high-performance PCs over R20k that are designed for extreme performance from the start.
This safe overclocking guide helps you find the sweet spot for your machine. If you find yourself craving more power after finding your stable limit, it might be time to browse the best gaming PC deals for your next big upgrade. Happy tweaking! ✨
Ready for a Guaranteed Power Boost? Overclocking is a rewarding journey, but sometimes the best upgrade is a new machine built and tested by experts. If you're ready to jump to the next level of performance without the guesswork, explore our massive range of gaming PC deals and find the perfect rig to dominate the competition.