So, you’ve got your hands on the beastly ASRock Z890 Taichi WiFi, the heart of your next-gen Intel build. Lekker! This motherboard isn’t just a circuit board; it's a statement. It’s the foundation for insane frame rates and lightning-fast productivity right here in South Africa. But before you can dominate in Apex or render your next masterpiece, you need a solid setup. This guide will walk you through the essential integration and setup steps. 🚀
First Impressions: What's in the Box?
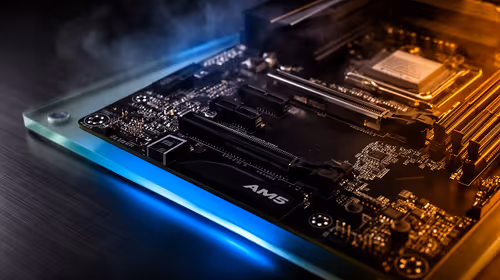
Opening the ASRock Z890 Taichi WiFi box feels like an event. You're greeted by a motherboard that’s heavy, dense, and packed with more heatsinks than a custom water-cooling loop. The signature Taichi cogwheel aesthetic is there, but refined. You’ll immediately notice the reinforced PCIe 5.0 slot for your chonky new graphics card and the multiple M.2 slots, all tucked under substantial thermal guards. This board is built to handle the heat from Intel's most powerful new CPUs without breaking a sweat.
For any high-performance build, choosing the right foundation is crucial. While this board represents the peak for Intel's new platform, it's always wise to see what options are available. Exploring the full range of Intel motherboards can help you find the perfect fit for your specific needs and budget, ensuring your new processor has the perfect home.
Your ASRock Z890 Taichi WiFi Setup Guide
Getting your components installed correctly is the most critical step. A proper ASRock Z890 Taichi setup ensures stability and unlocks the full performance of your hardware. Let's get to it. 🔧
1. CPU and Cooler Installation
First, lift the retention arm on the LGA socket, align the golden triangle on your Intel CPU with the triangle on the socket, and gently place it down. Lower the retention arm until it clicks. Next, apply a pea-sized amount of thermal paste and mount your CPU cooler. The robust VRM and heatsinks on this board mean it’s optimised for both high-end air coolers and AIO liquid coolers.
2. Installing DDR5 RAM
The ASRock Z890 Taichi WiFi uses four DDR5 DIMM slots. For a dual-channel configuration (using two sticks), the optimal slots are typically A2 and B2 (the second and fourth slots from the CPU). Check the motherboard manual to be 100% sure. Push the sticks in firmly until the clips on both sides lock into place.
BIOS Flashback Pro Tip ⚡
Before you install your CPU and RAM, consider using the BIOS Flashback feature. You can update the motherboard's BIOS with just a power supply and a USB stick. This ensures you have the latest compatibility and stability updates from day one, which can be a lifesaver for brand-new platforms.
3. Blazing Fast M.2 Storage
Carefully unscrew and remove the M.2 heatsinks. Before installing your NVMe SSD, please remember to peel off the blue protective plastic film from the thermal pads! Slot the M.2 drive in at a 30-degree angle, press it down, and secure it with the provided screw or tool-less latch. Then, re-attach the heatsink. A proper ASRock Z890 Taichi WiFi integration means keeping those speedy drives cool.
First Boot and BIOS Configuration
With everything installed, it's time for the moment of truth. Connect your power supply, monitor, and keyboard, then hit the power button. Mash that 'Del' or 'F2' key to enter the UEFI BIOS.
Once inside, the first thing you should do is enable the XMP (Extreme Memory Profile) for your DDR5 RAM. This is usually a one-click option on the main screen and ensures your memory runs at its advertised speed, not the slower default. While you're in there, take a moment to set your boot priority to your new M.2 drive. The BIOS layout might seem complex, but ASRock provides an "Easy Mode" that simplifies the key settings. Exploring the BIOS is a key part of the enthusiast experience, a philosophy shared across different platforms, including the latest AMD motherboards, which also offer deep customisation.
The ASRock Z890 Taichi WiFi is a premium board designed for enthusiasts who demand the best performance, connectivity, and aesthetics. But building a powerful PC doesn't always require the most expensive parts. For builders looking for maximum value, there are many excellent and cheap Intel and AMD based motherboards that provide a solid foundation for a fantastic gaming rig without breaking the bank. ✨
Ready to Build Your Ultimate Rig?
The motherboard is the backbone of any great PC. Whether you're aiming for the top-tier performance of the Taichi or a budget-friendly powerhouse, the right choice makes all the difference. Explore our massive range of PC components and find the perfect parts to conquer your world.