Before you touch a soldering iron or buy a single sensor, the one purchase that turns an Arduino board into a working electronics lab is a breadboard and jumper wire starter set. It lets you build, test and rip apart circuits in seconds with zero soldering, which is exactly what learning electronics demands. Wire something wrong, pull the jumpers, try again. That freedom to experiment without commitment is why this humble set, not the flashy sensors, is the first accessory every Arduino beginner should own.
Quick Answer
A solderless breadboard plus a mixed pack of jumper wires is the single most important first Arduino accessory, usually costing well under R200 as part of a starter kit. It lets you connect components without soldering, so you can prototype, fix mistakes and reuse every part across dozens of projects.
What a Breadboard Actually Does
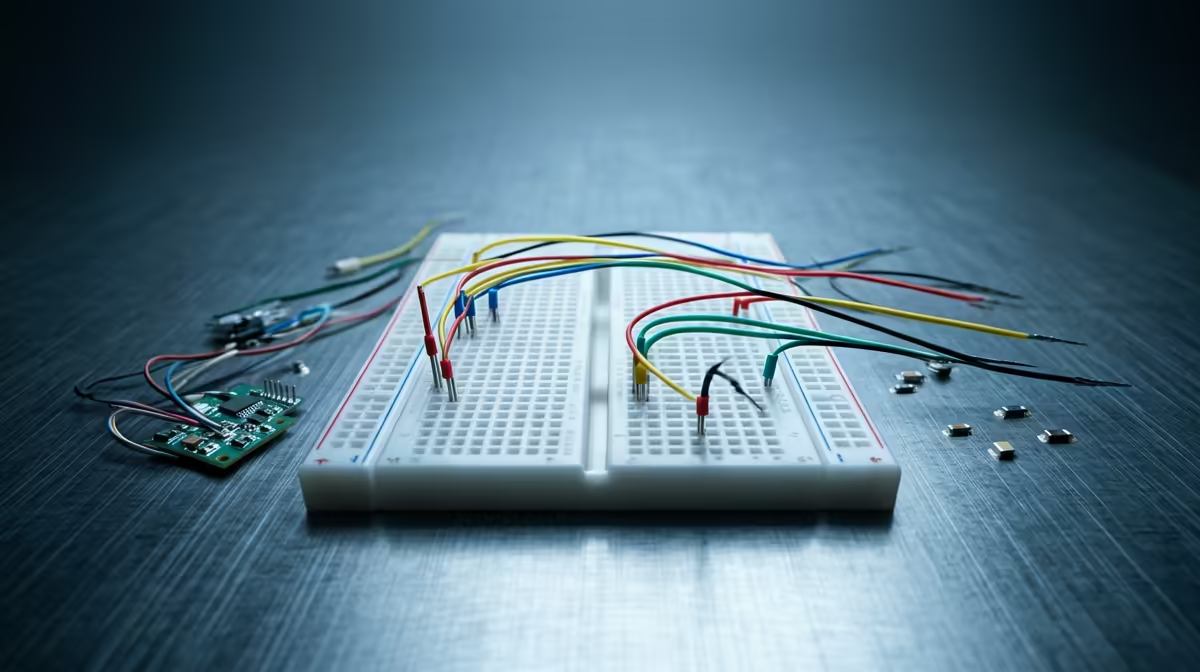
A breadboard is a plastic block full of tiny spring clips hidden under a grid of holes. Push a component leg or a wire into a hole and the clip grips it, making an electrical connection without any heat or solder. The holes are grouped into rows that are electrically joined, so anything plugged into the same row is connected.
Most boards have two long rails running down the sides, marked red and blue, for power and ground. The main field in the middle is split by a central channel, with short rows of five holes on each side. That channel is sized to straddle the legs of chips, which is why it sits exactly where it does. Understanding these joined rows is the whole skill: once you can read which holes connect, you can build almost any beginner circuit.
Why Solderless Matters for Beginners
Soldering is permanent. For a newcomer, that permanence is intimidating and wasteful, because a single wrong connection means desoldering and starting over. A breadboard removes that fear entirely. You can wire an LED circuit, realise the resistor is in the wrong place, move it, and have it working again in under a minute.
This is how learning actually happens: rapid trial and error with no penalty. Every component you buy survives the process intact and gets reused in the next project. A starter kit built around a breadboard stretches your budget far further than buying parts you might destroy while learning. The maker-focused smart home and electronics range carries the boards, sensors and modules that slot straight into a breadboard once you are ready to expand.
The Three Jumper Wire Types
A good starter set includes three styles of jumper wire, and knowing which is which saves a lot of confusion early on.
Male to Male
Both ends are pins. These are your workhorses for connecting one point on the breadboard to another, or bridging the power rails into the main field. A beginner uses these the most.
Male to Female
One pin end, one socket end. These connect the breadboard's pins to components that have their own header pins, such as many sensor modules, or to the male header pins on some boards. They bridge the gap between the breadboard and add-on modules cleanly.
Female to Female
Both ends are sockets. These link two pin-headers directly, for example connecting a sensor module's pins straight to an Arduino's header pins without going through the breadboard at all. Less used at first, but invaluable as projects grow.
A well-stocked kit gives you a generous mix of all three in varied lengths, so you are never stuck mid-build hunting for the right connector. Topping up later from the accessories and best-sellers range keeps a spare bundle on hand for bigger layouts.
Your First Circuit on a Breadboard
The classic first build is blinking an LED. You run a wire from the Arduino's 5V pin to the breadboard's red power rail, ground to the blue rail, then place an LED and a current-limiting resistor in the main field, joined by short jumpers. A male-to-male wire carries a signal from a digital pin to the LED. Upload the blink sketch and it flashes.
What makes this powerful is what comes next. Want to add a button? Push it into a fresh row and wire it in. Want a sensor? Drop in a module and connect it with male-to-female jumpers. The breadboard grows with your ambition, and nothing you built before needs to be undone.
Wiring Discipline From the Start
One habit that separates frustrating projects from smooth ones is colour-coding wires from the very first build. Red for the positive power rail, black for ground, and any other colour for signals. On a three-component LED circuit it barely matters, but once you have a breadboard with a sensor, a button, a motor driver and a few indicator LEDs, the ability to follow a red wire straight to the 5V rail and a black wire straight to ground saves real diagnostic time.
Solid-core 22AWG wire in a multi-colour pack is the ideal choice: it holds its shape when pushed into the holes, making tidier layouts that are easier to photograph, share, and return to weeks later. Flexible stranded wire is better for longer runs between boards, but for the short hops across a half-size breadboard, solid core is cleaner.
It is also worth noting that breadboard holes do have a finite lifespan. The spring clips wear after thousands of insertions, eventually gripping loosely and creating intermittent connections that look like code bugs. A beginner chasing an intermittent fault in a clip that looks seated but is not can lose an afternoon. If a circuit that was working stops for no obvious reason, reseat every wire and component as the first debugging step.
When to Move Beyond the Breadboard
Breadboards are for prototyping, not permanence. Once a circuit works and you want to keep it, the right move is to transfer it to stripboard (also called Veroboard) with soldered joints, or order a custom PCB if the project justifies it. For most learners that step comes months or years into the hobby, but knowing it exists frames the breadboard correctly: it is a workshop tool, not a finished product.
For school projects, science fairs, and competitions, a working breadboard circuit in a tidy case is entirely acceptable and respected. The point is that it works, it is reproducible, and the person who built it understands every connection on it.
Buying the Right Set
Look for a half-size or full-size breadboard with at least 400 tie points, paired with a wire pack that includes all three jumper types. Many Arduino starter kits bundle the board, wires, LEDs, resistors and a handful of sensors together, which is the most economical way in for a complete beginner. Avoid the temptation to buy exotic sensors first; without the breadboard and wires to connect them, they just sit in a drawer.
FAQ
Do I need to solder anything to use an Arduino?
No. A breadboard lets you build complete working circuits with zero soldering. You only need soldering later if you want to make a project permanent or fit components that do not have pin legs.
What size breadboard should a beginner buy?
A half-size board with around 400 tie points is plenty for most learning projects and stays tidy. Step up to a full-size board only when your circuits start filling the smaller one.
Why do jumper wires come in male and female ends?
The end type matches what you are connecting. Male pins push into breadboard holes and headers, while female sockets receive pins from modules. Having all three combinations lets you join any two parts in a project.
Can I reuse breadboard components in other projects?
Yes, and that is the whole point. Because nothing is soldered, every wire, LED, resistor and sensor pulls out cleanly and goes into the next build. This makes a breadboard kit extremely cost-effective over time.
Is a starter kit better than buying parts separately?
For a first purchase, yes. A starter kit bundles the breadboard, jumper wires and core components at a lower combined price, and ensures you have everything needed to follow beginner tutorials from day one.