So, you’ve built your dream rig. The RGB is synced, the cable management is immaculate, and it boots up in seconds. But what if we told you there’s free performance hiding inside your processor, just waiting to be unlocked? Welcome to the thrilling world of CPU overclocking. This guide is for South African PC builders ready to push their hardware to the absolute limit and squeeze out every last drop of power for a smoother gaming experience. 🚀
What is CPU Overclocking, Really?
At its core, CPU overclocking is the process of manually increasing your processor's operating speed (clock frequency) beyond its official factory settings. Think of it like tuning a car's engine. The manufacturer sets a reliable, efficient baseline, but with careful adjustments, you can unleash its true performance potential. This means higher frame rates in games, faster video rendering, and a snappier system overall.
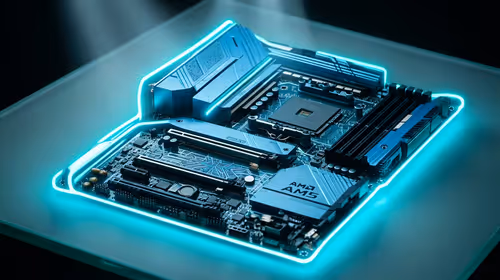
To get started, you need two key things: an "unlocked" CPU (like Intel's 'K' series or most AMD Ryzen chips) and a motherboard with a compatible chipset (e.g., Z-series for Intel, B- or X-series for AMD) that allows for these tweaks. Even some well-chosen components in budget gaming PCs can offer a gateway into the world of performance tuning.
Is CPU Overclocking Safe for Your Rig?
This is the big question, and the honest answer is: it’s safe if you’re careful. Pushing your CPU harder generates more heat and consumes more power. The main risks are system instability (crashes) or, in extreme cases, damaging your hardware. However, modern CPUs and motherboards have built-in safety features to prevent catastrophic failure.
The golden rule is to make small, incremental changes and test thoroughly at every step. A high-quality CPU cooler is not optional... it's essential. Many modern builds, especially those in our range of powerful PCs under R20k, come equipped with cooling solutions that can handle a modest overclock right out of the box.
Your Essential CPU Overclocking Toolkit 🔧
Before you even think about diving into your BIOS, you need the right software to monitor your progress and test for stability. Here’s your essential checklist:
- Monitoring Software: Tools like HWiNFO64 or HWMonitor are crucial. They give you a real-time view of your CPU's clock speeds, temperatures, and voltages. Keep a close eye on those temps!
- Stress-Testing Software: You need to push your CPU to 100% load to ensure your overclock is stable. Prime95, AIDA64, and Cinebench R23 are the industry standards for this.
- Benchmarking Software: How do you measure your gains? Use benchmarks like 3DMark or the built-in benchmark tools in games like Cyberpunk 2077 or Shadow of the Tomb Raider to see the real-world difference.
Voltage Warning ⚡
When overclocking, your CPU's core voltage is the most dangerous setting to adjust. Only increase it in the smallest possible increments (e.g., 0.01v at a time). Too much voltage is the fastest way to degrade or permanently damage your processor. Always stay within the safe voltage limits recommended for your specific CPU model.
A Step-by-Step CPU Overclocking Guide for Beginners
Every CPU and motherboard is different, so consider this a conceptual roadmap, not a precise set of instructions. Always research your specific hardware first!
Step 1: Establish Your Baseline
Before you change anything, run your stress tests and benchmarks at stock settings. Write down your maximum temperature and your benchmark scores. This is the baseline you'll measure your success against.
Step 2: Enter the BIOS/UEFI
Restart your PC and press the appropriate key during boot-up (usually Del, F2, or F12) to enter the BIOS. This is your command centre. Look for settings related to "CPU Frequency," "CPU Ratio," or "Multiplier."
Step 3: Increase and Test
Start by increasing the CPU multiplier by a small amount (e.g., from 45x to 46x for a 4.6GHz clock speed). Save your settings, reboot into Windows, and run a stress test for at least 30 minutes. If it's stable and temperatures are safe (ideally under 85-90°C under load), repeat the process.
Step 4: Find Your Limit
Eventually, your PC will crash or fail to boot. This is your current limit. Now you can either back down to the last stable setting or, if you're feeling brave and your temps are low, add a tiny bit of core voltage to see if it stabilises the higher clock speed. For the most ambitious overclocks, you'll need the premium power delivery and cooling found in top-tier systems like our gaming PCs above R20k.
The Pro-Built Alternative: Performance Without the Pain
Let's be real: manual CPU overclocking is a fantastic hobby for enthusiasts who love to tinker. But it takes time, patience, and carries a degree of risk. What if you just want maximum performance without the hassle? ✨
That’s where professionally built and optimised systems come in. When you get a rig from Evetech, you're not just getting a box of parts. You're getting a machine that has been expertly assembled, cable-managed, and stability-tested by technicians who do this all day. Many of our pre-built PC deals offer the perfect balance of performance and peace of mind, with everything optimised for you under full warranty.
Ready to Unleash Maximum Power? Whether you're a hands-on enthusiast following a CPU overclocking guide or a gamer who just wants guaranteed performance, the right PC is waiting. For a rig that's expertly built, stability-tested, and ready to dominate from day one, look no further. Explore our best gaming PC deals and find the perfect machine to conquer your world.