So, you want more frames-per-second without spending another Rand? Squeezing extra performance from your hardware is the classic PC gamer's dream. But let's be honest, the idea of "frying" your expensive CPU is terrifying. This guide is for you, the South African gamer who wants a real competitive edge. We'll walk you through how to safely overclock your gaming PC, ensuring you get that free performance boost without the risk.
Understanding the Overclocking Basics
Before you jump into your BIOS, let's quickly demystify what overclocking is. In simple terms, it's the process of manually increasing the operating frequency (clock speed) of a component—usually your CPU or GPU—beyond its factory settings. The reward? More processing cycles per second, which translates to better performance in games and applications.
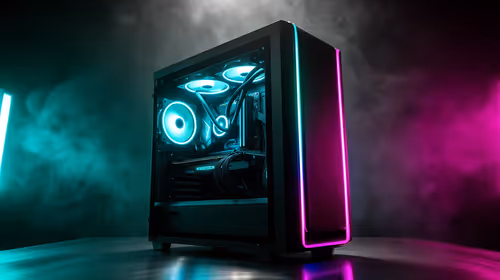
The trade-off is increased heat and power consumption. This is why a solid foundation is crucial. A PC with a robust motherboard and an efficient cooling system, like many of the pre-built Intel PC deals available in South Africa, provides a much safer starting point for your overclocking journey.
Is Your Rig Ready for a Speed Boost? 🔧
Not all PCs are created equal when it comes to overclocking. Pushing your hardware requires a system that can handle the extra strain. Here’s a quick checklist of what you need for a safe overclocking experience:
- An Unlocked CPU: For Intel, this means a "K" or "X" series processor (e.g., Core i7-14700K). For AMD, most Ryzen CPUs are unlocked.
- A Capable Motherboard: You'll need a motherboard with a chipset that supports overclocking (like Intel's Z-series or AMD's B- and X-series). These boards have better power delivery systems (VRMs) to provide stable voltage.
- Sufficient Cooling: The stock cooler that came with your CPU is likely not going to cut it. A good aftermarket air cooler or an All-in-One (AIO) liquid cooler is essential to manage the extra heat, especially in our warmer South African climate.
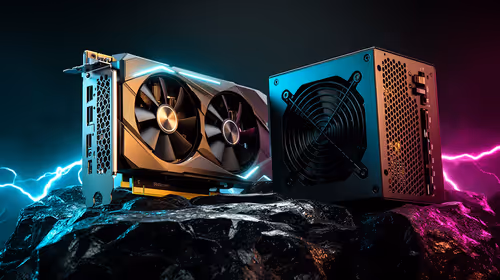
- A Quality Power Supply (PSU): An overclocked system draws more power. A reliable PSU from a reputable brand ensures your components get clean, stable energy.
If you're starting fresh, considering a system built around a solid foundation, like one of these customisable AMD Ryzen PC deals, can save you a lot of headaches later.
A Step-by-Step Guide to Safely Overclocking Your CPU
This is a high-level overview. Always search for a detailed guide specific to your exact CPU and motherboard model before you begin!
1. Establish a Baseline
Before changing anything, run a benchmark like Cinebench R23 and a stress test like Prime95 for 15-20 minutes. Use monitoring software (like HWMonitor or Core Temp) to note your stock clock speeds, temperatures, and benchmark score. This is your starting point.
2. Enter the BIOS/UEFI
Restart your PC and press the designated key (usually Del, F2, or F12) to enter the BIOS. This is your PC's command centre. Take a moment to familiarise yourself with the layout.
Pro Monitoring Tip ⚡
For an all-in-one view of your system's stats, install MSI Afterburner with the RivaTuner Statistics Server. It's famous for GPU overclocking but also provides a fantastic on-screen display to monitor CPU GPU temperatures, clock speeds, and frame rates in real-time while you game.
3. Make Small, Incremental Changes
Find the "CPU Core Ratio" or "Multiplier" setting. Increase it by a tiny increment (e.g., from 45 to 46, representing 4.5GHz to 4.6GHz). Don't touch the voltage yet! Save your settings and reboot into Windows.
4. Stress Test for Stability
If your PC boots successfully, it's time to test for stability. Run the same benchmark and stress test again. If it runs without crashing or overheating (keep temperatures below 90-95°C), you have a stable overclock. If it crashes, you may need to slightly increase the "CPU Core Voltage" (Vcore) or dial back the multiplier.
Rinse and repeat this process of small adjustments and thorough testing. The key to a safe overclock is patience. Once you've found your chip's sweet spot, you can enjoy the performance gains in your favourite titles, whether you're running on one of our powerful NVIDIA GeForce gaming PCs or another setup.
Don't Forget Your Graphics Card 🚀
GPU overclocking is often simpler and can provide even more noticeable gains in gaming. Using a tool like MSI Afterburner, you can adjust three main sliders:
- Core Clock: The speed of the GPU itself.
- Memory Clock: The speed of the VRAM.
- Power Limit: Allows the card to draw more power for higher, more stable clocks.
Increase the Core Clock in small steps (+15 to +25 MHz), apply, and then test for stability and visual artifacts using a benchmark like 3DMark or Unigine Heaven. The same principle applies to the Memory Clock. Finding the right balance is key, and it’s a fantastic way to get more performance from the heart of your rig, especially on the latest AMD Radeon gaming PCs.
For professional tasks where stability is paramount, such as on dedicated workstation PCs, it's often best to leave components at their validated stock speeds to ensure 100% reliability.
Ready for a Performance Boost? Safely overclocking your gaming PC starts with a solid foundation. If your current rig's cooling or power delivery is holding you back, upgrading might be your best bet. Explore our massive range of custom gaming PCs and find the perfect, overclock-ready machine to dominate your game.