Chasing that extra 15 FPS in Apex Legends? Before you start tweaking voltages and clock speeds, the biggest barrier to a stable overclock might be hiding in plain sight. We’re talking about dust, the silent performance killer. A deep clean isn't just about aesthetics; it's the foundation for pushing your hardware. Getting your PC clean for overclocking is the essential first step to unlocking its true potential, ensuring your rig runs cool, quiet, and lightning-fast when it matters most.
Why a Clean PC is Non-Negotiable for Overclocking
Think of dust as a tiny, fluffy blanket for your components. While that sounds cosy, it’s a nightmare for performance. Dust insulates your CPU cooler, GPU heatsink, and case fans, trapping heat and preventing them from working efficiently.
When you overclock, you're pushing more power through your components, which generates significantly more heat. If that heat can't escape, your system will do one of two things:
- Thermal Throttling: Your CPU or GPU will automatically slow down to protect itself from overheating, completely defeating the purpose of your overclock.
- Instability & Crashes: Excessive heat leads to system instability, causing those frustrating blue screens or game crashes mid-match.
A properly clean PC for overclocking ensures maximum airflow, allowing your cooling system to handle the extra thermal load with ease. This translates to higher, more stable clock speeds and, ultimately, better performance. Even if you're rocking one of our popular budget gaming PCs, a good clean can make a world of difference.
Your Step-by-Step Performance Cleaning Guide 🔧
Ready to give your rig the spa day it deserves? Here’s how to get it done safely and effectively.
What You'll Need:
- A can of compressed air
- Isopropyl alcohol (90% or higher)
- Microfibre cloths
- Cotton swabs (Q-tips)
- A small, soft brush (like a paintbrush)
- A Phillips head screwdriver
Static Safety First ⚡
Before you touch any internal components, make sure you're grounded! Unplug your PC from the wall and press the power button a few times to discharge any residual electricity. Then, touch a large metal object (like your PC case's bare metal frame) to ground yourself and prevent static discharge from damaging your precious hardware.
Step 1: The Exterior and Filters
Start with the easy wins. Power down and unplug everything. Use a microfibre cloth to wipe down the exterior of your case. Most modern cases have removable dust filters on the front, top, and bottom (for the PSU). Slide or pop these out, give them a good rinse under a tap, and let them dry completely before putting them back. This simple step drastically improves airflow.
Step 2: Inside the Beast
Open up your side panel. Using your can of compressed air, blow out the loose dust in short, controlled bursts. Start from the top of the case and work your way down. Focus on these key areas:
- Case Fans: Hold the fan blades gently with one finger to stop them from spinning while you blow the dust off.
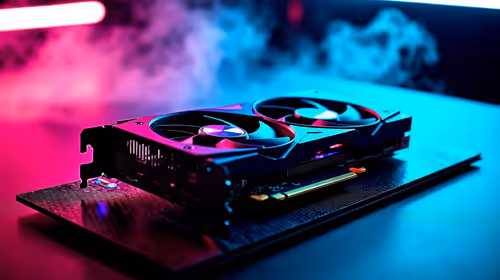
- GPU Fans & Heatsink: Pay close attention here. Blow air through the heatsink fins to dislodge trapped dust. This is critical for GPU overclocks.
- CPU Cooler: Whether you have a giant air tower or an AIO radiator, the goal is the same. Blow dust out from the fan blades and the radiator/heatsink fins.
For many builds, especially those in the sweet spot of PCs under R20k, keeping the CPU and GPU coolers clear is the single most important part of the process.
Step 3: Deep Cleaning Details ✨
Now, grab your isopropyl alcohol, cotton swabs, and soft brush for the finer details. Lightly dampen a cotton swab with alcohol to carefully wipe down fan blades and stubborn dust patches. A soft brush is perfect for gently cleaning sensitive areas like your motherboard's surface or your RAM sticks.
For more powerful systems, like high-performance PCs above R20k, you might have more complex AIO coolers or custom water loops. Ensure all radiator surfaces are completely clear for optimal heat dissipation.
Beyond the Dust: A Quick Software Tidy-Up
A physically clean PC is only half the battle for a great overclocking experience. A cluttered operating system can cause instability and performance bottlenecks. Before you start overclocking, consider a quick software clean-up:
- Update your graphics drivers to the latest version.
- Close unnecessary background applications.
- Run a malware scan.
Of course, nothing beats the feeling of a completely fresh start. Many of our pre-built PC deals come with a clean Windows installation, optimised for gaming right out of the box, giving you the perfect blank canvas for performance tuning. 🚀
Ready for a Performance Upgrade? Sometimes, even the cleanest rig has hit its limit. If you're dreaming of a machine built for extreme performance from day one, we've got you covered. Explore our legendary gaming PC deals and find the perfect rig to dominate the leaderboards.