Is your rig running hotter than a Durban summer? Before you blame your GPU, that layer of Highveld dust could be the real culprit. A clean gaming PC isn't just for looks; it's a free performance boost. Learning how to clean your gaming PC properly is the cheapest upgrade you'll ever make. Let’s get your machine running cool, quiet, and fast again, ready for whatever 2026 throws at it. ✨
Why Cleaning Your Gaming PC is Non-Negotiable
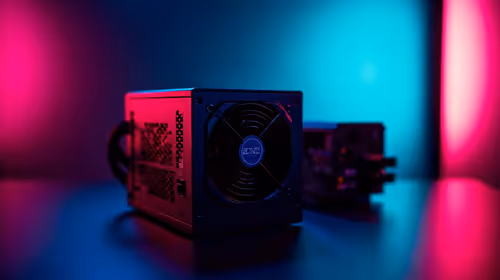
Heat is the number one enemy of performance. Every component in your PC, from the CPU to the GPU, generates heat under load. Your cooling system—a collection of fans and heatsinks—is designed to pull that heat away. But when dust, pet hair, and other gunk build up, they form an insulating blanket.
This blanket traps heat, forcing your fans to spin faster (and louder) to compensate. If they can't keep up, your components will "thermal throttle," intentionally slowing down to prevent damage. Suddenly, your frame rates drop in the middle of a boss fight. Regular PC maintenance prevents this, extending the lifespan of your components and ensuring you get the performance you paid for. A clean machine is a fast machine, whether you're checking out the latest PC deals or maintaining a rig you've had for years.
Your Essential PC Cleaning Toolkit 🔧
You don’t need a high-tech lab to perform a thorough PC clean. Having the right tools makes the job safer and more effective. Before you start, gather these essentials:
- Can of Compressed Air: The go-to for blasting dust out of tight spaces. An electric duster is a great long-term, eco-friendly investment.
- Isopropyl Alcohol (90%+): Perfect for cleaning thermal paste residue or stubborn grime. It evaporates quickly without leaving residue.
- Microfibre Cloths: Soft, lint-free, and ideal for wiping down surfaces without scratching them.
- Cotton Swabs: Great for getting into the tiny nooks and crannies of fan blades and motherboard heatsinks.
- A Phillips-Head Screwdriver: To open your case, of course.
Static Safety First! ⚡
Static electricity is a silent killer of PC components. Before you touch anything inside your case, make sure you're grounded. The easiest way is to touch the metal part of your plugged-in (but switched off) power supply. Working on a hard floor instead of a carpet also reduces static buildup. An anti-static wrist strap is a cheap and effective piece of pro gear.
The Step-by-Step Guide to Cleaning Your PC 💨
Ready to get hands-on? This simple process will get your machine looking and performing like new. Set aside about 30-45 minutes for a proper clean.
Step 1: Power Down and Prep
Shut down your PC completely. Switch the power supply off at the back and unplug it from the wall. Disconnect all peripherals like your monitor, keyboard, and mouse. Move your PC tower to a well-ventilated area—your garage or balcony is perfect, as this process can get dusty.
Step 2: Open the Case
Place the tower on its side and unscrew the thumb screws holding the main side panel in place. Slide it off and set it aside. Now you have full access to the internals. Take a moment to see where the dust has settled the most; it's usually on the intake fans, CPU cooler, and the GPU.
Step 3: The Big Dust-Out
Take your can of compressed air and, using short, controlled bursts, blow the dust out of the case. Start from the top and work your way down.
- Fans: Hold the fan blades gently with one finger to stop them from spinning while you spray. Letting them spin freely can damage the fan bearings.
- Heatsinks: Direct the air through the fins of your CPU cooler and GPU heatsink to dislodge trapped dust.
- Motherboard & PSU: Blow dust off the motherboard surface and out of the power supply vents.
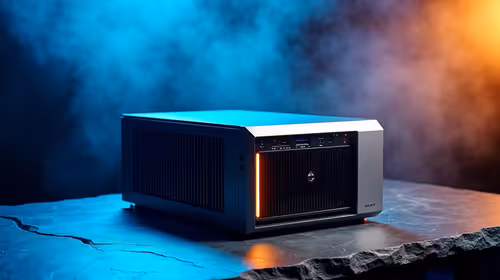
This is the core of how to clean your gaming PC, and doing it correctly is vital for all machines, including today’s top gaming PCs which pack incredible power into dense spaces.
Step 4: Detail Work
Use your microfibre cloth to wipe down the inside of the case, cables, and any flat surfaces. For stubborn dust on fan blades, lightly dampen a cotton swab with isopropyl alcohol and carefully wipe them clean. Don't forget to remove and clean your case's dust filters—most can be rinsed with water (just make sure they are 100% dry before reinstalling).
Advanced PC Maintenance for Peak Performance 🚀
A basic clean is fantastic, but for enthusiasts, there's always another level. Once a year, consider tidying up your cable management. Better airflow not only looks great but also improves cooling efficiency. For those comfortable with more advanced tasks, reapplying thermal paste to your CPU every 2-3 years can dramatically improve temperatures, especially on older systems. This principle of meticulous care applies to all high-end hardware, as even high-performance workstation PCs require regular maintenance to deliver consistent results on demanding tasks.
Learning how to clean your gaming PC is a fundamental skill for any serious gamer. It saves you money, boosts your performance, and gives you a deeper connection to the machine that powers your passion.
Keep It Cool or Upgrade Your Rig? A clean PC is a happy PC. But if your machine is still struggling after a thorough clean, it might be time for an upgrade. From entry-level beasts to 4K monsters, we build them clean and cable-managed from day one. Explore our legendary gaming PC deals and get the performance you deserve.