Is your gaming rig running hotter than a Karoo blacktop in December? Are your frame rates dropping at the worst possible moment? Before you blame lag or the latest game patch, the culprit might be lurking inside your case. Dust, the arch-nemesis of every South African PC gamer, silently chokes your components, causing overheating and throttling performance.
This guide will show you exactly how to clean a gaming PC, boosting its speed and extending its lifespan. Let's get that rig looking and running like new. 🚀
Why Cleaning Your Gaming PC is Non-Negotiable
Ignoring dust is like driving with the handbrake on. As it builds up on your heatsinks and clogs your fans, it acts as an insulator, trapping heat. Your PC's components, like the CPU and GPU, then have to slow down (a process called thermal throttling) to avoid damage. This directly translates to lower FPS, system stuttering, and a rig that sounds like a jet engine.
Regularly cleaning a gaming PC not only restores that lost performance but also helps your expensive hardware last longer. A clean machine is a happy, high-performance machine.
Your PC Cleaning Toolkit: What You'll Need
You don't need a high-tech lab to get the job done. A few essential items are all it takes to perform a thorough clean.
Here’s your shopping list:
- Can of Compressed Air: Your primary weapon against dust.
- Isopropyl Alcohol (90%+): Perfect for safely cleaning component surfaces.
- Microfibre Cloths: For a lint-free wipe-down of the case exterior.
- Cotton Swabs: Great for getting into tight corners and cleaning fan blades.
- Optional: Anti-static wrist strap: A smart precaution to protect your components from static discharge.
Gathering these items is a small investment that pays huge dividends in performance, especially if you're rocking one of our affordable budget gaming PCs and want to keep it in top shape.
The Step-by-Step Guide to a Dust-Free Rig 🔧
Ready to dive in? Follow these steps for a safe and effective PC cleaning session.
Step 1: Prep Work is Key
First things first: safety.
- Power Down: Completely shut down your PC through the operating system.
- Unplug Everything: Disconnect the power cable from the wall and all peripherals (USB, HDMI, etc.) from the PC.
- Find Your Workspace: Move your PC to a well-ventilated area, preferably outdoors or on a tiled floor, to avoid covering your room in dust.
Step 2: The Interior Deep Clean
This is where the real magic happens.
- Open the Case: Remove the side panel(s). Usually, this involves undoing a few thumbscrews at the back.
- Blow Out Dust: Grab your compressed air. Hold the can upright and use short, controlled bursts to blow dust out of the case. Start from the top and work your way down. Crucial: Hold fan blades with a finger to prevent them from spinning too fast, which can damage the motor.
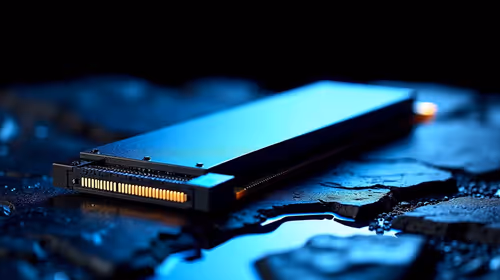
- Target Key Areas: Pay special attention to the CPU cooler's heatsink, the GPU's fans and cooling fins, and all case fans. These are the biggest dust magnets. If your current setup is a nightmare of cables and tight spaces, you might appreciate the clean layouts in our great value gaming PCs under R20k.
="Airflow Pro Tip ⚡" , While your case is open, check your cable management. Messy cables can obstruct airflow, creating hot spots. Use cable ties to route wires neatly along the chassis. It not only looks better but also improves cooling efficiency, helping your components breathe easier.
Step 3: Detailing and Dust Filters
For that final touch, lightly dampen a cotton swab with isopropyl alcohol to gently wipe stubborn dust off fan blades and other hard surfaces. Don't forget to remove and clean your PC's dust filters! Most are magnetic or slide out easily. A quick rinse under a tap (make sure they are completely dry before reinstalling) will make a huge difference. The meticulous build quality found in many high-end rigs often includes premium, easy-to-clean filters.
Common PC Cleaning Mistakes to Avoid
Knowing how to clean your gaming PC also means knowing what not to do. Avoid these common blunders:
- Never use a vacuum cleaner: Vacuums generate a ton of static electricity, which can instantly fry your sensitive components. Stick to compressed air.
- Avoid harsh household chemicals: Cleaners like window spray can damage plastics and leave residue. Isopropyl alcohol is your safest bet.
- Don't spray liquids directly: Always apply alcohol to your cloth or swab first, never directly onto a component. If you prefer a setup that's professionally assembled and ready to go, check out our range of powerful pre-built PCs.
When a Clean Isn't Enough... ✨
You've followed all the steps. Your PC is spotless, gleaming like the day you bought it... but it's still struggling to hit those high frame rates in the latest titles. Sometimes, a deep clean reveals a simple truth: your hardware is getting old.
If your rig is still underperforming after a thorough cleaning, it might be the perfect time to consider an upgrade. Technology moves fast, and a new GPU or CPU can deliver a performance leap that no amount of cleaning can match.
{{CALLTOACTION :
Ready for a Real Performance Boost? A clean PC is a fast PC, but nothing beats brand-new hardware. If your rig is still lagging, it might be time for an upgrade. Explore Evetech's best gaming PC deals and find the perfect machine to dominate the competition. }}