Tired of watching loading bars crawl across your screen while your mates are already in the lobby? Upgrading your PC's storage is the single biggest speed boost you can give it. And the best part? Learning how to install an M.2 SSD on a modern motherboard is easier than ever… some don't even need a single screw. This guide will walk you through the entire process, getting you back in the game faster. 🚀
Why an M.2 SSD is a Must-Have Upgrade
If you're still running your games or operating system from an old hard disk drive (HDD), you're leaving a massive amount of performance on the table. An M.2 Solid State Drive plugs directly into your motherboard, eliminating cables and offering mind-blowing speeds.
The difference is night and day. Windows boots in seconds, games load almost instantly, and the whole system feels incredibly snappy. The performance of today's modern SSDs is simply in another league compared to the mechanical drives of the past. It’s a relatively affordable upgrade that makes your entire PC feel brand new.
Pre-Installation Checklist: What You'll Need
Before you start unscrewing your case, let's get organised. A smooth M.2 SSD installation starts with a little prep. You'll need:
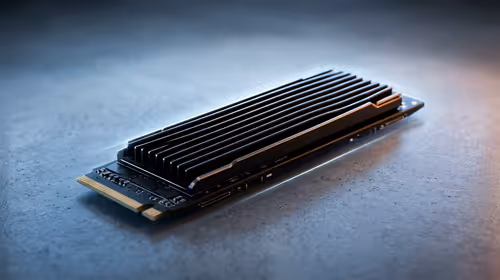
- Your new M.2 SSD: The star of the show!
- Your motherboard manual: This is your best friend. It will show you exactly where the M.2 slots are and which one is best to use.
- An anti-static wrist strap (recommended): To keep your components safe from static electricity.
- A small Phillips-head screwdriver: You might not even need it!
Most importantly, check your motherboard's compatibility. Ensure the slot matches your drive's key (most modern drives use an 'M' key) and length (usually 2280). For the ultimate performance, make sure you're grabbing one of our blazing-fast NVMe SSDs which use the PCIe interface for maximum throughput.
The Main Event: How to Install an M.2 SSD
Alright, let's get to the good part. This is where the magic happens. 🔧
Step 1: Power Down and Prep Your PC
Shut down your computer completely. Switch off the power supply unit (PSU) at the back and unplug it from the wall. Open your PC case and lay it on its side. If you have an anti-static wrist strap, now's the time to put it on.
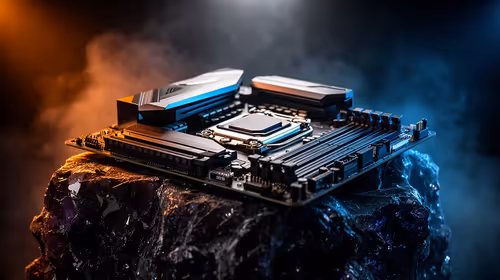
Step 2: Locate the M.2 Slot
Consult your motherboard manual to find the M.2 slot(s). They are small, horizontal slots, often located below the CPU socket or between the PCIe slots. Some motherboards even hide them under sleek metal heatsinks, which you'll need to unscrew first.
Step 3: Insert and Secure the Drive
This is where 2025-era motherboards make life easy.
- The Old Way (with a screw): You'll see a tiny screw and a standoff. Unscrew it, gently slide your M.2 drive into the slot at a 20-30 degree angle, then press it down flat. The notch on the end of the SSD should line up with the standoff. Finally, use that tiny screw to secure it. Don't overtighten it!
- The NEW Screwless Way (Q-Latch): Many new motherboards from brands like ASUS and Gigabyte feature a tool-free latch. Simply insert the M.2 SSD as described above, press it down, and then rotate the plastic latch to lock the drive in place. No tiny screws to lose… brilliant!
This simple M.2 SSD installation process is fundamentally the same for most Solid State Drives on the market today.
Cloning vs. Fresh Install 🤔
Cloning your old drive copies everything... OS, files, and clutter... over to the new M.2 SSD. It's fast but can bring old problems with it. A fresh Windows install is cleaner and often results in better performance, but you'll need to reinstall your apps and games. For a primary OS drive, we almost always recommend a fresh install!
After You Install: Making Windows Recognise Your Drive
You've successfully managed to install the M.2 SSD, but you don't see it in "My Computer". Don't panic! This is normal for a brand-new drive. You just need to initialise it.
- Right-click the Start button and select Disk Management.
- A pop-up should appear asking you to initialise the new disk. Choose GPT (GUID Partition Table) and click OK.
- You'll now see your drive listed as "Unallocated". Right-click on the unallocated space and select New Simple Volume.
- Follow the wizard's prompts. You can leave most settings as default. Assign it a drive letter, give it a name (like "Games"), and perform a quick format.
And that's it! ✨ Your lightning-fast new storage is ready to go. With prices always improving, it's a good idea to check out the latest SSD deals and snag a high-capacity drive for less.
Don't Want to Open Your PC?
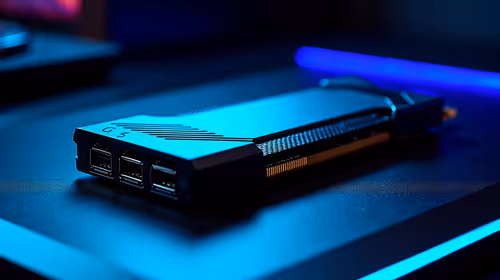
If the thought of opening up your PC rig is a bit much, you can still get a massive speed boost for your game library or media files. For a simple plug-and-play solution, high-speed external SSDs are fantastic. They connect via USB-C or USB 3.0 and offer incredible performance without you ever having to touch a screwdriver.
Ready for the Speed Boost? Upgrading to an M.2 SSD is one of the most satisfying PC upgrades you can make. It transforms your PC's responsiveness, from booting up to loading the biggest game worlds. Explore our massive range of SSDs and find the perfect drive to slash your loading times.