You’re in the final circle. It’s a 1v1. You peek around a rock, lining up the perfect shot... but a distracting smudge on your screen catches the light, breaking your focus for a millisecond. Game over. We’ve all been there. A dirty display doesn’t just look bad; it can cost you the match. Learning how to clean your gaming monitor correctly is a non-negotiable skill for any serious South African gamer. It protects your investment and ensures crystal-clear visuals when it matters most.
Why a Quick Wipe with Your T-Shirt Won't Cut It
Before you grab the closest cloth, stop. Modern monitor screens are delicate. They often have special anti-glare or matte coatings that can be permanently damaged by harsh chemicals or abrasive materials. Using the wrong technique can lead to fine scratches, discolouration, or stripping of these important coatings, leaving you with a worse view than before.
Properly cleaning your monitor isn't just about aesthetics; it's about preserving the lifespan and performance of all kinds of PC monitors, from entry-level displays to high-end panels. A clean screen provides better colour accuracy, deeper blacks, and the immersive experience you paid for.
The Right Tools for a Spotless Screen 🔧
Forget the kitchen spray or paper towels. To clean your gaming monitor safely, you only need a few specific items. Using the wrong stuff is how horror stories of ruined screens begin.
What You'll Need:
- Two or three high-quality microfiber cloths: One for dusting, one for damp wiping, and one for drying. Make sure they are perfectly clean.
- Distilled or deionised water: Tap water contains minerals that can leave white, streaky deposits on your screen. Always use pure water.
- (Optional) A 50/50 solution of distilled water and white vinegar: This is for extremely stubborn grime only. Use it sparingly.
What to AVOID at All Costs:
- Window cleaner, alcohol, or ammonia-based products: These chemicals are too aggressive and will damage your screen's protective layers.
- Paper towels, tissues, or rough cloths: They are abrasive and will leave behind lint and tiny scratches.
- Applying liquid directly to the screen: Never spray anything onto the monitor itself. Liquid can seep into the bezel and fry the internal components.
You can often find specialised cleaning kits and other useful monitor accessories that bundle everything you need safely.
Stubborn Spot Takedown ⚡
For a really tough spot like a dried-on speck of... something... dampen a small section of your microfiber cloth with the distilled water (or the 50 50 vinegar solution as a last resort). Gently hold the damp cloth on the spot for a few seconds to soften it, then wipe away in a circular motion. Never apply excessive pressure or try to scrape it off!
Your Step-by-Step Guide to Crystal-Clear Visuals
Ready to get that factory-fresh look back? Follow these steps carefully for a perfect, streak-free finish.
- Power Down: Turn off your monitor and unplug it from the wall. A dark screen makes it much easier to see dust and smudges, and it's a crucial safety step.
- The Dry Pass: Take your first clean, dry microfiber cloth and gently wipe the screen to remove any loose dust and debris. Use light, sweeping motions from top to bottom.
- The Damp Wipe: Lightly dampen a different microfiber cloth with your distilled water. It should be moist, not dripping wet. Wring it out thoroughly.
- Gentle Wiping Motion: Wipe the screen from top to bottom in smooth, even strokes. Avoid pressing hard or using a scrubbing motion. This gentle approach is especially important for preserving the delicate surface of immersive curved monitors where pressure can be uneven.
- The Final Buff: Use your third (or another dry part of your cloth) to gently buff the screen dry. This final step is key to preventing streaks, which are especially noticeable on high-resolution 5K and 4K monitors where every pixel counts.
- Don't Forget the Frame: Use the slightly damp cloth to clean the monitor's plastic frame (bezel), stand, and back to complete the job.
When Cleaning Isn't Enough ✨
Sometimes, a screen's issues go beyond dirt. If you’ve followed this guide for cleaning your gaming monitor and still see imperfections, you might be dealing with permanent damage. Scratches, pressure marks from being handled incorrectly, or clusters of dead pixels unfortunately can't be wiped away.
This is often the point where you have to weigh the frustration of a damaged display against the joy of an upgrade. If your screen is holding you back, it might be time to explore the incredible advancements in monitor technology. From ultra-high refresh rates to stunning OLED colour, today's panels are a massive leap forward. Even adding small, versatile portable monitors to your setup can revolutionise your workflow and gaming experience. If your main screen is looking a bit tired, exploring the latest gaming monitors could be the best fix of all.
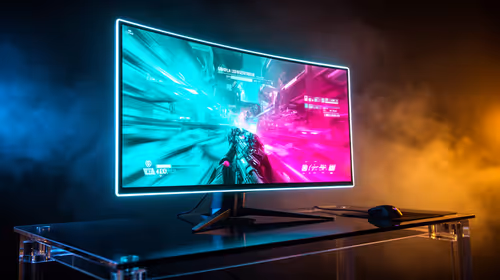
Ready to Upgrade Your View?
A clean screen makes a world of difference, but nothing beats a brand-new panel. If your old monitor is beyond saving, it's time for an upgrade. Explore our massive range of gaming monitors and find the perfect display to dominate the competition.