Is your PC lagging just when you're about to clutch a win in Warzone? Before you start pricing new hardware, what if you could unlock free performance hidden inside your current CPU? Learning how to overclock your CPU for gaming is like finding a secret power-up for your rig. It’s a rite of passage for serious PC builders in South Africa, and this guide will show you how to do it safely and effectively. 🚀
Before You Start: The Overclocking Checklist
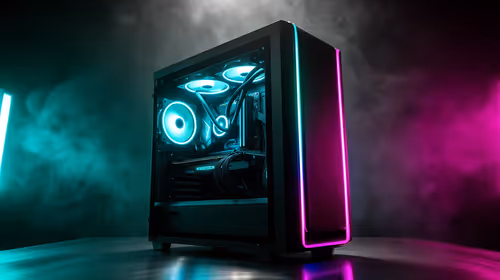
Hold on there, tiger! Before you dive into your BIOS, you need to make sure your hardware is up for the task. Pushing your processor past its factory limits requires the right gear. A successful CPU overclock depends on three key components working together.
First, you need an unlocked processor. For Intel, this means a "K" or "KF" series CPU (like the Core i7-14700K). For AMD, most modern Ryzen CPUs are unlocked right out of the box. Second, you'll need a motherboard with a chipset that supports overclocking, such as an Intel Z-series or an AMD B or X-series board. Finally, and most importantly, you need a robust cooling solution. The stock cooler won't cut it... you'll need a beefy air cooler or an All-in-One (AIO) liquid cooler to handle the extra heat.
If you're unsure whether your current setup is ready, it might be time to browse the latest CPU processors available online to see what's possible.
The Core Principles of CPU Overclocking
So, what are we actually doing when we overclock? At its core, CPU overclocking involves tweaking two main settings:
- CPU Core Ratio (or Multiplier): This number, multiplied by the Base Clock (BCLK, usually 100MHz), determines your final clock speed. For example, a multiplier of 48 gives you a 4.8GHz clock speed (48 x 100MHz). This is the primary setting you'll be increasing.
- CPU Core Voltage (Vcore): This is the power supplied to the CPU core. Higher clock speeds require more voltage to remain stable. However, more voltage also means significantly more heat.
The goal is to find the highest possible Core Ratio that remains stable at the lowest possible Voltage. It’s a delicate balancing act. ✨
A Step-by-Step Guide to Overclocking Your CPU for Gaming
Ready to get your hands dirty? Remember, every CPU is different due to the "silicon lottery," so your results may vary. Proceed with caution and patience.
Step 1: Establish a Baseline
Before you change anything, you need to know your starting point. Run a benchmarking tool like Cinebench R23 and a stress-testing program like Prime95 (using the "Small FFTs" preset) at stock settings. Record your scores and monitor your temperatures using a tool like HWMonitor. This baseline is crucial for measuring your gains.
Step 2: Enter the BIOS/UEFI
Restart your computer and press the designated key (usually Del, F2, or F12) to enter your motherboard's BIOS/UEFI. This is the command centre for your hardware. It might look intimidating, but we're only focusing on a few settings.
Essential Monitoring Tip 🔧
Use a free tool like HWMonitor or Core Temp to keep a constant eye on your CPU temperatures and voltages during stress tests. Anything consistently hitting 90-95°C under load is a red flag. This means you need to either improve your cooling or dial back your overclock settings to a safer level.
Step 3: Adjust the CPU Multiplier and Voltage
Navigate to the "Advanced," "Tweaker," or "OC" section. Start by increasing the CPU Core Ratio by a small increment (e.g., from 48 to 49). If you're using one of the latest processors from the Intel CPU range, you might be adjusting the P-core ratio specifically. For those on Team Red, most chips in the modern AMD CPU lineup offer similar flexibility through their Precision Boost Overdrive or manual settings.
After adjusting the multiplier, you may need to slightly increase the Vcore to maintain stability. Set the voltage control to "Manual" or "Override" and increase it in tiny steps, like from 1.25V to 1.26V. Small changes are key to this process.
Step 4: Stress Test and Monitor 🌡️
Save your changes and reboot into Windows. Now, run your stress test (Prime95) for at least 30 minutes while watching your temperatures like a hawk. If the system is stable and temps are under control (ideally below 85°C), you've found a potentially stable overclock. If it crashes or gets too hot, reboot back into the BIOS and either increase the voltage slightly or decrease the multiplier.
Step 5: Rinse and Repeat
This is the heart of the CPU overclocking guide: make a small change, test for stability, and repeat. Continue bumping up the multiplier one step at a time, testing after each change, until you find the point where the system becomes unstable or temperatures get too high. Once you hit that wall, dial it back to the last known stable setting. That's your sweet spot! Run a final, longer stress test (a few hours) and your benchmark to see your performance gains.
Is Overclocking Worth It for a Modern Gaming PC?
With modern CPUs featuring intelligent boost technologies that already push clock speeds high, is manual overclocking still necessary? For many, the answer is yes. While the gains might not be as dramatic as they once were, a good overclock can still provide a noticeable 5-15% performance boost in CPU-bound games and applications. It's a fantastic way to squeeze every drop of performance from the hardware you already own, giving you a competitive edge and a smoother gaming experience.
Ready to Push Your PC's Limits?
A successful overclock starts with the right foundation. Whether you're planning a new build or upgrading your current rig, having an unlocked processor is key to unlocking maximum performance. Explore our massive range of CPUs and find the perfect core for your gaming beast.


")