The first time you build a circuit, the last thing you want is a soldering iron and the permanence that comes with it. A breadboard lets you push components and jumper wires straight into a grid of holes, build a working circuit, and pull it apart again in minutes, all with no solder and no mess. It is the single most useful tool for learning electronics by doing.
Quick Answer
A breadboard is a solderless prototyping board that lets you build circuits by pushing component legs and wires into its holes, where spring-loaded metal clips grip them and make the electrical connections for you. It needs no soldering, is required for most Arduino projects, and lets you rebuild a circuit in minutes, which makes it the fastest hands-on way to learn electronics.
What Is Actually Inside
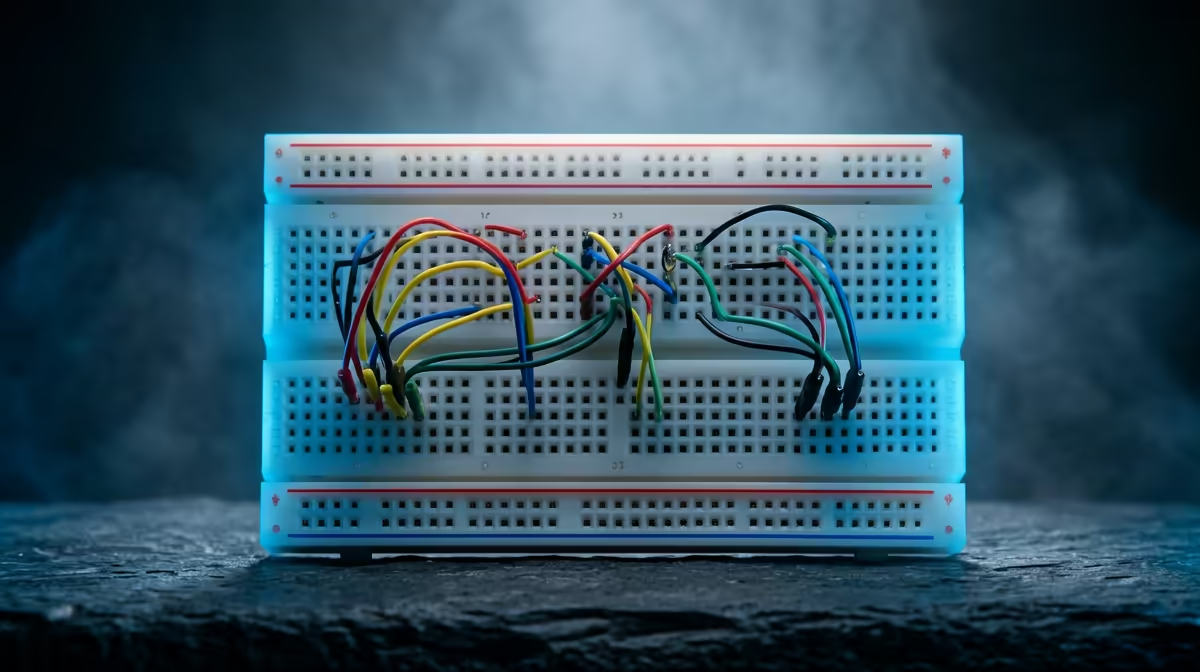
The holes are not just empty sockets. Beneath them sit strips of metal that connect certain holes together automatically. When you push a wire or a component leg in, a small spring clip inside grips the metal and completes a circuit, no solder required. Pull the part out and the connection is simply gone, which is exactly why mistakes cost nothing here.
That removability is the whole point. A wrong connection is fixed by lifting one wire, and a finished experiment can be torn down and turned into the next project in moments. For a beginner, that low cost of error removes the fear of getting it wrong. Many of the boards, controllers, and connected components that pair with this kind of prototyping live in the smart home and appliances range at Evetech.
How the Rows and Rails Connect
A breadboard has two kinds of connection, and knowing which is which is most of the skill. The inner section runs in short horizontal rows, typically connecting five holes together at a time on each side of a central gap. Any two component legs pushed into the same row, on the same side of that gap, are electrically joined. That is how you connect parts to each other.
Running down the long edges are the power rails, also called bus strips, marked with a plus for power and a minus for ground. These run the full length of the board vertically, so you can tap voltage or ground from anywhere along the side. The central gap down the middle is deliberate: it lets a chip straddle the divide so each row of its legs lands in a separate set of holes.
Wiring It to an Arduino
This is where most beginners start. You connect the 5V or 3.3V pin from the Arduino to the breadboard's power rail, and the ground pin to the ground rail. From there, every component you add can draw power and ground from those rails, while the short rows wire the parts to each other and back to the Arduino's signal pins. A simple first project, an LED with a resistor blinking on a pin, comes together in a couple of minutes. The jumper wires, resistors, and small components for these builds turn up in the accessories best sellers.
Frequently Asked Questions
Do I need to solder anything on a breadboard?
No. That is the entire appeal. Components and wires push into the holes and are held by internal spring clips, so connections are made and unmade by hand. Soldering is only needed later if you want to make a circuit permanent on a different board.
Why are some holes connected and others not?
The short inner rows connect five holes together across each side of the central gap, joining components plugged into the same row. The long side rails connect down the length of the board for power and ground. Holes in different rows or across the central gap are not joined.
What is the central gap in the middle for?
It separates the two halves of the board so an integrated circuit chip can sit across the divide, with each leg landing in its own row. Without the gap, the chip's pins would short against each other.
Is a breadboard good for permanent projects?
No. Its strength is temporary prototyping and learning. Once a circuit works and you want it to last, you move it to a soldered board such as a perfboard or a custom PCB. The breadboard is for designing and testing, not for keeps.