Staring at another loading screen while your mates are already dropping into the hot zone? We've all been there. That old, slow hard drive in your gaming laptop is costing you precious seconds… and victories. The good news? A gaming laptop SSD upgrade in South Africa is one of the most impactful and affordable performance boosts you can make. It's simpler than you think, and this guide will walk you through every step. Let's get your machine feeling brand new. 🚀
Why a Gaming Laptop SSD Upgrade is Worth It
Still running on a traditional Hard Disk Drive (HDD)? It's like trying to win a drag race with a tractor. HDDs use spinning platters and a physical read/write head, which is ancient technology by today's standards. A Solid-State Drive (SSD), on the other hand, uses flash memory—no moving parts, just pure, silent speed.
The difference is night and day:
- Warp-Speed Boot Times: Your laptop will go from off to fully operational in seconds.
- Instant Game Loading: Say goodbye to those painfully long loading screens in games like Cyberpunk 2077 or Starfield.
- Snappier System: Everything feels faster, from opening applications to transferring files.
Upgrading your gaming laptop's SSD isn't just a minor tweak; it's a fundamental improvement to your entire user experience.
Choosing the Right SSD for Your Laptop in South Africa
Before you splash the cash, let's make sure you get the right drive for your rig. Compatibility is key.
Check Your Laptop's Compatibility
Most modern gaming laptops have at least one M.2 slot, but older or more budget-oriented models might only have a 2.5-inch SATA bay. How can you be sure?
- Google Your Model: The quickest way is to search for
"[Your Laptop Model] SSD upgrade"or"[Your Laptop Model] specs". - Check the Manual: Your laptop's documentation will detail the storage slots available.
- Open It Up: If you're comfortable, a quick look inside will give you a definitive answer. (Just be sure to power it down completely first!)
NVMe vs. SATA SSDs
You'll mainly encounter two types: 2.5-inch SATA SSDs and M.2 NVMe SSDs.
- SATA SSDs: These use the older SATA interface and come in a 2.5-inch rectangular shape. They are significantly faster than HDDs and a great budget-friendly upgrade.
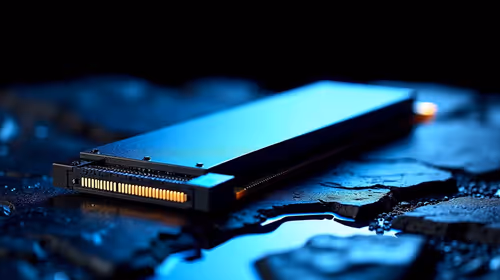
- NVMe SSDs: These look like a small stick of RAM and plug directly into an M.2 slot on the motherboard. They offer mind-blowing speeds, often 5-7 times faster than their SATA counterparts. For the ultimate gaming performance, this is the way to go. Check out our range of blazing-fast NVMe SSDs to see the difference.
How Much Storage Do You Need?
With game install sizes ballooning (we're looking at you, Call of Duty), 500GB is the absolute minimum we'd recommend. For most gamers, a 1TB or 2TB SSD is the sweet spot, giving you enough room for your operating system, key applications, and a healthy library of games. Browse Evetech's massive collection of solid-state drives to find the perfect capacity for your needs.
Your Step-by-Step Gaming Laptop SSD Upgrade Guide 🔧
Ready to get your hands dirty? It's easier than it sounds. Follow these steps for a successful installation.
Step 1: Gather Your Tools
You won't need a massive workshop. Just grab:
- Your new SSD.
- A set of small Phillips-head screwdrivers.
- A plastic pry tool (an old credit card can work in a pinch).
- An anti-static wrist strap (highly recommended to protect your components).
Step 2: Clone Your Existing Drive (The Easy Way)
Don't want to reinstall Windows and all your games from scratch? Cloning is your best friend. This process copies everything from your old drive to your new one, creating an exact replica.
To do this, you'll need to connect your new SSD to your laptop externally first. The easiest way is with an external SSD enclosure, which turns your new internal drive into a temporary USB drive.
Free Cloning Software
Most SSD manufacturers, like Crucial and Samsung, offer free cloning software (e.g., Acronis True Image, Samsung Data Migration). Macrium Reflect Free is another excellent third-party option. Just download, install, and follow the on-screen wizard to copy your old drive to the new one.
Step 3: The Physical Installation ✨
- Power Down & Unplug: Shut down your laptop completely and disconnect the power adapter.
- Open the Case: Flip the laptop over and remove the screws holding the bottom panel in place. Use your pry tool to carefully unclip the panel.
- Disconnect the Battery: This is a crucial safety step! Before you touch anything else, locate the battery connector and gently disconnect it from the motherboard.
- Locate and Swap the Drive: Find your old SSD/HDD. It will be held in by a screw or two. Remove them, carefully take out the old drive, and slot your new SSD in its place. Secure it with the same screws.
- Reassemble: Reconnect the battery, clip the bottom panel back on, and replace the screws.
Step 4: Boot Up and Verify
You're done! Power on your laptop. It should boot directly into your familiar Windows environment, but now… it will be incredibly fast. To confirm everything is running optimally, you can check your drive in Windows' Disk Management tool. Enjoy the speed!
Finding the Best SSD Deals
A top-tier gaming laptop SSD upgrade in South Africa doesn't have to cost a fortune. Prices have become incredibly competitive, making this one of the best value-for-money upgrades available. To get the most performance for your Rand, it's always a good idea to check out our best SSD deals for the latest promotions and price drops.
Ready for Warp Speed? Stop waiting and start playing. An SSD upgrade is the single best way to revitalise your gaming laptop and crush those loading times. Explore our full range of SSDs for performance that leaves lag in the dust.