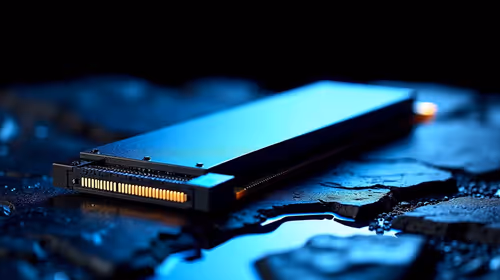
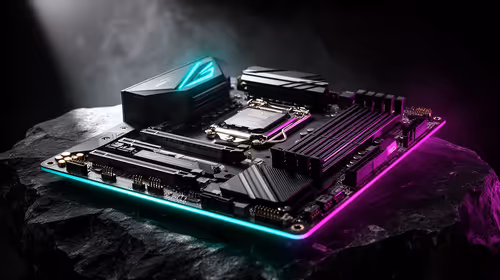
That high-end gaming PC humming on your desk? It's your portal to other worlds, but it's also a dust magnet. Over time, that build-up suffocates your components, causing higher temps, louder fans, and throttled performance. Learning how to clean a gaming PC isn't just a chore; it's essential maintenance to protect your investment and keep your frame rates silky smooth. Let's get that rig looking and running like new. ✨
Why Cleaning Your Gaming PC is Non-Negotiable
Dust, pet hair, and general gunk are the enemies of performance. When they clog your heatsinks and fans, your PC can't breathe. This forces your components—especially the CPU and GPU—to run hotter. The result? Thermal throttling, where your hardware automatically slows down to prevent damage. Suddenly, your smooth 144 FPS experience starts stuttering.
Properly cleaning your gaming PC prevents this, extending the lifespan of your components and ensuring you get the performance you paid for. This principle applies to every rig, from entry-level budget gaming PCs to the most powerful custom builds.
Your PC Cleaning Toolkit: What You'll Need 🔧
You don't need a specialised lab to perform a thorough PC cleaning. A few affordable tools will do the trick, proving you don’t always need to spend a fortune for great results—much like how you can find incredibly powerful gaming PCs under R20,000 that deliver amazing value.
Here’s your shopping list:
- Can of Compressed Air: The number one tool for blasting dust from tight spaces.
- Isopropyl Alcohol (90%+): Perfect for cleaning thermal paste or stubborn grime.
- Microfibre Cloths: For wiping down panels and surfaces without leaving lint behind.
- Soft Brushes: An old, clean paintbrush or anti-static brushes work wonders for dislodging stubborn dust.
- Cotton Swabs: Useful for getting into the nooks and crannies of fan blades.
- Optional: Anti-Static Wrist Strap: A good precaution to protect your components from static discharge.
The Step-by-Step Guide to Cleaning Your Gaming PC
Ready to get hands-on? Set aside about 30-60 minutes, put on some tunes, and follow these steps for a comprehensive PC clean.
Step 1: Prep and Power Down
Safety first! Before you open that case, completely shut down your computer. Switch off the power supply unit (PSU) at the back and unplug it from the wall. Disconnect all peripherals like your monitor, keyboard, and mouse. Move your PC to a well-ventilated area—you'll be kicking up some dust.
Step 2: Conquering Case Dust
Start with the exterior. Wipe down the outside panels with a microfibre cloth. Next, remove your side panels and take out all the removable dust filters (usually found at the front, top, and bottom). Give them a good clean with a brush or rinse them with water if the manufacturer says it's okay (make sure they are 100% dry before reinstalling).
Now, with the case open, use your compressed air to blow dust out, working from the top down. Direct the airflow out of the case, not deeper into it.
Pro Tip: Fan Safety ⚡
When using compressed air on your case fans or component fans, don't let them spin freely. The high-pressure air can make them spin faster than they are rated for, potentially damaging the fan bearings. Gently hold the fan blades in place with a finger while you spray.
Step 3: Tending to Your Components
This is where the real magic happens. Careful, focused cleaning of your core components will yield the biggest temperature improvements.
- GPU & CPU Coolers: These are the biggest dust traps. Use short, controlled bursts of compressed air to clear the fins of the heatsinks. For the powerful graphics cards and coolers found in most high-performance PCs over R20,000, keeping this cooling solution pristine is critical for maintaining boost clocks and quiet operation.
- Fans: After holding them steady and blowing them out, use a cotton swab lightly dampened with isopropyl alcohol to wipe down each blade. You'll be surprised how much grime comes off.
- Motherboard, RAM, and PSU: Give these a gentle dusting with compressed air from a safe distance. Avoid touching the circuitry directly. Make sure to blow out the dust from inside the PSU shroud if your case has one.
Step 4: Cable Management & Final Touches
Once everything is dust-free, take a moment to tidy up your cables. Good cable management isn't just for looks; it improves airflow. Re-route any stray cables and tie them down. Before closing up, give the bottom of the case a final wipe to collect any dust you've dislodged. Re-install your dust filters, put the side panels back on, and you're done!
How Often Should You Clean Your Gaming Rig?
The ideal PC cleaning schedule depends on your environment.
- Light Clean (Every 3-4 months): A quick clean of the dust filters and a blast of air through the case.
- Deep Clean (Every 6-12 months): The full, step-by-step process described above.
If you have pets or live in a dusty area, you might need to do this more often. Whether you've meticulously built your own machine or picked up one of our expertly assembled pre-built PC deals, regular cleaning is the key to longevity and peak performance. 🚀
Mastering how to clean a gaming PC properly is a skill that pays dividends. It keeps your hardware healthy, quiet, and running at its best. A well-maintained rig isn't just about aesthetics; it's about respecting the power you've invested in. This simple ritual ensures you're always getting top-tier performance, especially if you scored one of the best gaming PC deals in South Africa.
Ready For a Performance Upgrade? A clean PC runs faster, but nothing beats a fresh build. If your rig is showing its age even after a thorough clean, it might be time for an upgrade. Explore our massive range of custom-built PCs and find the perfect machine to dominate the leaderboards.