Got your hands on a shiny new 32GB KLEVV CRAS V DDR5 kit? Lekker! You're just a few simple steps away from unlocking smoother frame rates and beastly multitasking performance. This isn't some complex, hours-long mission; it's one of the quickest, most satisfying PC upgrades you can do. This guide will show you exactly how to install your 32GB KLEVV CRAS V DDR5 RAM and get you back in the game, faster. 🚀
Pre-Installation Checks & Safety First
Before you even touch a screwdriver, let's cover the basics. A successful installation starts with preparation.
First, compatibility is key. DDR5 memory is not backwards compatible with DDR4 slots. Ensure your motherboard and CPU support DDR5 RAM. If you're building from scratch or planning a major overhaul, starting with one of our up-to-date Intel barebone kits is a great way to guarantee compatibility from the get-go.
Next, safety!
- Power Down: Completely shut down your PC.
- Unplug Everything: Disconnect the main power cable from the back of your power supply.
- Ground Yourself: Static electricity is the enemy of PC components. Touch a metal part of your unplugged PC case to discharge any static buildup before you begin. For extra peace of mind, an anti-static wrist strap is a worthy investment.
A Step-by-Step Guide to Install 32GB KLEVV CRAS V DDR5
Alright, let's get to the main event. With your PC prepped, it's time to perform the upgrade. The process to install the 32GB KLEVV CRAS V DDR5 modules is straightforward.
Step 1: Open Your PC Case
Place your PC tower on a flat, stable surface. Remove the side panel—usually held on by two thumbscrews at the back—to get access to the motherboard.
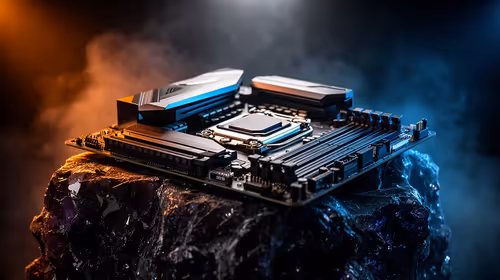
Step 2: Locate the RAM Slots
The RAM slots are long, thin channels located near the CPU socket. Most motherboards have four slots. To enable dual-channel mode for the best performance, you'll typically install your two RAM sticks in the second and fourth slots (often labelled A2 and B2). Always check your motherboard manual to be sure!
Step 3: Prepare the Slots & Align the RAM
Open the retaining clips at one or both ends of the RAM slots you'll be using. They should click outwards. Now, pick up a KLEVV CRAS V DDR5 module. Notice the small notch on the bottom row of gold contacts? This is crucial—it's designed to align with a bump in the RAM slot, making it impossible to install incorrectly.
Step 4: Seat the Memory Module
Align the notch on the RAM stick with the bump in the slot and press down firmly and evenly on both ends. You'll hear a satisfying click as the retaining clips snap back into place, securing the module. That's it! ✨
Repeat the process for the second stick in the correct corresponding slot.
Post-Installation: First Boot & Performance Optimisation
Once the modules are securely installed, put your side panel back on, plug everything in, and power up your PC. Don't panic if it takes a little longer to boot the first time; your system is recognising the new hardware.
Head straight into your system's BIOS/UEFI (usually by pressing DEL or F2 during startup). Here, you should see the system correctly reports 32GB of installed memory. The final step is to enable its full speed. Processors like those in high-performance AMD Ryzen 7 bundles thrive on fast memory, so you don't want to skip this.
Unlocking Full Speed ⚡
Your new DDR5 RAM will likely run at a default JEDEC speed, not its advertised speed. To fix this, find the setting called "XMP" (for Intel) or "EXPO" (for AMD) in your BIOS. Enable the profile to instantly overclock your RAM to its maximum rated performance. Save your settings and reboot.
Why This Upgrade Matters for SA Gamers
So, why go through the effort to install a 32GB KLEVV CRAS V DDR5 kit? It's about future-proofing and raw power. Modern games, streaming software, and even having a few dozen browser tabs open can eat up memory. With 32GB, you eliminate bottlenecks, ensuring smoother gameplay in titles like Warzone or Apex Legends and snappier performance across your entire system. It's a foundational upgrade for any serious rig, whether you're starting with AMD barebone kits or upgrading an existing machine.
This simple installation paves the way for a superior gaming and productivity experience. For those looking to build a new PC from the ground up, exploring pre-configured Intel and AMD based bundle packs can save you time and ensure all your parts work together perfectly from day one.
Ready to Unleash Your PC's Potential? 🚀 Installing new RAM is a gateway to incredible performance. If this upgrade has you hungry for more, explore our massive range of PC components and build the rig you've always dreamed of.