
Best AMD GPU Under R15000 in SA 2026
Top AMD GPU Under R15000 picks evaluated on performance, value & SA availability with current Rand pricing from Evetech.
Read more• Identify headers • Pick software • Wire ARGB correctly • Troubleshoot. Sync CPU cooler RGB with your motherboard fast—step-by-step setup, software tips, and fixes to match LED lighting. ✨🔧

You’ve just assembled your new gaming rig. The CPU is seated, the GPU is glowing, and everything boots up perfectly. But something’s... off. Your CPU cooler is pulsing a chaotic rainbow, completely out of step with your motherboard’s cool blue theme. It’s a classic PC builder problem. Don't stress! Learning how to sync your CPU cooler RGB with your motherboard is the final touch that transforms a good build into a stunning, unified masterpiece. 🎨
Before we dive into the "how," let's quickly cover the "why." RGB lighting isn't a one-size-fits-all standard. Control is handled through specific connectors and software. If your cooler and motherboard aren't speaking the same language, you get that disco-in-a-blender effect.
The key is to ensure both your motherboard and your cooler support the same RGB technology. When you're browsing the massive range of modern CPU coolers, you'll see two main types of RGB connectors mentioned. Understanding them is 90% of the battle.
Always check your motherboard's specifications before buying an RGB cooler. Look for "RGB_HEADER" (4-pin) or "ADD_HEADER" (3-pin) in the manual or on the board itself. Plugging a 3-pin ARGB cooler into a 4-pin 12V header can permanently damage the LEDs. Safety first!
Ready to get those lights harmonised? It's a two-part process: connecting the hardware and then configuring the software.
First, power down your PC completely and unplug it from the wall. Safety first!
The most common choice for PC builders is a reliable air cooler, and the process is straightforward.
With the hardware connected, it's time to take control. This part happens inside Windows. Each major motherboard manufacturer has its own RGB control software:
Download and install the correct utility for your motherboard brand. Once you launch the software, it should automatically detect all compatible, connected devices—including your CPU cooler. Many popular models that use 120mm fans are designed specifically for this kind of software integration.
From the software dashboard, you can select your cooler and apply any effect you want. Choose a static colour, a breathing effect, or a wild rainbow wave. The best part? You can apply that same effect to your motherboard, RAM, and GPU for perfect synchronisation. ✨
Trusted brands like Deepcool often include clear instructions and high-quality cables to make this process a breeze. Even budget-friendly options from brands such as EINAREX now offer brilliant ARGB lighting that syncs flawlessly.
And that's it! You've successfully managed to sync your CPU cooler RGB with your motherboard. Now sit back and enjoy the perfectly coordinated light show you built. 🚀
Ready to Create Your Perfect RGB Build? Getting the right compatible cooler is the first step to a beautiful, synchronised PC. A great cooler doesn't just look good; it keeps your CPU running cool under pressure. Explore our huge range of CPU coolers and find the perfect match for your motherboard and style.
Connect the cooler's ARGB cable to the correct header, install the motherboard RGB software (Aura, Mystic Light, RGB Fusion), then enable device sync.
Use a 3-pin 5V ARGB header for addressable RGB or a 4-pin 12V RGB header to match your cooler. Check the manual for header locations.
Yes—if your AIO exposes an ARGB connector and you attach it to a 5V header, ASUS Aura can detect and sync the AIO pump RGB.
Common causes: wrong header type, incompatible software, loose connector, or faulty cable. Follow troubleshooting steps to resolve the issue.
Only when your motherboard lacks enough ARGB headers or your cooler uses nonstandard connectors. A compatible controller bridges devices for sync.
Use your motherboard maker's app: ASUS Aura, MSI Mystic Light, Gigabyte RGB Fusion, or ASRock Polychrome for the cleanest sync experience.
No. RGB sync controls LEDs only and does not affect CPU or cooling performance when connected and configured correctly.
Top AMD GPU Under R15000 picks evaluated on performance, value & SA availability with current Rand pricing from Evetech.
Read more
Top RTX 4060 Ti Model Under R8,000 picks evaluated on performance, value & SA availability with current Rand pricing from Evetech.
Read more
Top PC Build Around the RTX 4080 Super picks evaluated on performance, value & SA availability with current Rand pricing from Evetech.
Read more
Top ASUS GPU Under R40000 picks evaluated on performance, value & SA availability with current Rand pricing from Evetech.
Read more
Top RTX 4080 Laptop Under R30,000 picks evaluated on performance, value & SA availability with current Rand pricing from Evetech.
Read more
Top RTX 4070 Super Model Under R12,000 picks evaluated on performance, value & SA availability with current Rand pricing from Evetech.
Read more
Snapdragon X2 NPU Explained: How 80 TOPS Changes. Plain-English explanation of what it means, why it matters & how it affects your buying decisions in SA.
HBM? High Bandwidth Memory Used in GPUs and AI. Plain-English explanation of what it means, why it matters & how it affects your buying decisions in SA.
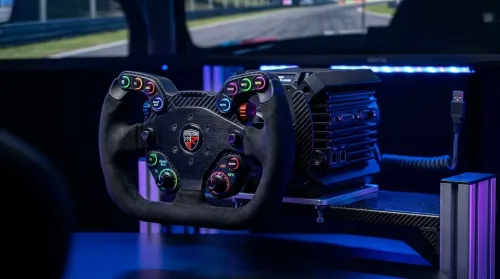
How much should you spend on sim racing accessories in South Africa for a realistic setup? We break down budgets by quality tiers, so you buy smart gear and avoid overspending 🎮💸
G-Sync and FreeSync? Variable Refresh Rate. Plain-English explanation of what it means, why it matters & how it affects your buying decisions in SA.

AMD Laptop: Value. SA-focused analysis with local pricing data, real-world insights & actionable buying advice.

How MacBook Neo Handles 30+ Chrome Tabs with Only. SA-focused analysis with local pricing data, real-world insights & actionable buying advice.

Why Apple Put 8GB RAM in MacBook Neo: The A18 Pro. SA-focused analysis with local pricing data, real-world insights & actionable buying advice.
Upgrade your work laptop with a New Motherboard. Step-by-step instructions with SA-specific tips, common pitfalls to avoid & expert recommendations.
Maintain wired headset — Checklist: • inspect cables • clean earpads • store properly 🔧🎧 Practical steps to preserve sound quality and avoid premature replacements.

Fix crackling headset fast: step-by-step checks for cables, connectors, drivers, and settings to remove static or distorted audio on wired headsets 🎧⚙️

Stereo vs mono headsets: learn which delivers clearer calls, better spatial music, or simpler mono voice performance — pick the right headset for meetings, music, or gaming 🎧💬
- Compare gaming headset vs studio headphones; - Assess comfort, mic and sound; - Recommend best daily picks. Gaming headset vs studio headphones: learn which suits work, music and casual gaming. 🎧⚖️