A processor has few visible parts and a single damaged pin or pad can stop the whole build. Checking a used CPU means inspecting contacts, substrate, markings and a verified stress test before accepting the seller's history.
Quick Answer
Inspect a used processor under bright side lighting before it goes near a motherboard. Check every exposed pin or contact pad, the substrate edges, heat spreader, tiny surface components and model markings. Then watch it boot in a compatible system, return firmware settings to supported defaults and run a repeatable stability test. A ten-second desktop demo cannot reveal damaged memory channels, poor contact or instability under load.
Use the AMD processor range to identify the exact socket and retail model you are comparing. Intel buyers can do the same in the current Intel CPU catalogue. Match the full model suffix, included cooler where applicable and platform cost before deciding what the used part is worth to you.
Start with the right socket design
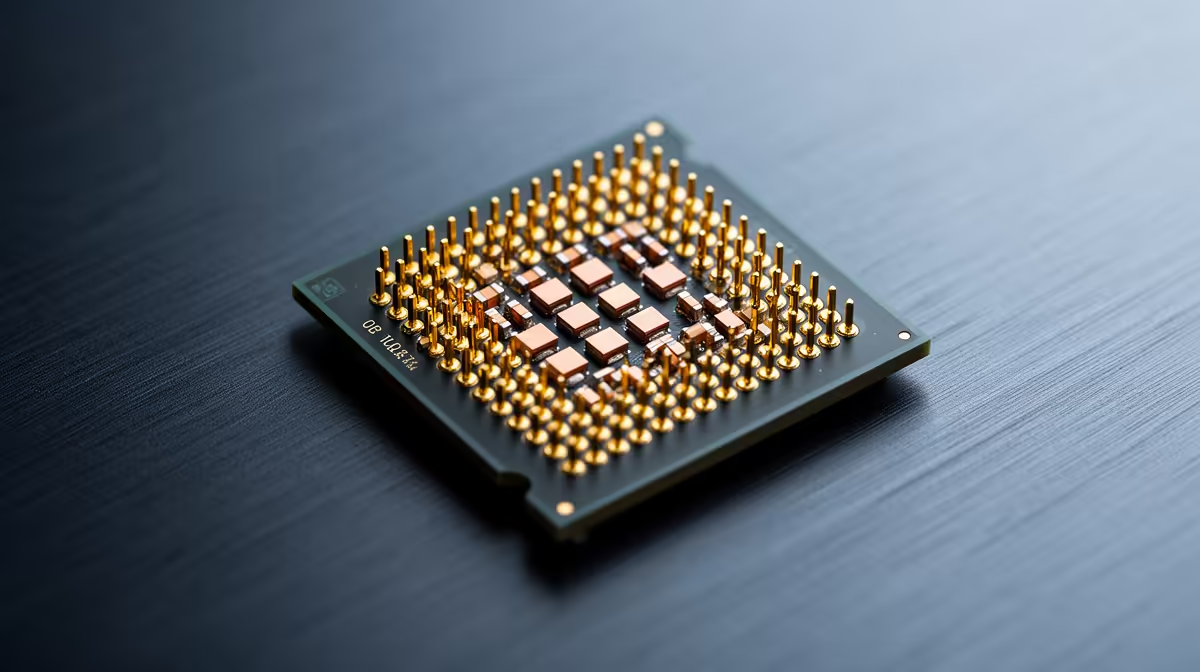
Some processors carry pins on the CPU package, while others present flat contact pads and rely on pins in the motherboard socket. Do not apply a generic "check the pins" rule until you know the platform.
Find the maker's product specification and a clear reference image for the exact package. Note the orientation marker and areas where missing-looking positions are part of the design. Compare like with like; a different generation can use a similar shape with a different contact layout.
Ask the seller to leave the CPU out of its socket for inspection. If it is already installed, watch it being removed after the system is shut down, disconnected and allowed to cool. Twisting a processor out with a cooler can damage a pin-grid package if dried thermal paste holds the two together.
Inspect pins from several angles
Set the processor on safe, clean packaging and avoid touching contacts. Shine a bright light across each row rather than straight down. Straight rows create a regular pattern; a bent pin breaks that line or catches the light at another angle.
Look from all four sides. Check for flattened tips, twists, different height, corrosion and thermal paste between rows. One pin leaning into another can short contacts when the retention force is applied.
Do not straighten a pin as a casual test. Even when it moves back, metal fatigue or a crack at the base can remain. A broken pin can be difficult to repair and may serve a specific memory, power or data function. Treat visible pin damage as a specialist-repair decision, not a discount you can price from a photo.
Read the contact pads
On a pad-style package, light wiping marks can appear from normal socket contact. Deep scratches, missing plating, discolouration, burnt spots, contamination or a gouge across several pads deserve concern. Check the small capacitors and other components on the underside for chips, solder work or missing pieces.
Thermal paste on the edges tells you the processor has been handled, which is expected for a used part. Paste under the package, across contacts or around surface components suggests careless cleaning. Do not use metal tools or flood the package with cleaner. Ask what happened and have uncertain contamination assessed before installation.
The top heat spreader should carry clear model markings. Compare them with the system report and invoice. Look for deep clamp marks, an uneven surface, sanding, lapping or adhesive residue. Cosmetic marks do not prove failure, but they help you understand how the part was used.
Inspect the motherboard socket too
A processor can look perfect while the demonstration motherboard has bent socket contacts. Ask to see the empty socket under good light before installation. Do not touch its pins. A damaged socket can produce no-boot symptoms or missing memory channels that get blamed on the CPU.
Confirm chipset and firmware support for the exact processor. A compatible physical socket does not guarantee that the board firmware recognises the model. Ask which firmware version is installed and whether updating it changes support for older CPUs.
Use a known-good cooler with the correct mounting pressure and fresh thermal compound. An uneven mount can cause heat or contact problems that confuse the test.
Make the live test meaningful
Enter firmware first and load supported defaults. Disable overclocking, undervolting and experimental settings. Confirm the exact CPU model, core count, reported memory capacity and temperatures. If the seller will not return the system to defaults, you cannot separate the processor from the tuning.
Boot a trusted operating environment and run a CPU workload long enough for temperatures and clocks to settle. Follow with a memory test across the installed channels. A processor can pass a short single-core load while showing faults when all cores or memory controllers work.
Compare clock behaviour and temperature with the cooler, motherboard limits and room conditions. Do not demand one universal temperature. Look for throttling, crashes, corrected hardware errors, sudden restarts or a core that behaves differently.
Repeat a cold boot after shutting down. Test sleep and wake if the platform will be used that way. Check that all expected memory channels and PCIe devices remain available. Record screenshots of the model identification and completed tests with the seller's permission.
Ask about its history
Find out which motherboard, cooler, voltage settings and workloads were used. Long rendering or gaming use does not prove damage by itself. Unsupported voltage, chronic overheating, physical modification and an unexplained repair attempt matter more.
Ask whether the CPU was delidded, lapped, used with liquid metal or repaired. Those changes can alter warranty and handling risk. Inspect around the heat spreader for tool marks or seal disturbance without trying to open it.
Request the original invoice, box and serial or batch markings. Check whether any remaining warranty transfers to you and which party must log a claim. Do not treat a seller's screenshot of another processor as proof; match every document to the item in your hand.
Use a written handover
Record the exact model, visible condition, tests completed, accessories, known modifications and agreed remedy if it fails the same test shortly after purchase. Include the processor markings and both parties' details through a safe process.
Do not pay before the inspection and supported-default test. If you cannot test because the seller has no compatible board, value the CPU as unverified or choose another route. A bargain that requires risking a motherboard and memory kit can erase its saving quickly.
When transporting the processor, use its proper plastic clamshell or anti-static package. Never place a pin-grid CPU loose in a bag, foam block or pocket. Protect pad-style packages from abrasion and keep fingers off the contacts.
FAQ
Can I straighten a bent CPU pin at home?
It is possible to move some pins, but fracture and alignment risks remain. Treat it as specialist work and price the processor as damaged until it passes a full test.
Do scratches on contact pads mean the CPU is dead?
Normal socket contact can leave light marks. Deep damage, missing plating, contamination or burnt areas need closer assessment and testing.
Does a working desktop prove the processor is sound?
No. Check supported defaults, all cores, memory channels, sustained load, temperatures and repeated boot behaviour.
Inspect every contact under side lighting, test the exact CPU at supported defaults, and walk away from damage or history the seller cannot explain.