Plenty of monitors that are perfectly good in every other respect ship with a smooth, hole-free back, and the moment you buy a monitor arm you discover there is nowhere to bolt it. A VESA adapter fixes exactly that. It clamps onto a screen that lacks the standard mounting holes and hands you the 75x75mm or 100x100mm pattern every arm and wall bracket expects, so you keep the display you already own instead of replacing a working screen just to mount it.
Quick Answer
A VESA adapter is a steel bracket that grips a non-VESA monitor by its frame and adds 75x75mm or 100x100mm mounting holes. It typically fits screens from 13 to 30 inches, holds up to roughly 8kg, and lets you mount almost any flat panel on a standard arm. Curved monitors are the main exception, since the clamp needs a flat back to sit against.
What a VESA adapter actually does
VESA is the industry standard for monitor mounting holes, a square pattern of threaded points, usually 75mm or 100mm apart, that arms and brackets bolt into. Cheaper or older monitors often skip it entirely to save cost, leaving you with a screen that only works on its bundled stand.
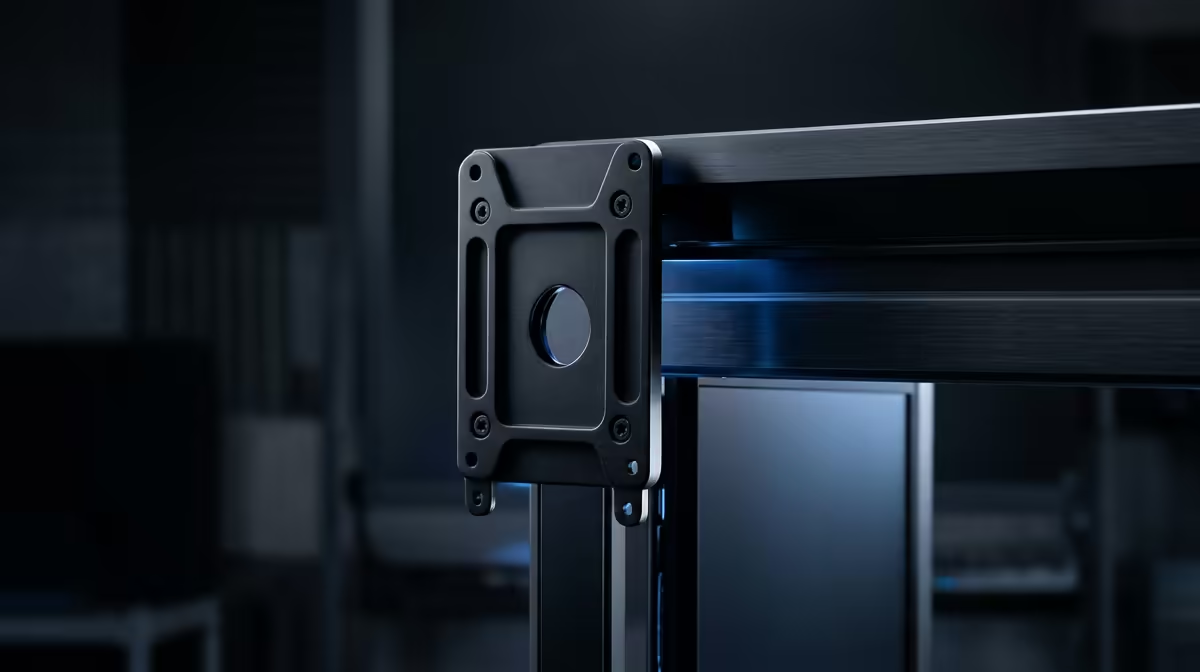
The adapter bridges that gap mechanically. Instead of threading into holes the monitor does not have, it captures the screen by its edges, top and bottom, or all four sides, and presents a flat plate with the VESA holes pre-drilled. Your arm bolts to the adapter, the adapter holds the screen, and the load transfers safely through the frame.
If your goal is a cleaner desk for long sessions, pairing the adapter with the right arm and desk matters, and Evetech's purpose-built work surfaces are worth browsing once your screen is up off the desk and your workspace layout changes.
How the adapter clamps on
Most adapters use a bracket-and-clamp design. Two horizontal arms slide to match your screen's height, then tension screws or spring-loaded clamps grip the top and bottom bezels. A central plate carries the VESA holes. Better kits use powder-coated steel arms with reinforced plastic clamps and include every screw and spacer you need, so assembly is a screwdriver job rather than a hardware run.
Measuring before you buy
Three numbers decide whether an adapter fits. Screen size, since most kits cover roughly 13 to 30 inches. Bezel height, because the arms must extend far enough to grip top and bottom, commonly across an 11 to 19 inch range. And panel thickness, since the clamps are rated for a window of roughly 25mm to 70mm. Measure all three against the adapter spec sheet before ordering, rather than assuming a generic kit will fit.
Weight, compatibility, and the curved-screen catch
Weight is the limit people overlook. A typical non-VESA adapter is rated to around 8kg, which covers most flat panels up to about 27 inches, but a heavy 32-inch screen can exceed it. Check your monitor's weight against both the adapter's rating and your arm's rating, since the lower of the two governs the system.
The hard limitation is curvature. These clamps are designed for flat backs, so curved monitors generally will not seat securely and are not supported. If you run a curved ultrawide, you need a screen with native VESA holes or a mount made specifically for that model, not a clamp adapter.
Cable management once the adapter is fitted
Mounting a monitor through an adapter shifts where the cables sit, and if you do not plan for this the back of your desk becomes a mess of cables pulling against the screen. Most monitor arms include a channel or clip rail for routing cables along the arm itself. Thread your display port or HDMI cable and USB hub leads through that route before you tighten everything fully, since adding cables after is far more awkward.
Also check that the adapter clamp does not block any ports on the rear of the monitor. Some cheaper adapters use a wide back plate that sits directly over the USB-A or audio jacks many users treat as a hub. Confirm the ports you actually use stay accessible before committing to a specific kit.
Monitor ventilation is the second thing to verify. Many flat panels have exhaust slots along the top or back edge that the clamp arms should not cover. Heat trapped behind the panel shortens its useful life, so position the clamp arms outside the vent zones and confirm nothing is blocked once the adapter is seated.
On a practical note, if your monitor has a glossy back panel with no grip points, placing a thin rubber pad between the adapter clamp and the panel face prevents the metal bracket from scratching the housing over time. Most quality adapter kits include foam or rubber padding on the contact points, but if yours does not, a strip of self-adhesive foam weather seal from a hardware store does the same job for a few rand.
Mounting it on an arm or wall
With the adapter fitted, the rest is straightforward. Bolt the arm's mounting plate to the adapter's VESA holes using the M4 screws for a 75mm pattern or M4 to M6 for 100mm, depending on the arm. Tighten evenly so the plate sits flush, then attach the assembly to the arm and balance the gas spring or tension to hold the screen at your chosen height. The same procedure works for a wall bracket. Once mounted, the desk space the old stand occupied is yours again, which is the whole reason most people go down this road.
For the arm and the surrounding desk setup, Evetech's highest-selling desk add-ons complete an ergonomic workstation once the screen is floating and your sightline has lifted.
Frequently Asked Questions
Will a VESA adapter fit any monitor?
Almost any flat monitor between roughly 13 and 30 inches, provided the bezel height and panel thickness fall within the adapter's range. Curved monitors are the main exception, since the clamp needs a flat back to grip.
How much weight can a VESA adapter hold?
Most clamp-style adapters are rated to around 8kg. Always check both the adapter rating and your arm's rating, because the system can only safely carry the lower of the two figures.
What is the difference between 75x75 and 100x100 VESA?
They are two standard hole spacings, 75mm and 100mm square. Smaller and lighter screens often use 75x75, larger ones 100x100. Most adapters and arms support both patterns, so you simply use the holes that match your arm.
Do I need any special tools to fit one?
No. A standard screwdriver and the included screws are usually all you need. The bigger task is measuring your screen's dimensions accurately before buying so the clamp arms reach and the thickness fits.
Can I wall-mount a non-VESA monitor with an adapter?
Yes. Once the adapter adds the VESA holes, the screen can attach to a wall bracket exactly as a native VESA monitor would, as long as the bracket's weight rating covers your screen.
A VESA adapter saves you from binning a working monitor just to free up desk space, so measure your screen, match the clamp range, and mount with confidence. While you are rebuilding the workspace, browse Evetech's purpose-built work surfaces at https://www.evetech.co.za/PC-Components/gaming-desk-331 to suit the new sightline once your display is floating on an arm.