SSD vs HDD – Which is Better?
Discover the perfect storage solution - Explore the benefits of SSD vs HDD and find out which powers your laptop best. 💾🚀
101 days ago·4 min read
Loading tags...
Install M.2 2280 NVMe SSD quickly and safely on desktops or laptops. Follow a clear tools checklist, BIOS boot setup, mounting tips, and fast troubleshooting 🔧💻

Tired of watching loading bars crawl across your screen while your mates are already dropping into the action? That agonizing wait is often the fault of an old, slow hard drive. The solution is here, and it's simpler than you think. Learning how to install an M.2 2280 NVMe SSD is one of the most impactful upgrades you can make, slashing load times and making your entire system feel snappier. This guide will walk you through it, step-by-step. 🚀


Before you even think about opening your case, let's get a few things sorted to ensure your upgrade goes smoothly. A little prep work saves a lot of headaches later.
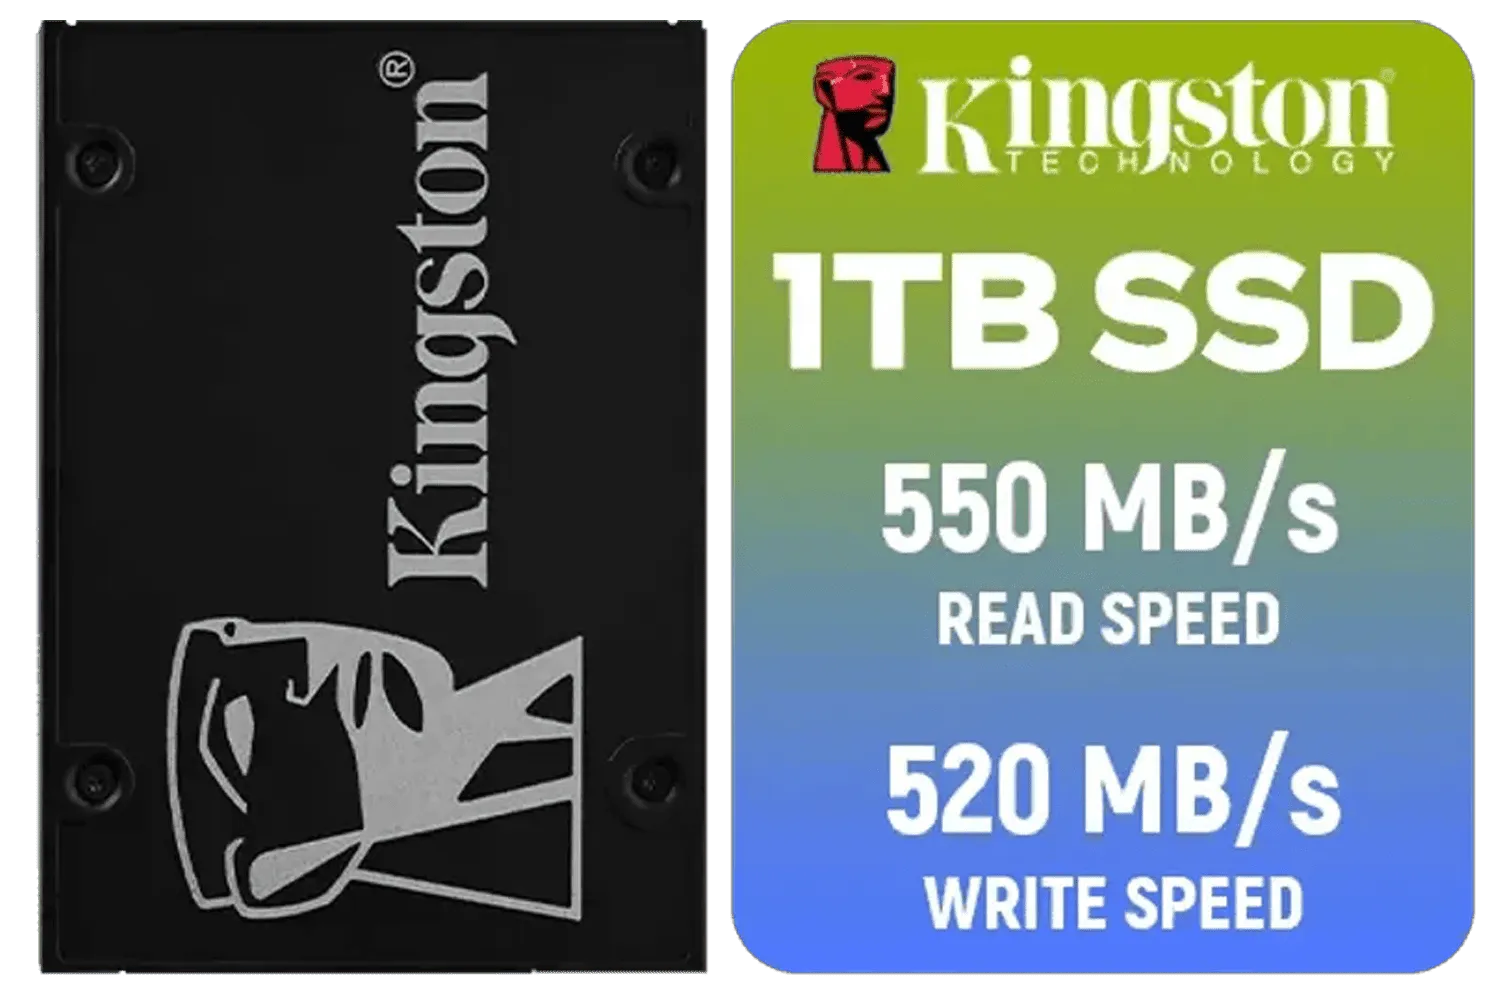
First, check your motherboard or laptop specs. Does it have a free M.2 slot? Most modern boards do, but it's crucial to confirm. You'll be looking for an "M-Key" slot to support the incredible speeds of NVMe SSDs. This is a massive leap from the performance of older 2.5-inch SATA SSDs, so you want to make sure you can take full advantage of the technology.
You don't need a full workshop for this job. All it usually takes is:


This is non-negotiable. Whether you plan to clone your existing drive or start with a fresh Windows installation, back up your important files to an external drive or cloud service. You can never be too safe!
Installing an M.2 drive in a desktop is incredibly straightforward. It's a small board that plugs directly into the motherboard, no messy cables required!
The M.2 screw is famously tiny and easy to lose. Some motherboards come with it pre-installed in the standoff, while others have it in a small bag. If you drop it, use a magnetic screwdriver or a bit of Prestik on the end of your normal one to retrieve it. It's a real lifesaver!


The process for a laptop is similar, but requires a bit more care due to the compact space.
You've physically installed the drive, but the job isn't quite done. Your PC needs to recognise it.
First, boot up your computer and enter the BIOS/UEFI (usually by pressing DEL, F2, or F12 on startup). Check your storage or boot devices list to confirm the new drive is detected. ✨
Once in Windows, the drive won't appear in "My Computer" just yet. You need to initialise it.

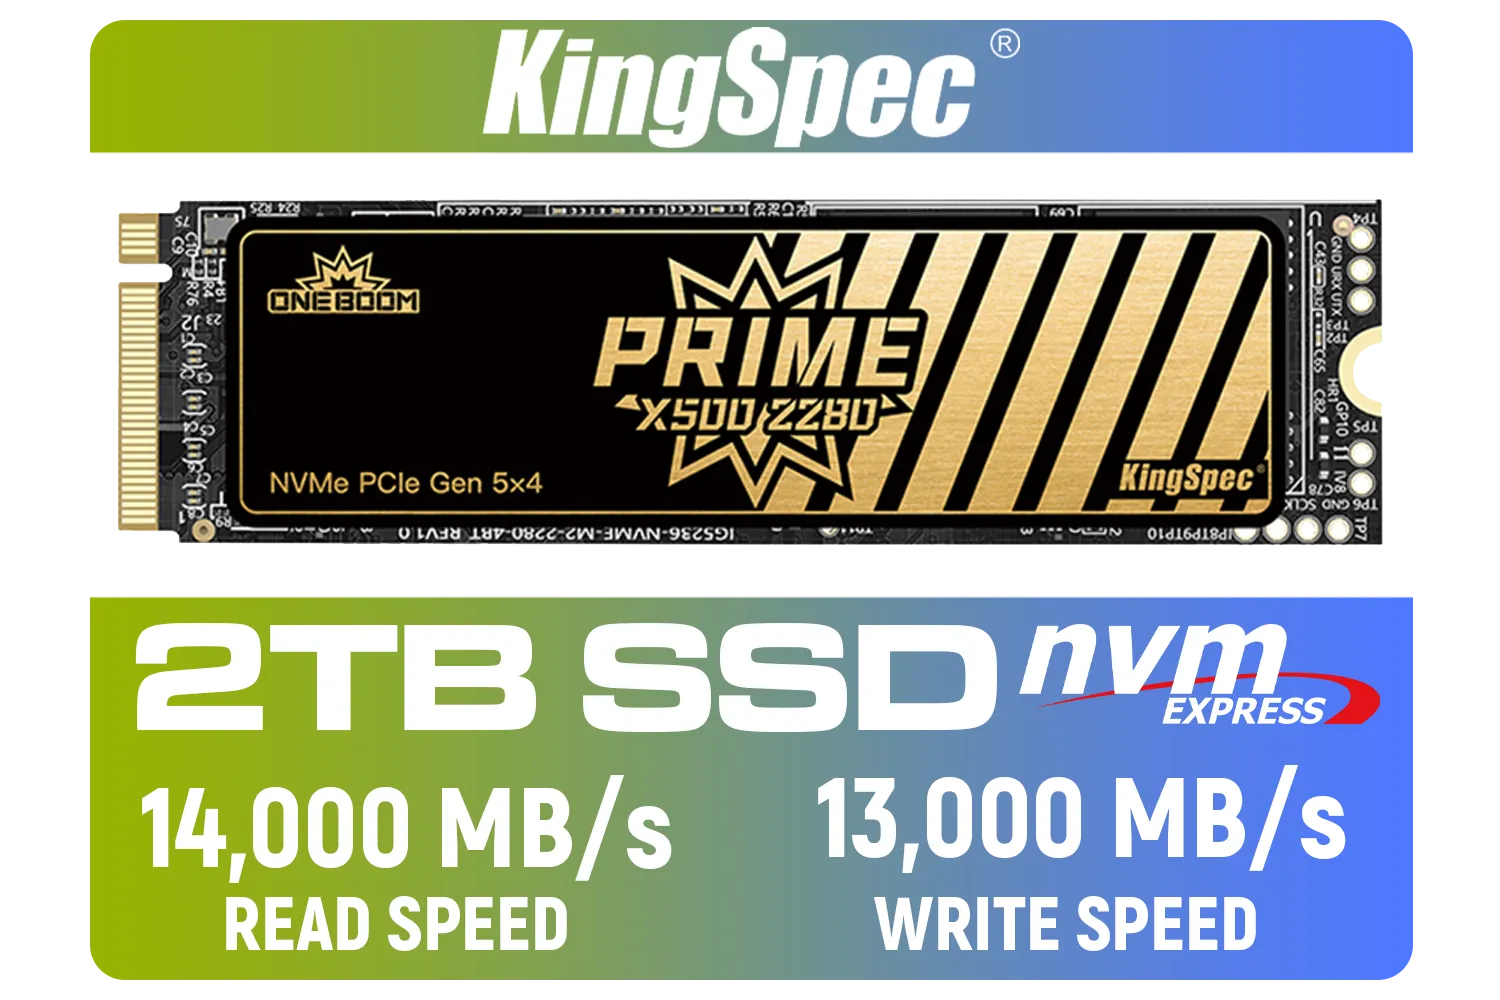
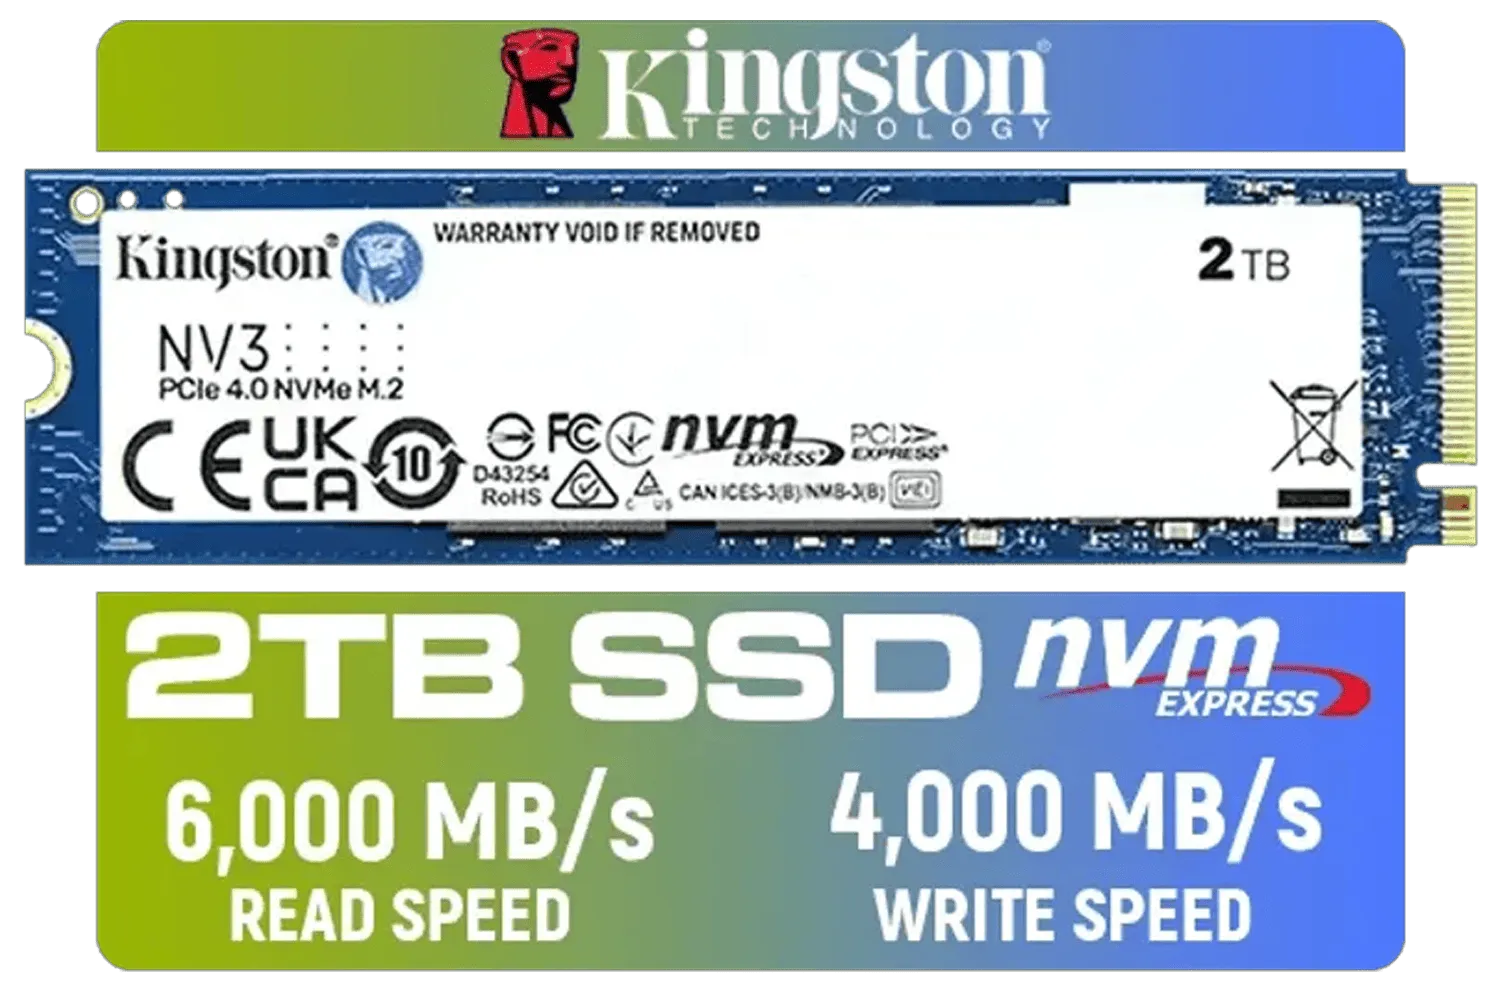

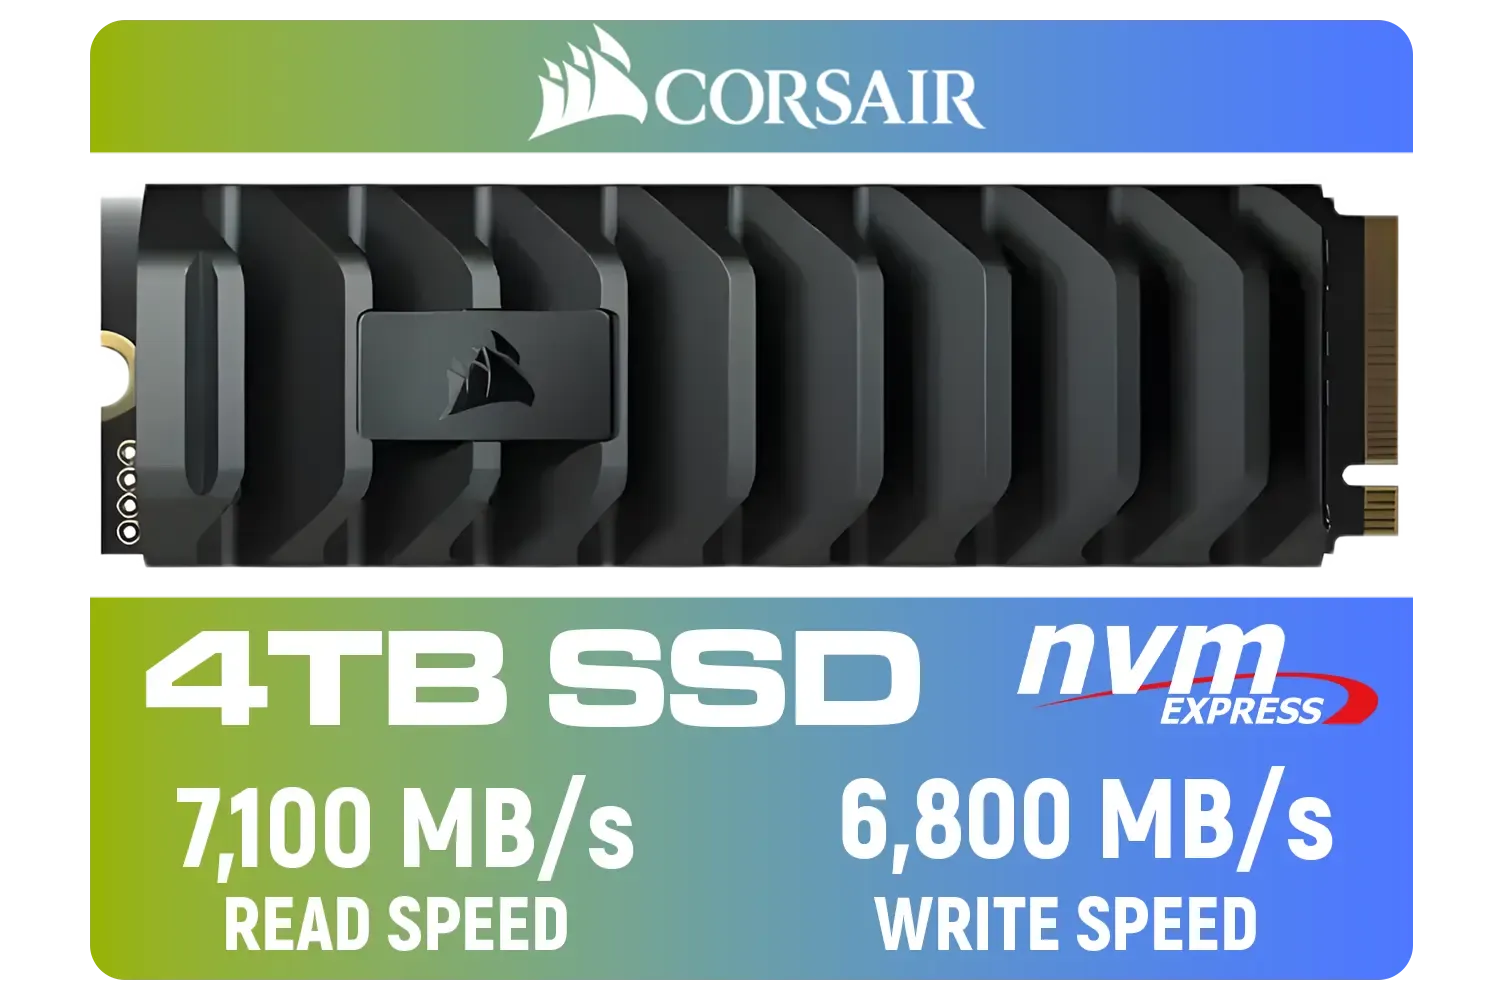
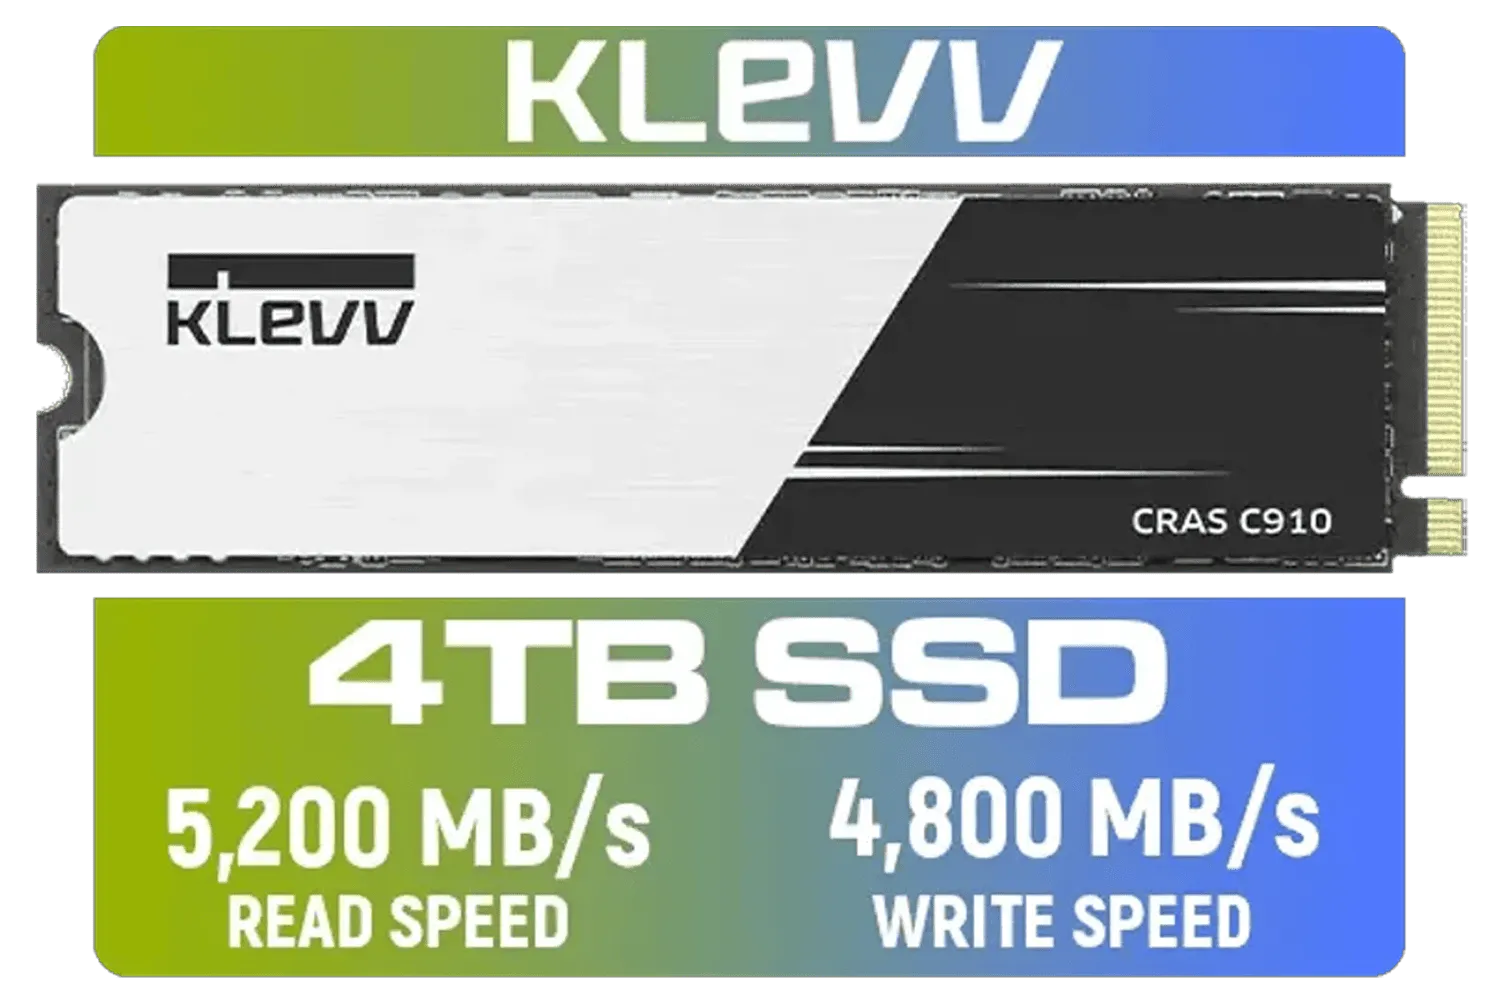
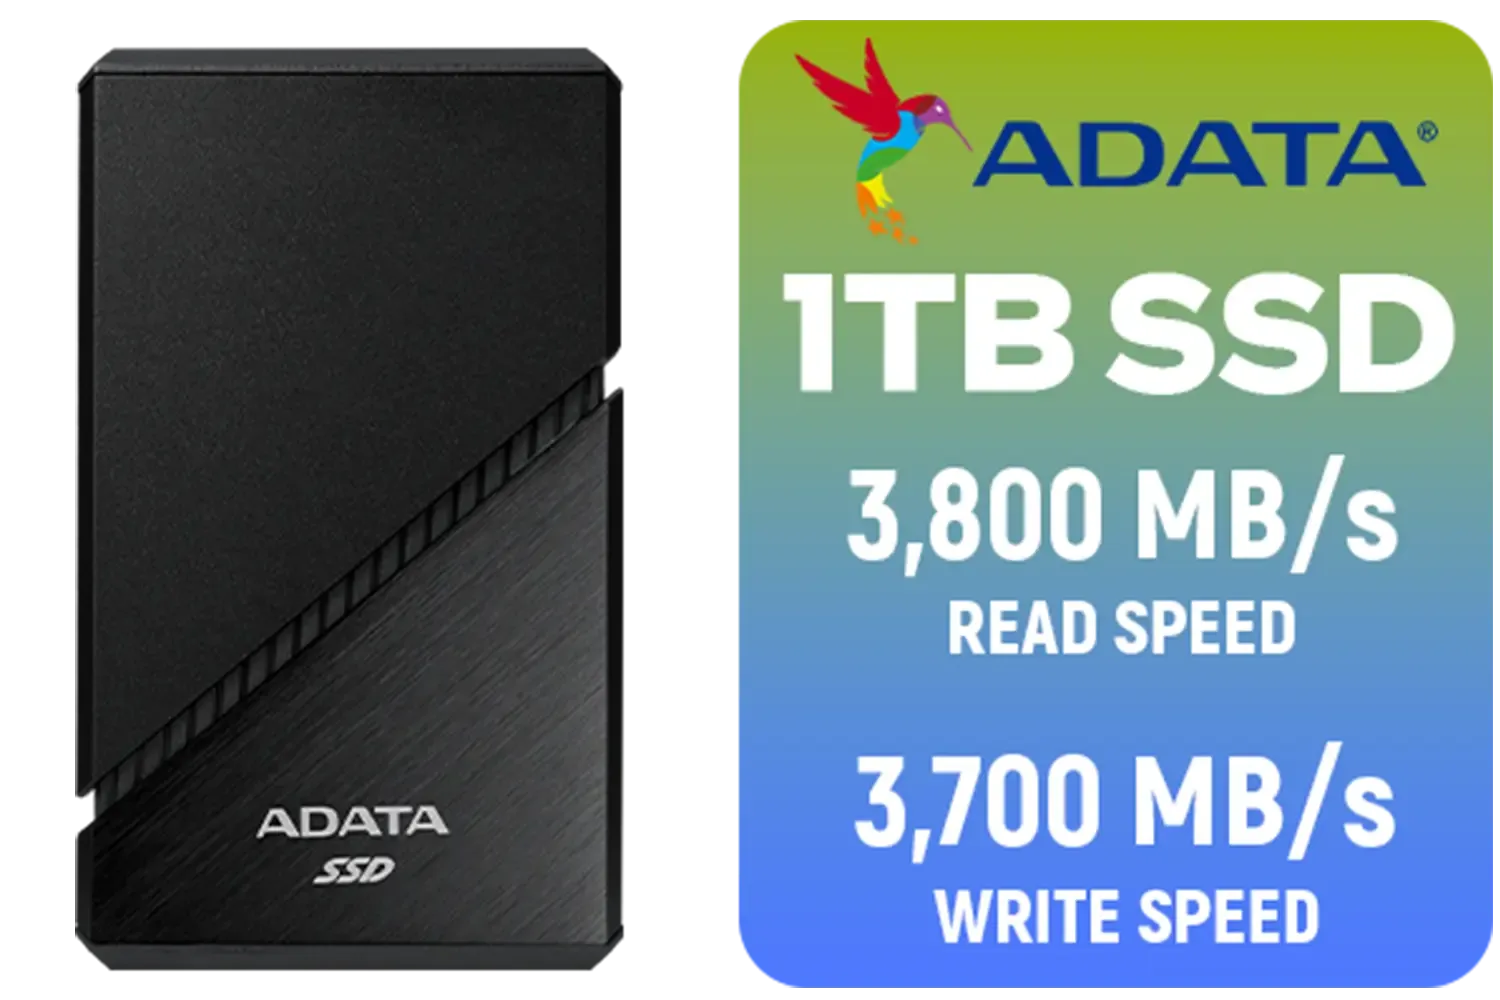
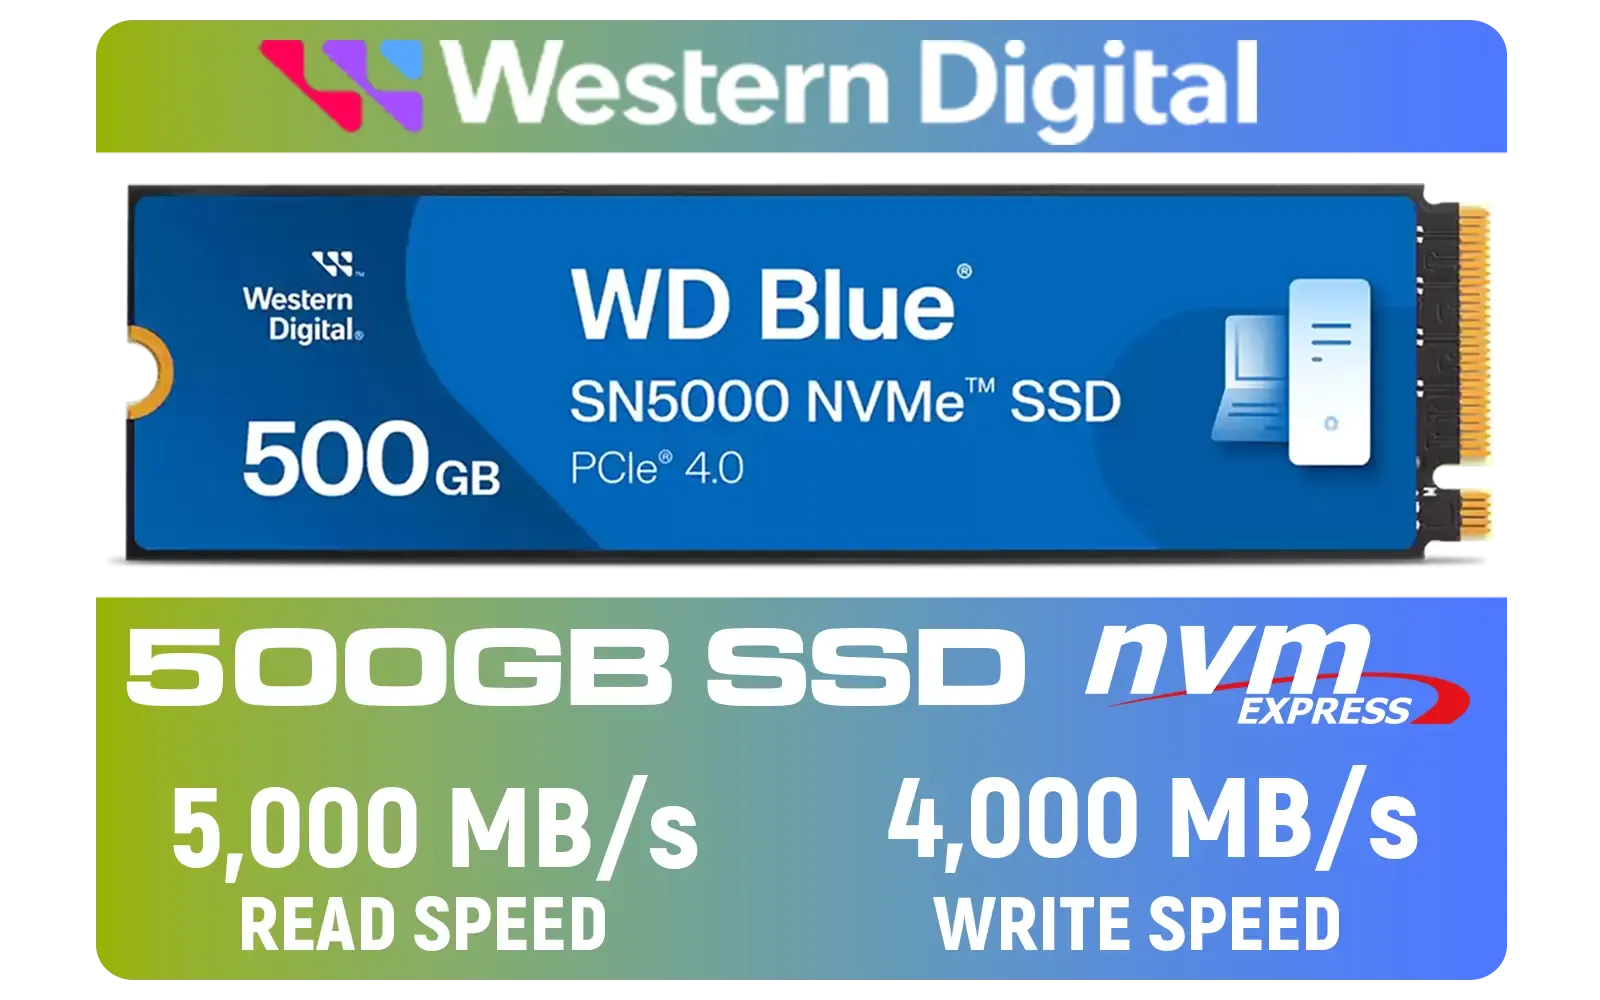
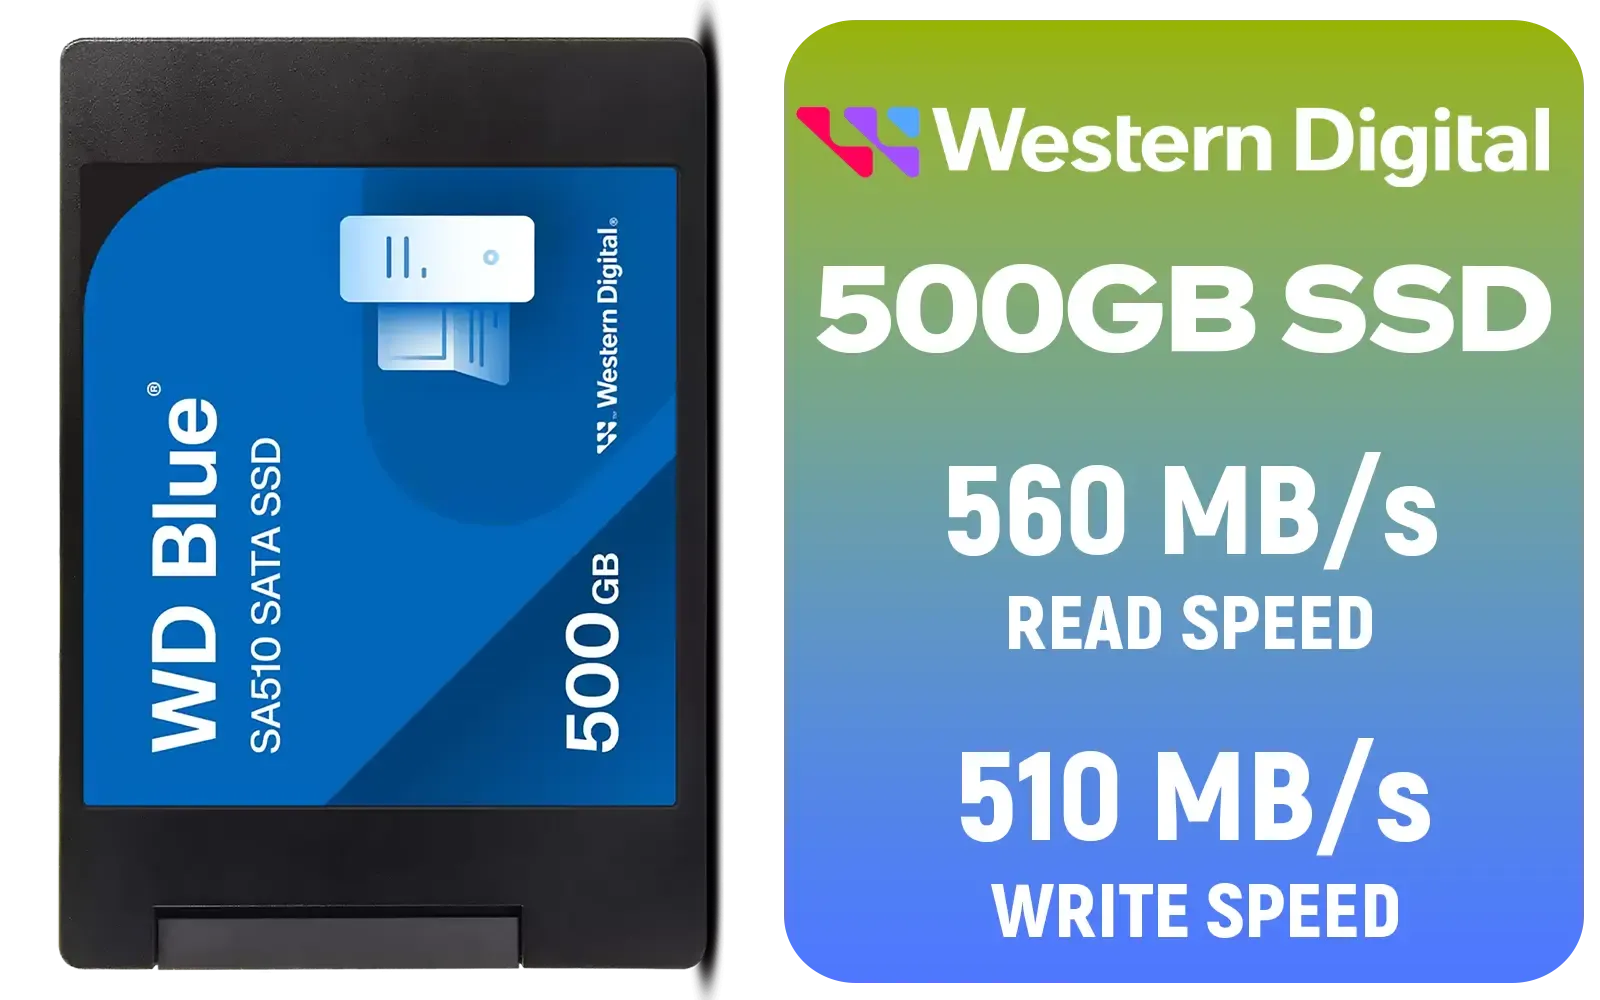
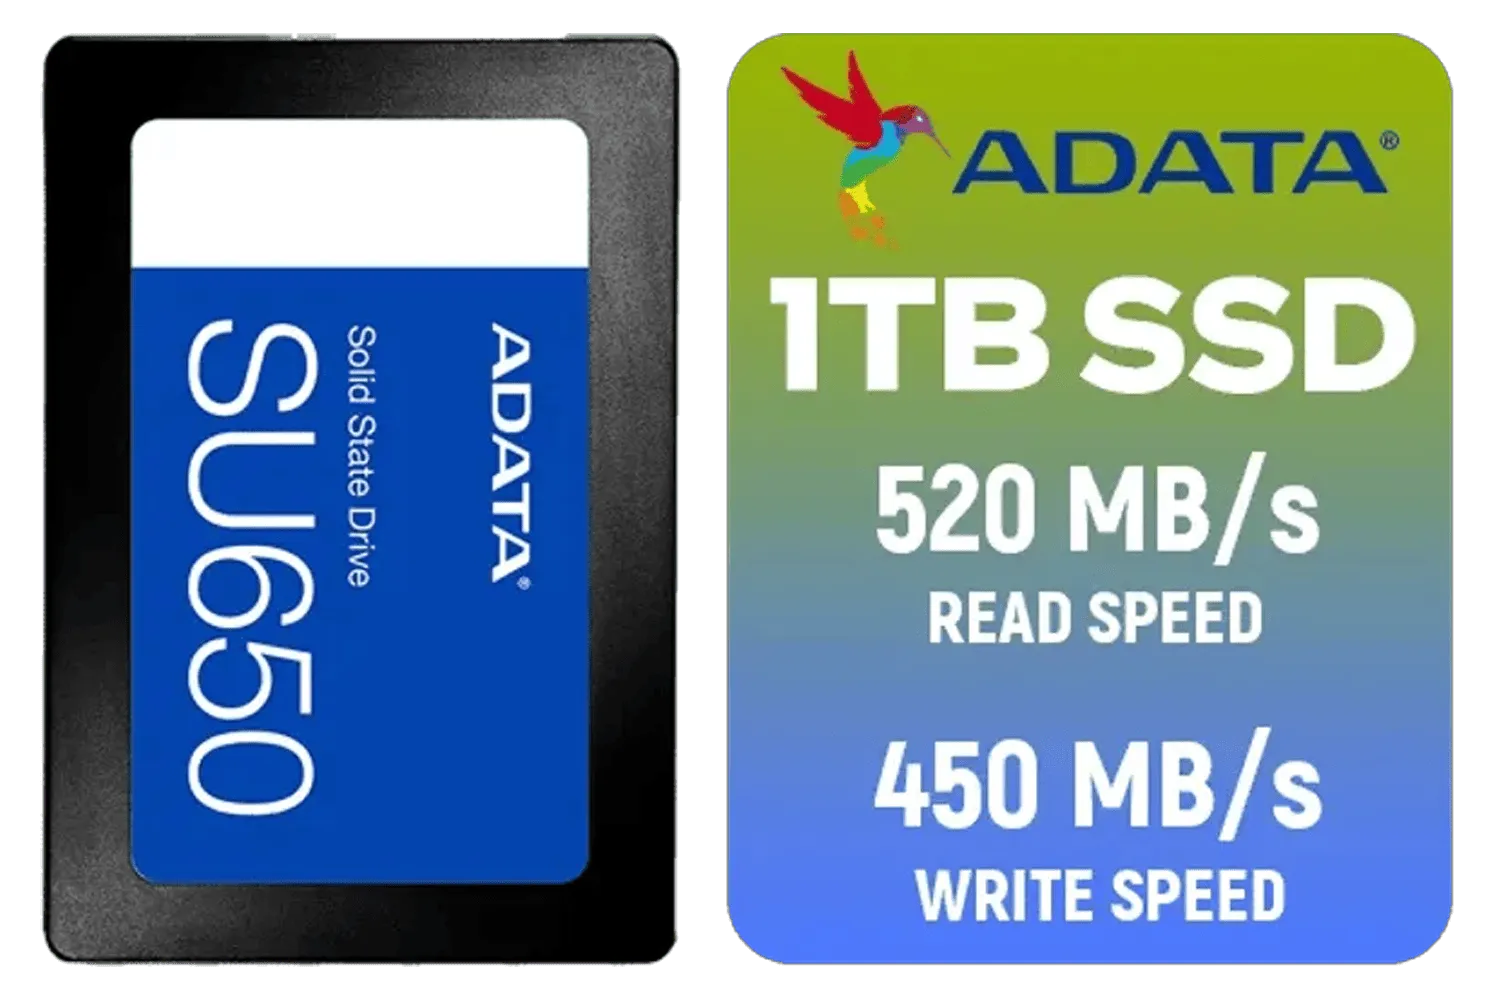
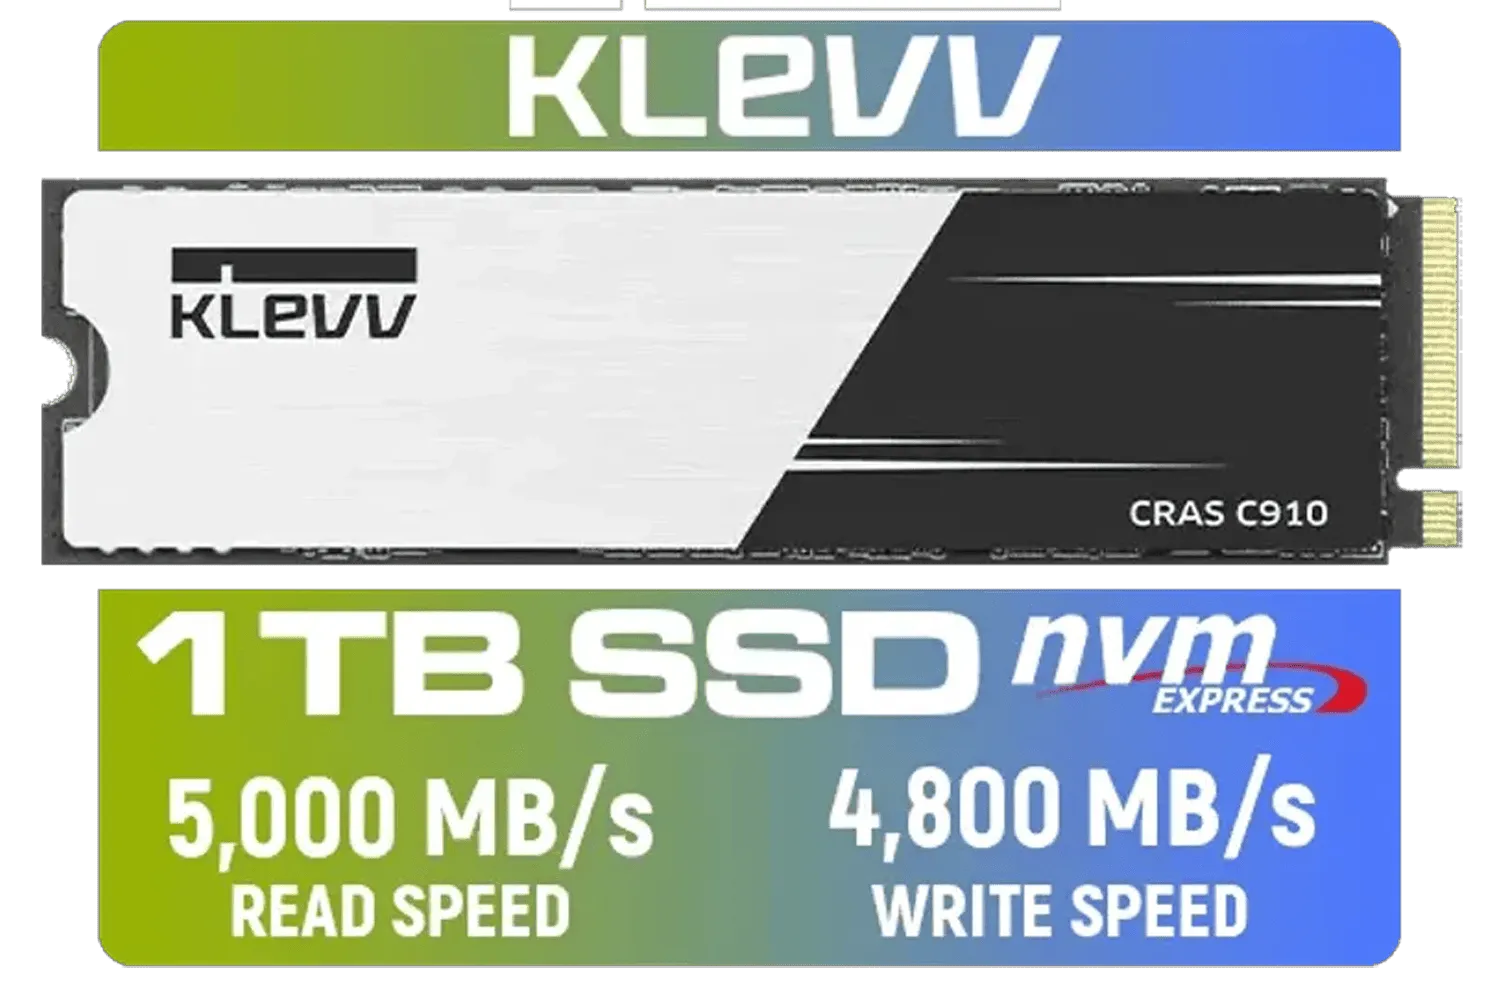
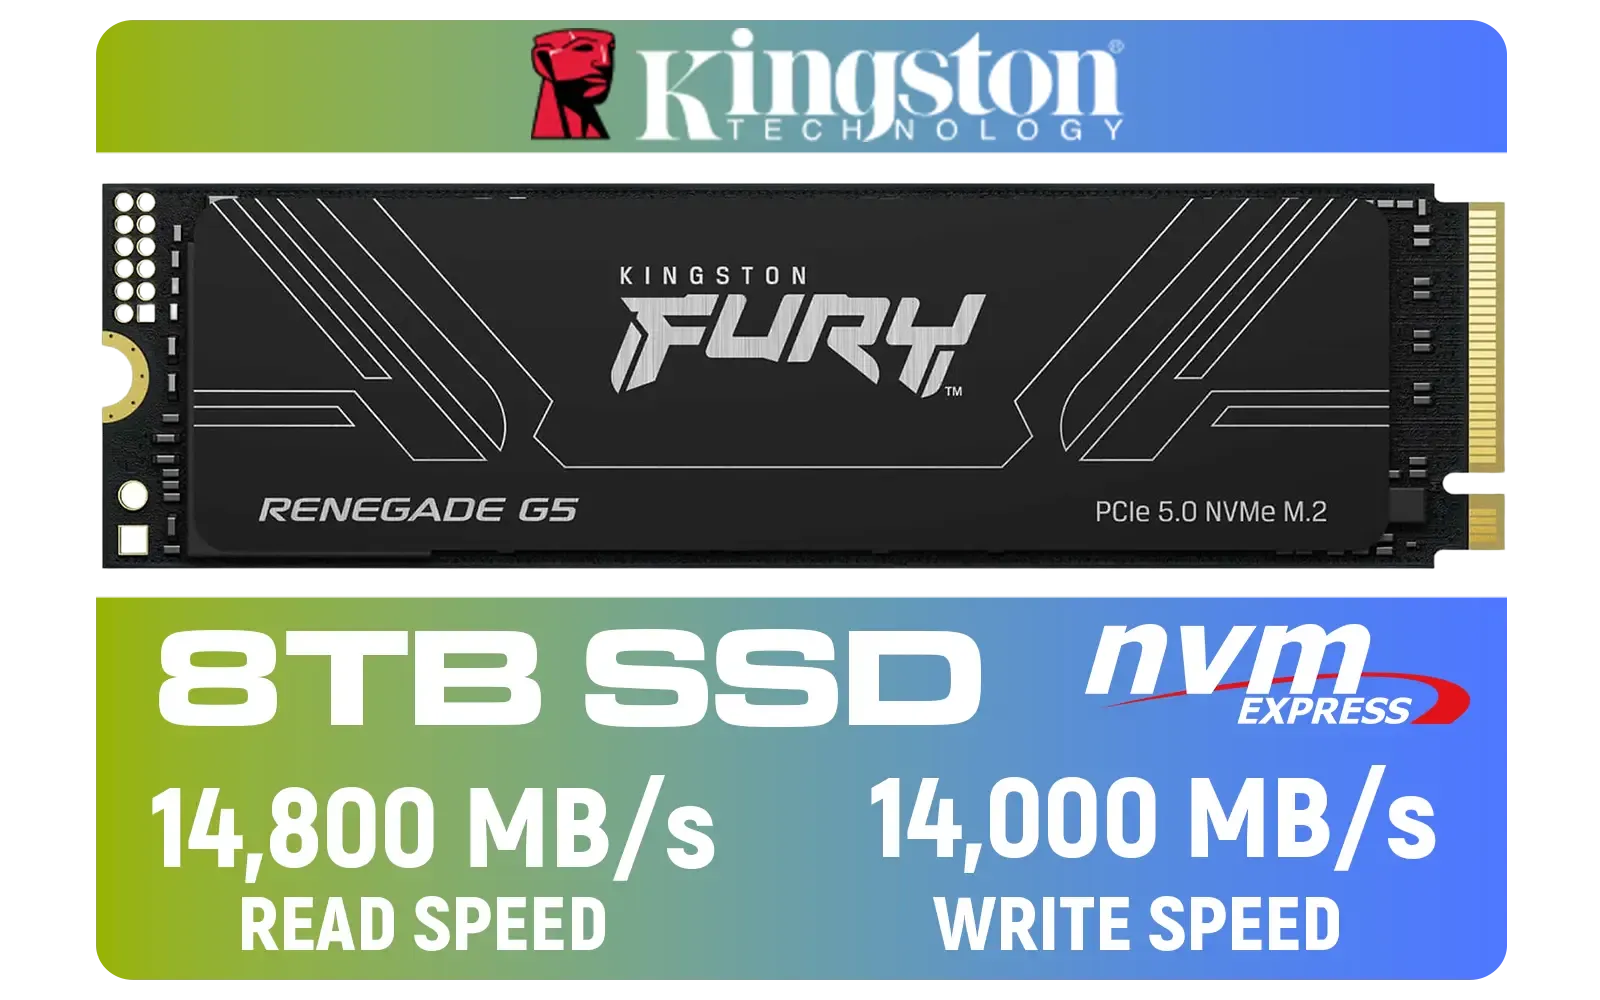
From here, you can either do a fresh installation of Windows for the cleanest performance or use cloning software to copy your old drive over. With a massive selection of SSDs available, from budget-friendly options to the absolute bleeding edge like blazing-fast Gen 5 NVMe drives, there's a perfect fit for every rig. For serious content creators or gamers who want zero compromises, there are even high-capacity 2TB Gen 5 models available. Whatever your needs, be sure to check out the best SSD deals to get top-tier speed without breaking the bank.
Ready for the Speed Boost? An NVMe SSD is one of the best upgrades you can make for your PC. Stop waiting and start playing. Explore our massive range of NVMe SSDs and find the perfect drive to supercharge your system today.


Not always. Check your laptop manual for an M.2 slot that supports 2280 size and NVMe protocol; some laptops only support M.2 SATA.
Mostly basic tools: a small Phillips screwdriver and anti-static strap. Some laptops may need Torx or pry tools to open the chassis.
Insert the M.2 2280 at a 30° angle into the slot, press down, and fasten with the standoff screw. Use a thermal pad if recommended.
Hardware install won't erase other drives, but initializing or formatting the new NVMe will. Always back up important data first.
Enter BIOS/UEFI, enable NVMe/AHCI if needed, set the NVMe drive as the primary boot device, then install or clone your OS.
High-performance NVMe 2280 drives often benefit from a heatsink or thermal pad to reduce throttling during sustained loads.
NVMe uses PCIe lanes for much faster speeds; 2280 denotes the 22x80mm size. SATA M.2 fits physically but performs significantly slower.
Discover the perfect storage solution - Explore the benefits of SSD vs HDD and find out which powers your laptop best. 💾🚀

Need serious computing on the go? 💡 The NAB9 Plus Mini PC delivers desktop-level performance in a pocket-friendly design. #1 choice for remote pros.

Discover why the NAB9 Plus Mini PC setup is a top pick for students and professionals.⚡ Boost productivity with powerful performance, compact design, and seamless multitasking. 💡

Upgrade to the best SSDs for gamers and experience lightning-fast load times, smoother gameplay✅Discover top picks, speed comparisons & savings🔥 | Evetech

Discover mini PCs that deliver seamless plug-and-play versatility 🚀. Boost productivity with instant setup and space-saving design 🔥!

Discover mini PCs with expandable storage to match your growing needs. Boost performance and capacity effortlessly! 🚀💾

🚀 Boost your data processing with the Intel Arc A730M PCIe 4 graphics card. Learn efficiency secrets now!

Unlock lightning-fast performance with our guide to motherboard storage speed for gaming. Learn how M.2 slots, PCIe 5.0, and SATA connections impact your load times and overall experience. Stop waiting and start playing faster! 🚀 We break down what you need to know. 🎮