SSD vs HDD – Which is Better?
Discover the perfect storage solution - Explore the benefits of SSD vs HDD and find out which powers your laptop best. 💾🚀
101 days ago·4 min read
Loading tags...
Install M.2 NVMe SSD quickly and safely on your gaming PC or laptop — tools, BIOS settings, thermal tips, and cloning steps to boost boot and game load times. ⚙️💨

Tired of staring at loading screens while your mates are already dropping into the action? That old, sluggish hard drive is costing you precious seconds. The fix is simpler and cheaper than you think: a lightning-fast M.2 NVMe SSD. Learning how to install an M.2 NVMe SSD is one of the easiest, most satisfying PC upgrades you can do. This guide will walk you through the entire process for both desktops and laptops, step-by-step. 🚀

Before you start your M.2 NVMe SSD installation, let's get your tools and workspace ready. It’s a quick job, but preparation is key to a smooth upgrade.
You’ll need:
Most importantly, confirm your motherboard or laptop has a compatible M.2 slot. Check for a small, horizontal slot on your motherboard, usually labelled with "M.2" or "NVMe".
Installing an M.2 drive in a desktop is incredibly straightforward. It clicks in directly onto the motherboard, meaning no messy power or data cables. Let's get to it.


Completely shut down your PC. Switch off the power supply unit (PSU) at the back and unplug the main power cable. Press the power button a few times to discharge any remaining electricity.
Place your PC on its side on a flat, stable surface. Remove the side panel to access the motherboard. The M.2 slot is a small connector about 22mm wide. You might find it below the CPU, near the PCIe slots, or even hidden under a heatsink (a "heat spreader").
If there's a screw in the standoff at the end of the slot, remove it. Take your M.2 SSD and, holding it by the edges, slide the gold-connector end into the slot at a 30-degree angle. It should fit snugly. The drive will naturally stick up at an angle.
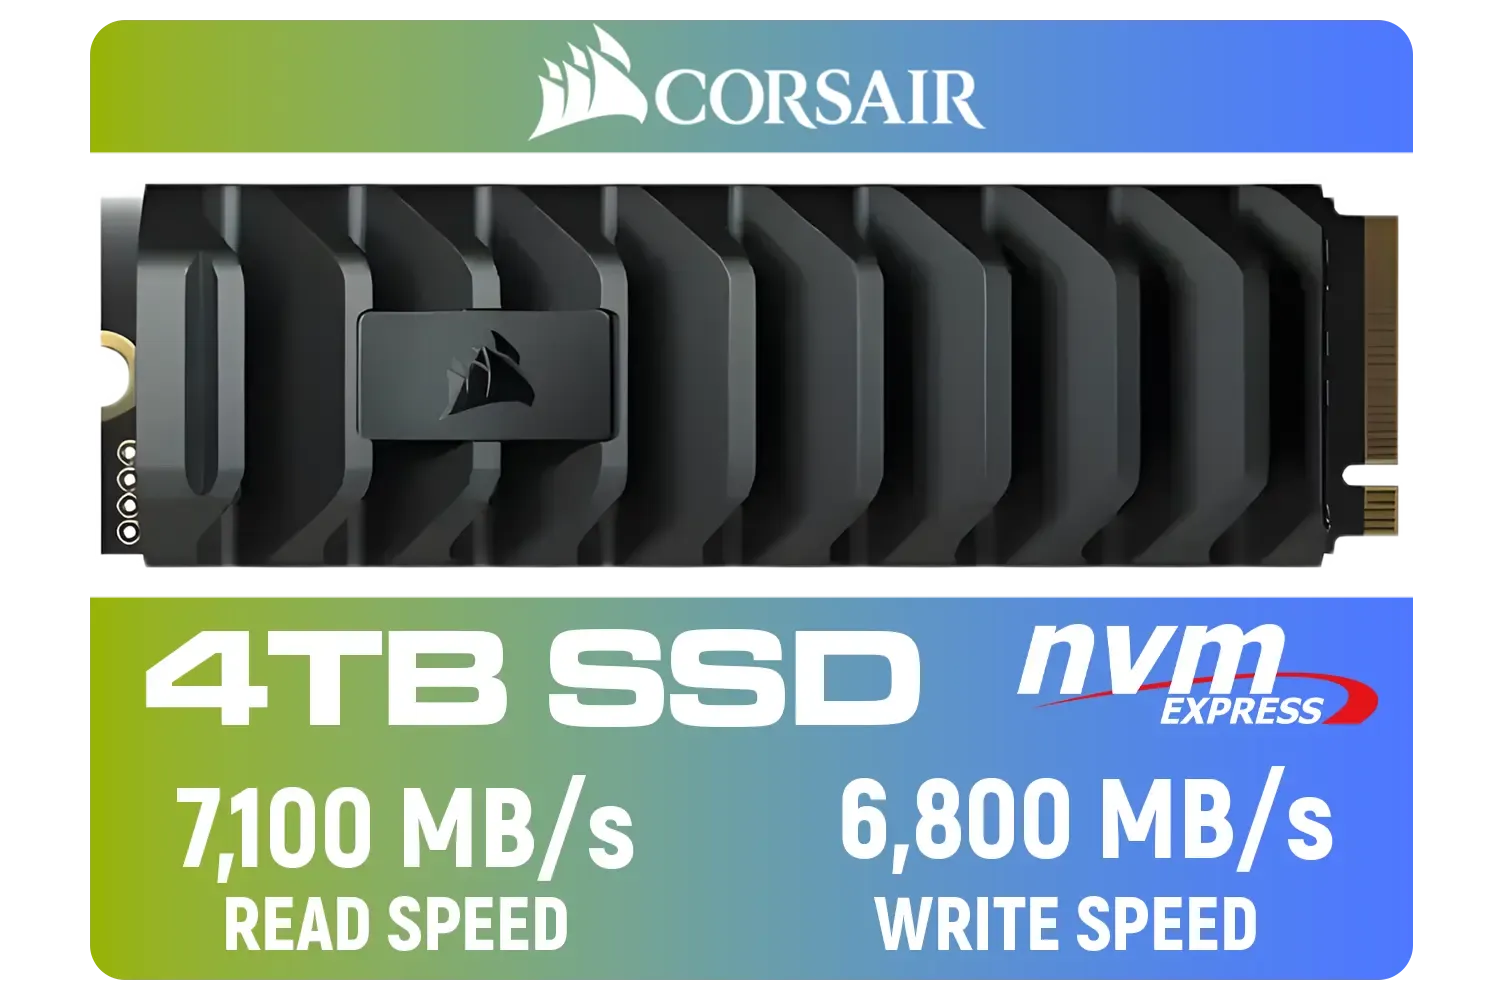
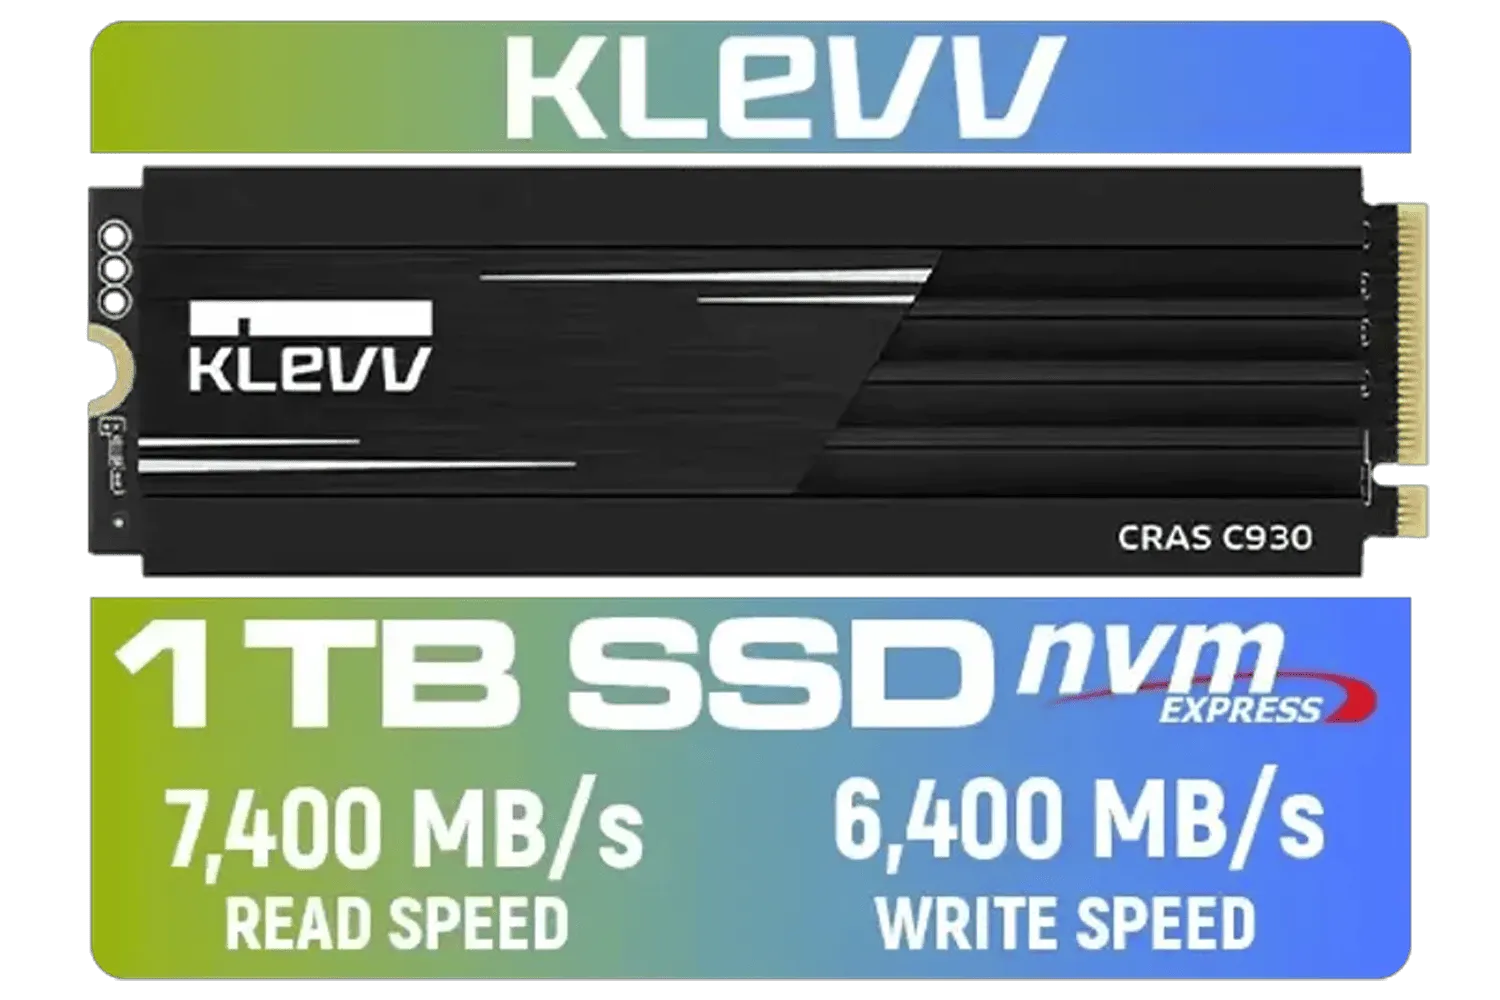
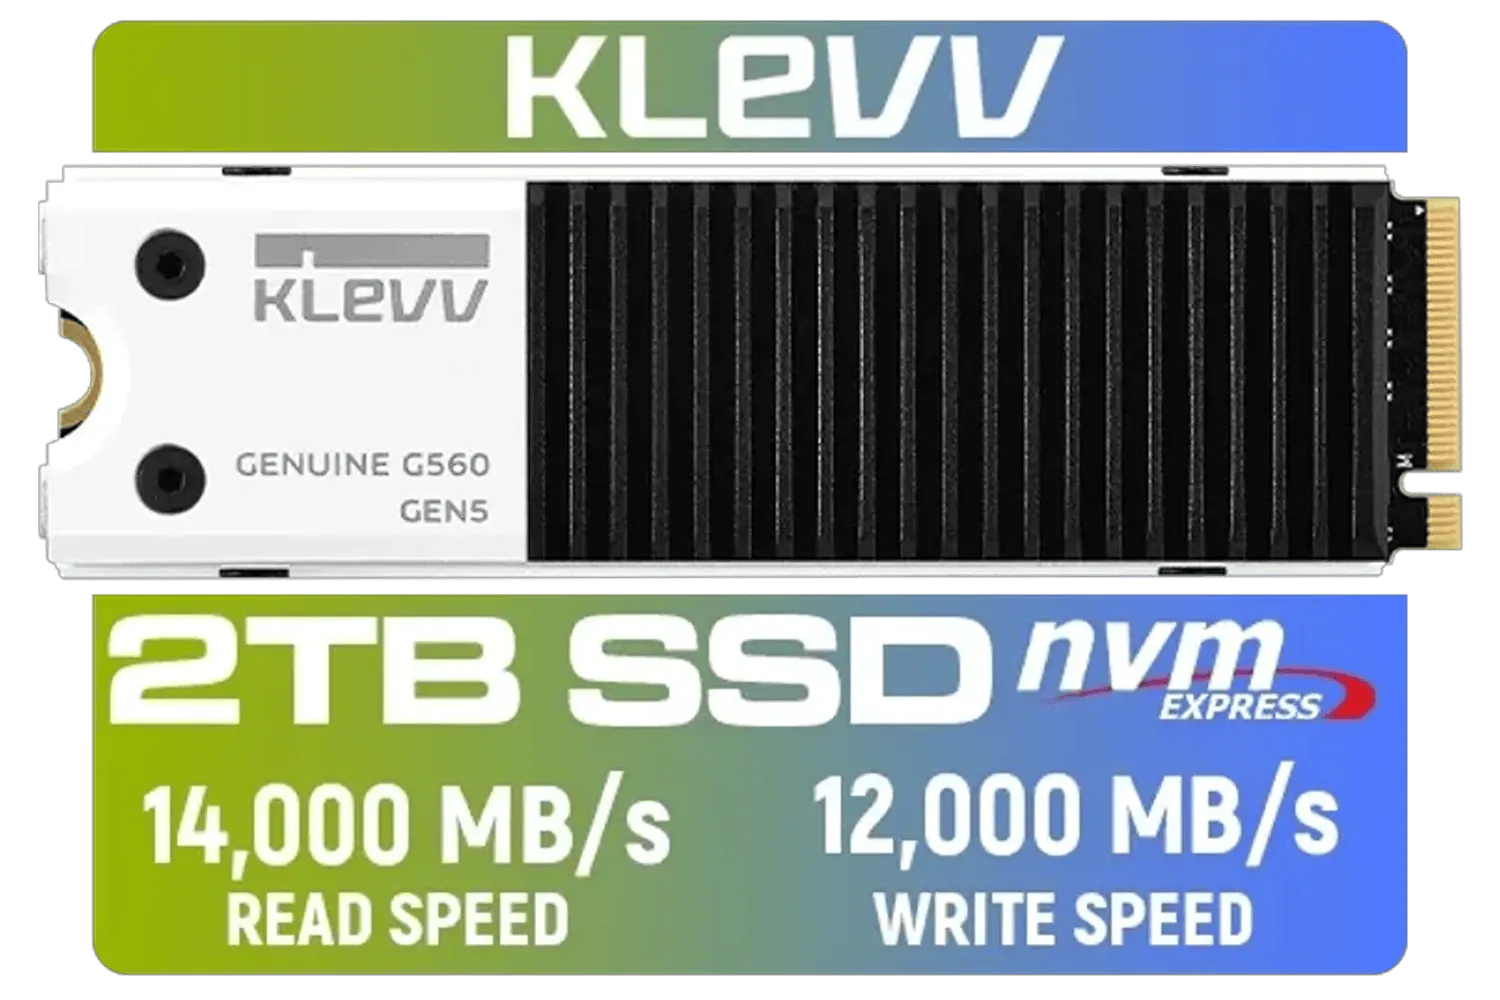
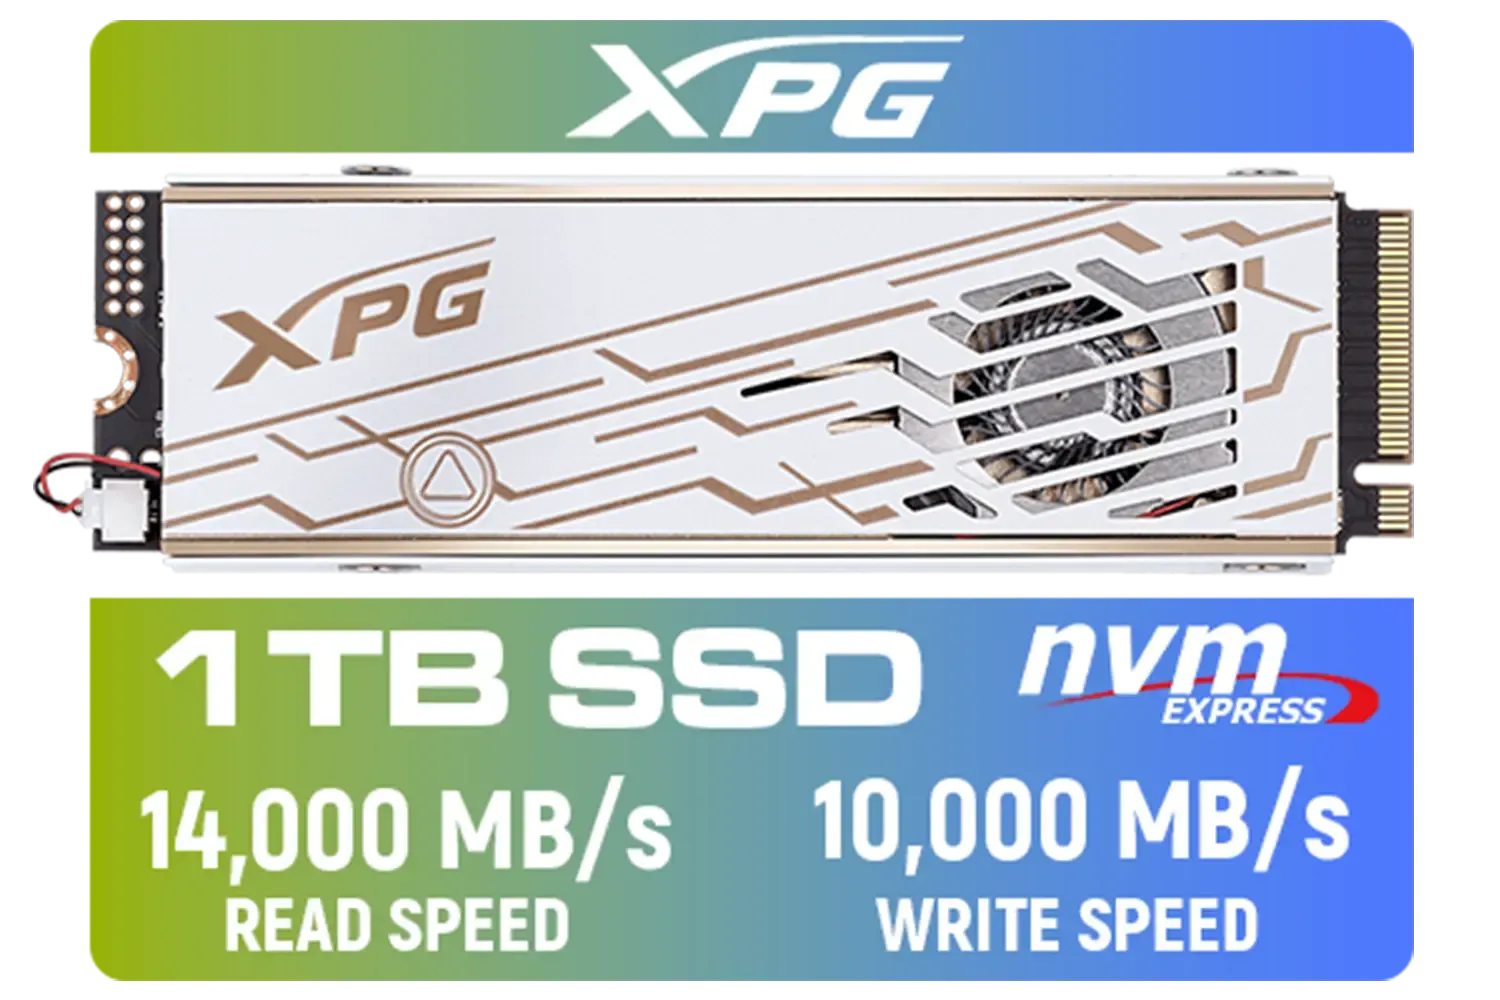
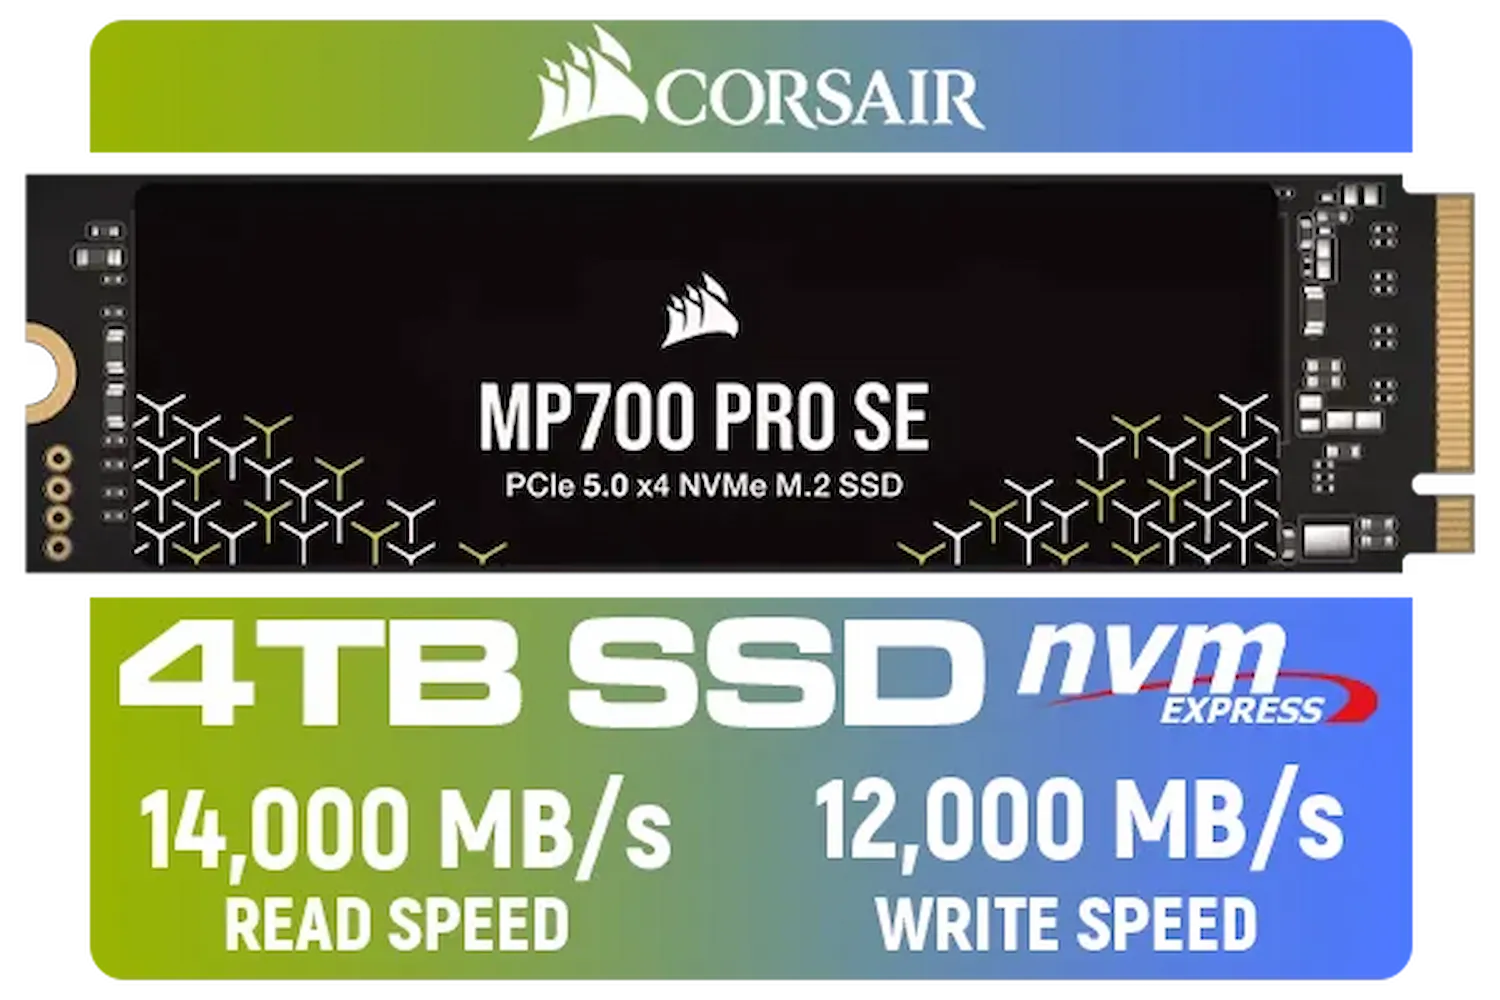
Gently press the other end of the M.2 SSD down so it sits flat against the motherboard standoff. Use the small screw you removed earlier to secure it in place. Don't overtighten it... just firm enough to be secure. High-performance drives from brands like CORSAIR sometimes come with their own heatsinks, which are installed at this stage.
Upgrading a laptop is similar, just a bit more compact. The key is to be gentle and organised. 🔧
Shut down your laptop, unplug the charger, and disconnect all peripherals.


Flip the laptop over and place it on a soft cloth to avoid scratches. Unscrew the back panel. Keep your screws organised! Some laptops have a smaller, dedicated panel for easy access to RAM and storage.
Before touching anything else, disconnect the battery from the motherboard. This is a critical safety step to prevent short circuits. The connector usually just pulls out or has a small clip.
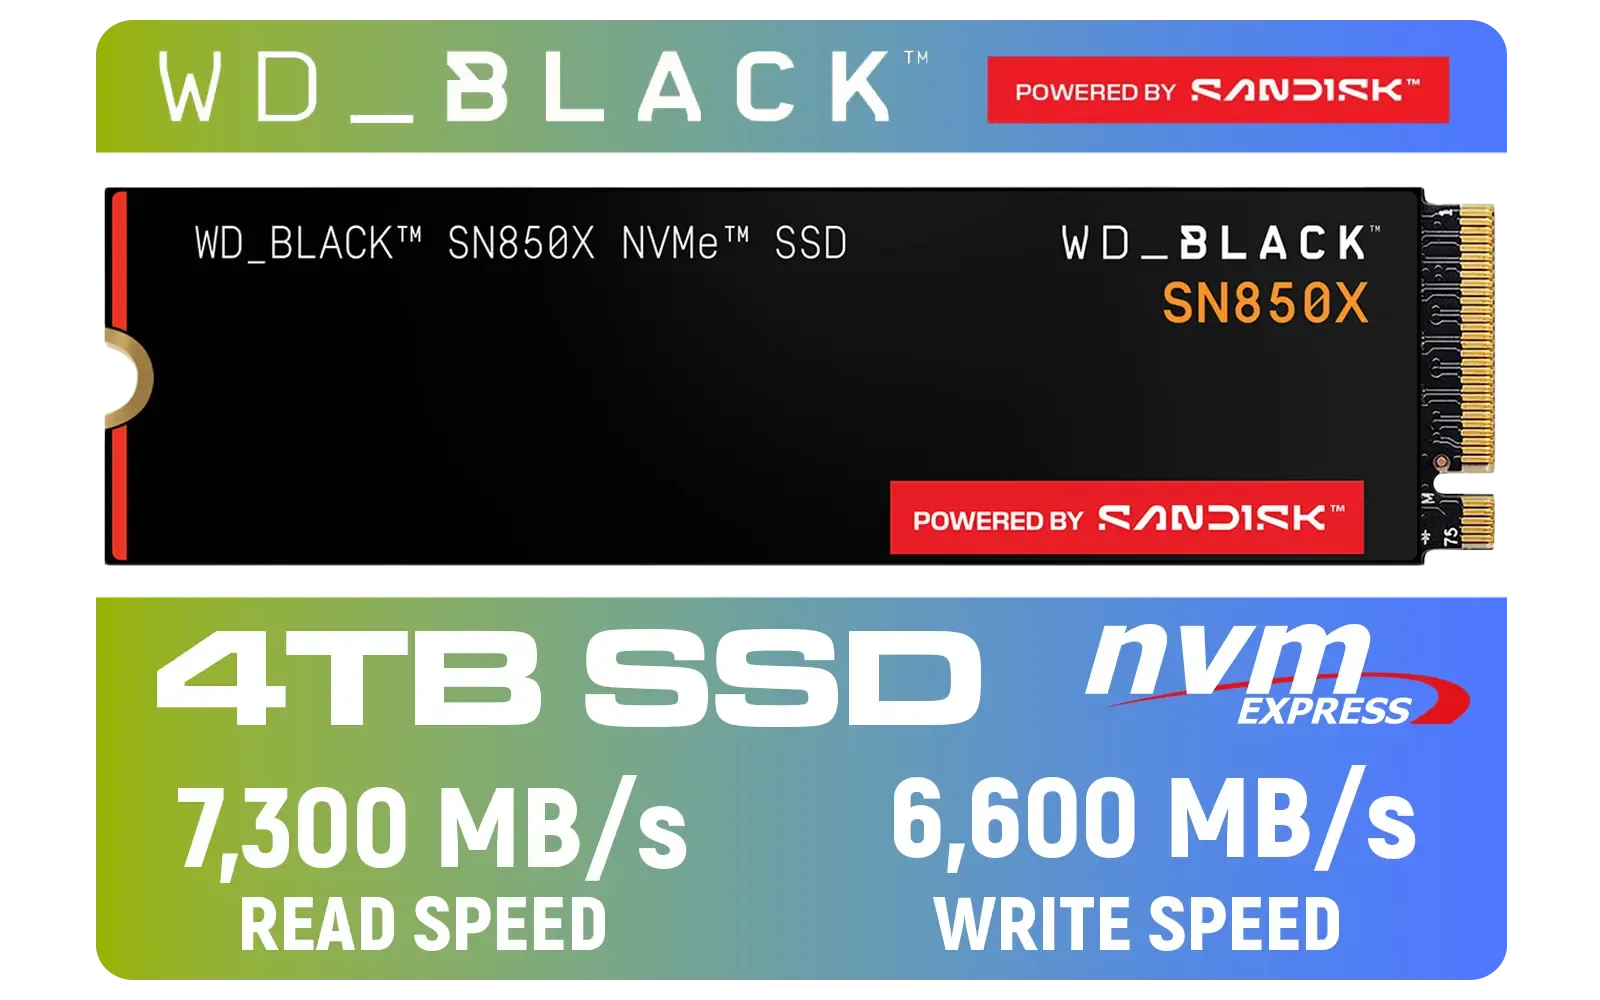
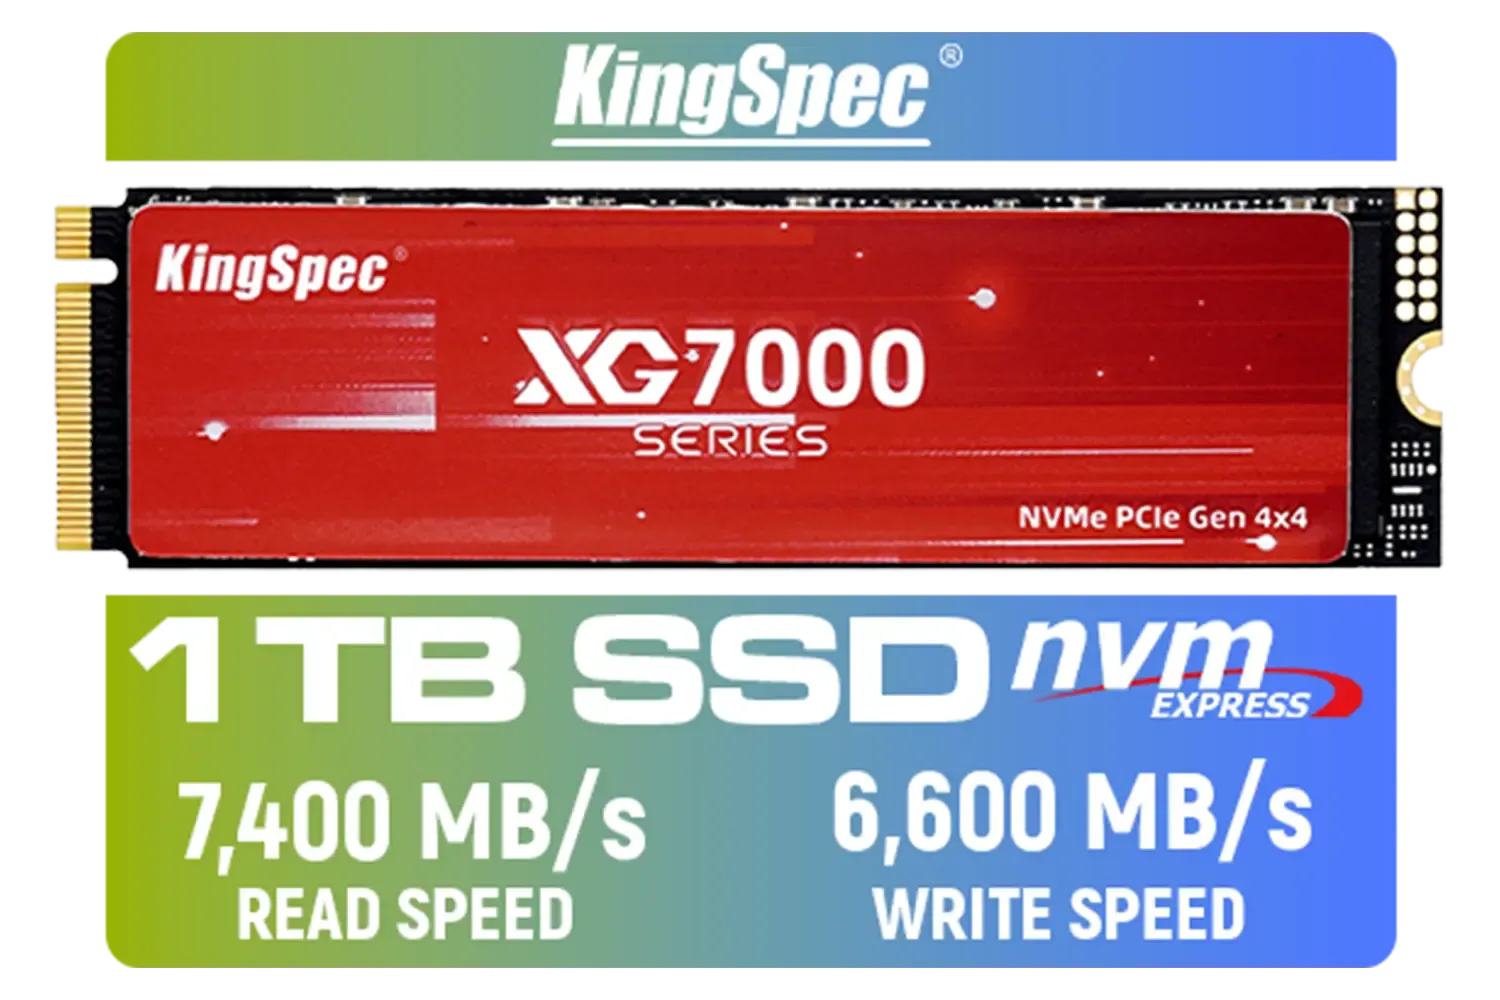
Find the M.2 slot. The installation process is identical to the desktop: insert the drive at an angle, press it down, and secure it with the screw. Many top-tier brands like Kingston offer M.2 SSDs perfect for laptop upgrades due to their power efficiency.
Once done, reconnect the battery, re-attach the back panel, and you're good to go.
To move your Windows installation to your new SSD without starting from scratch, use cloning software like Macrium Reflect (Free) or Acronis True Image. Most SSD manufacturers offer a free version. This copies everything—your OS, games, and files—from your old drive to the new one, saving you hours of re-installation.


Your PC won't automatically see the new drive. You need to tell Windows what to do with it.
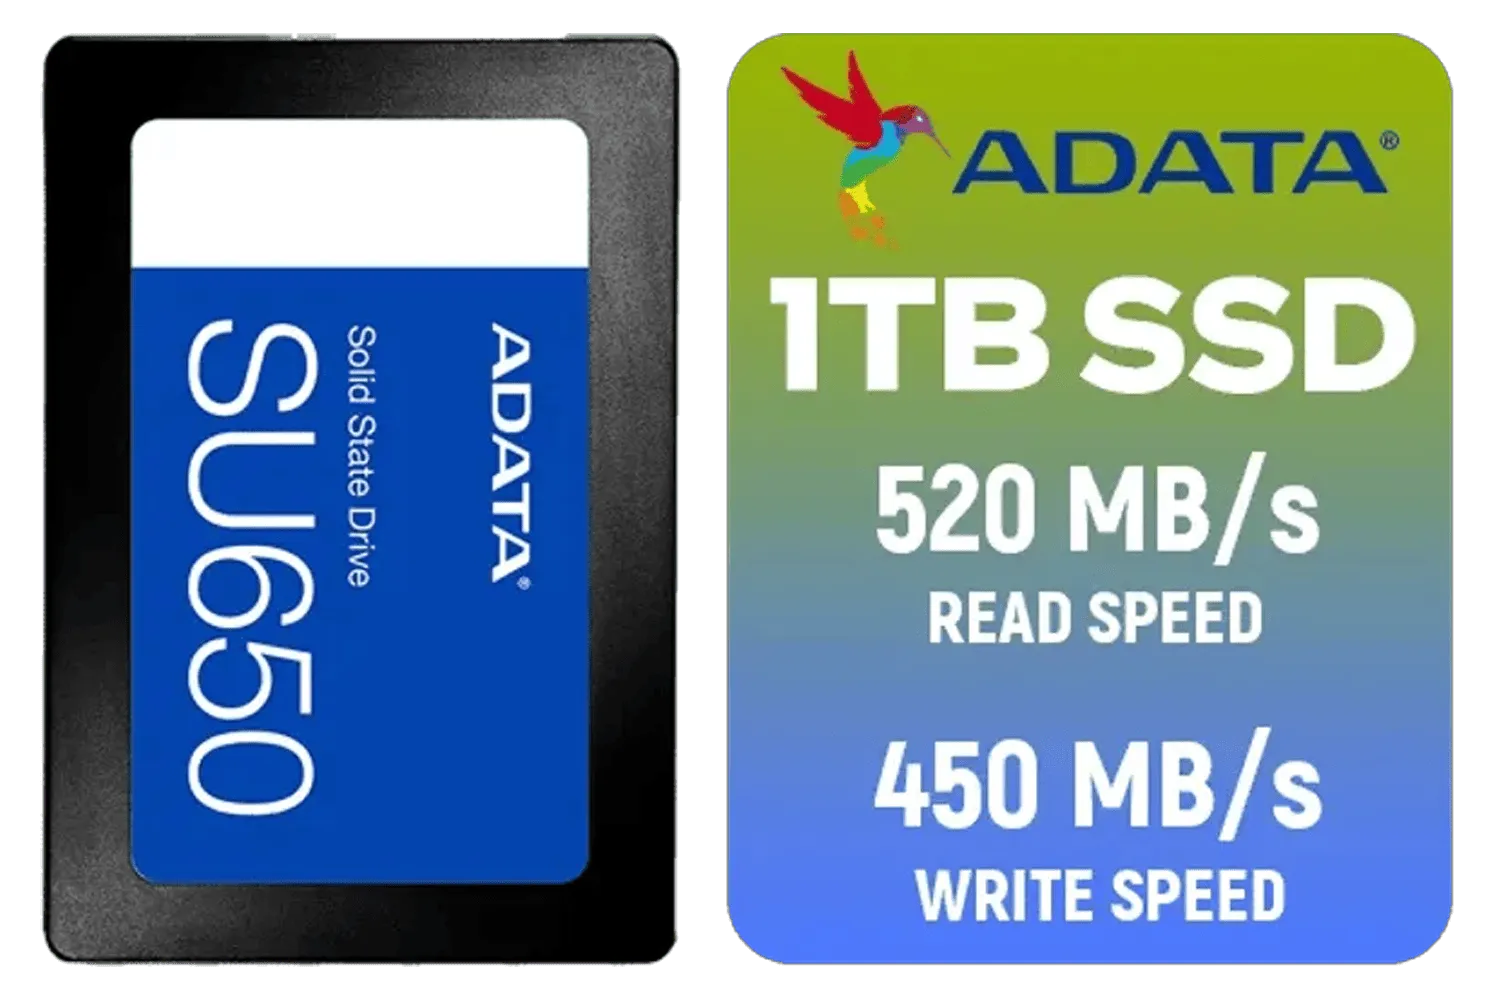
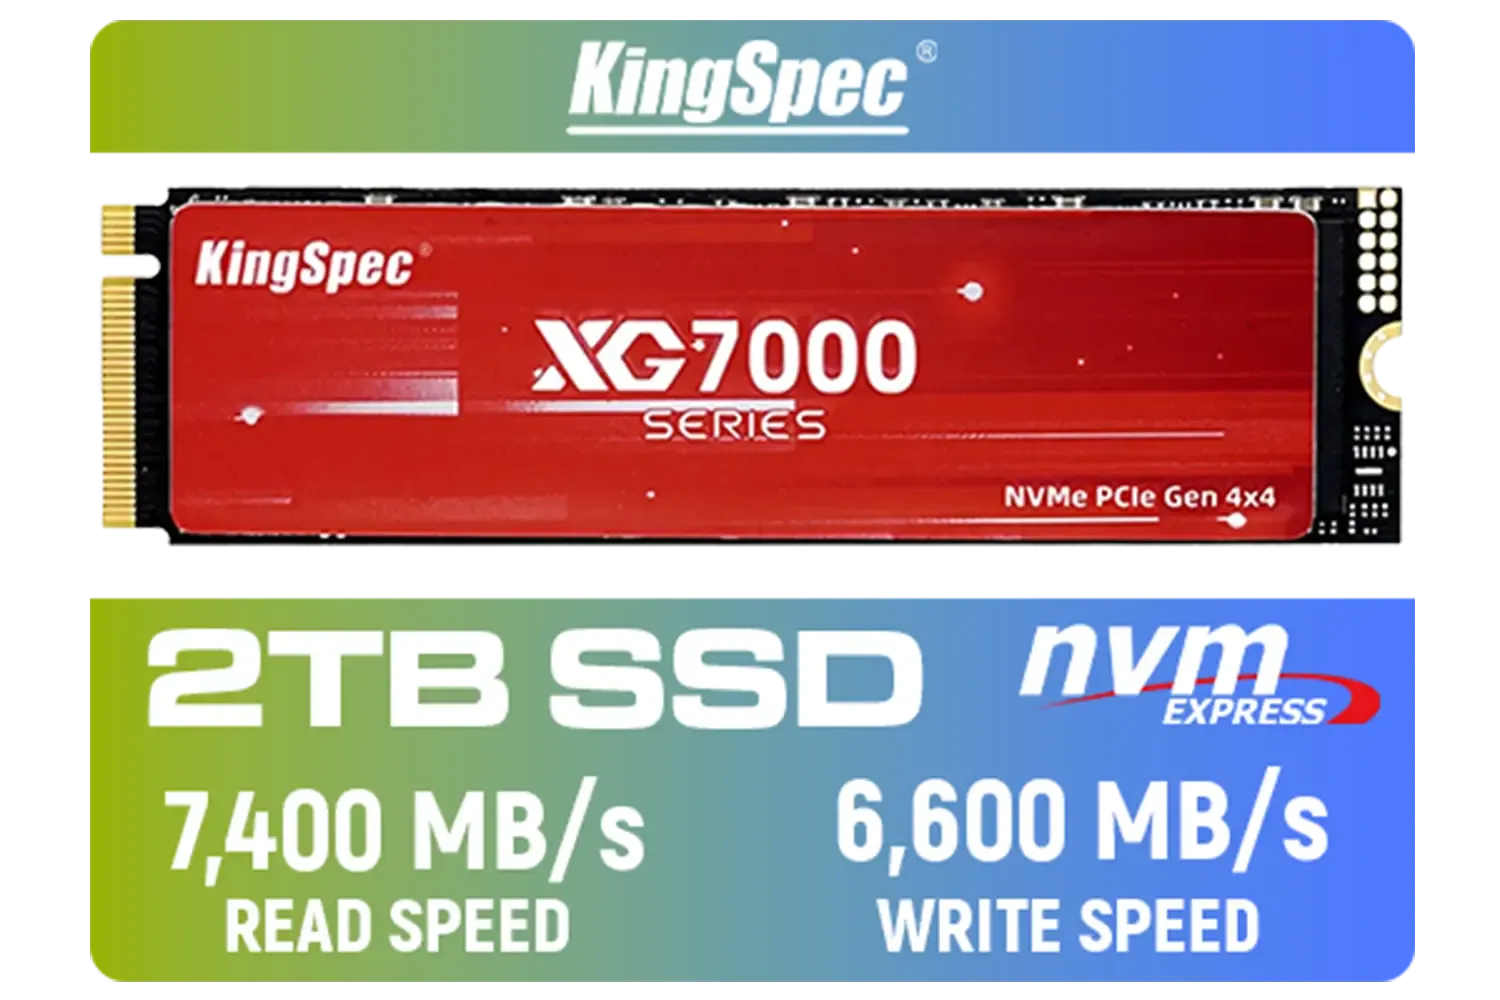
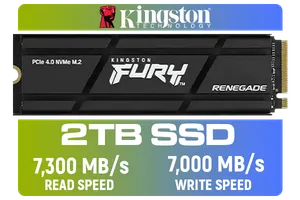
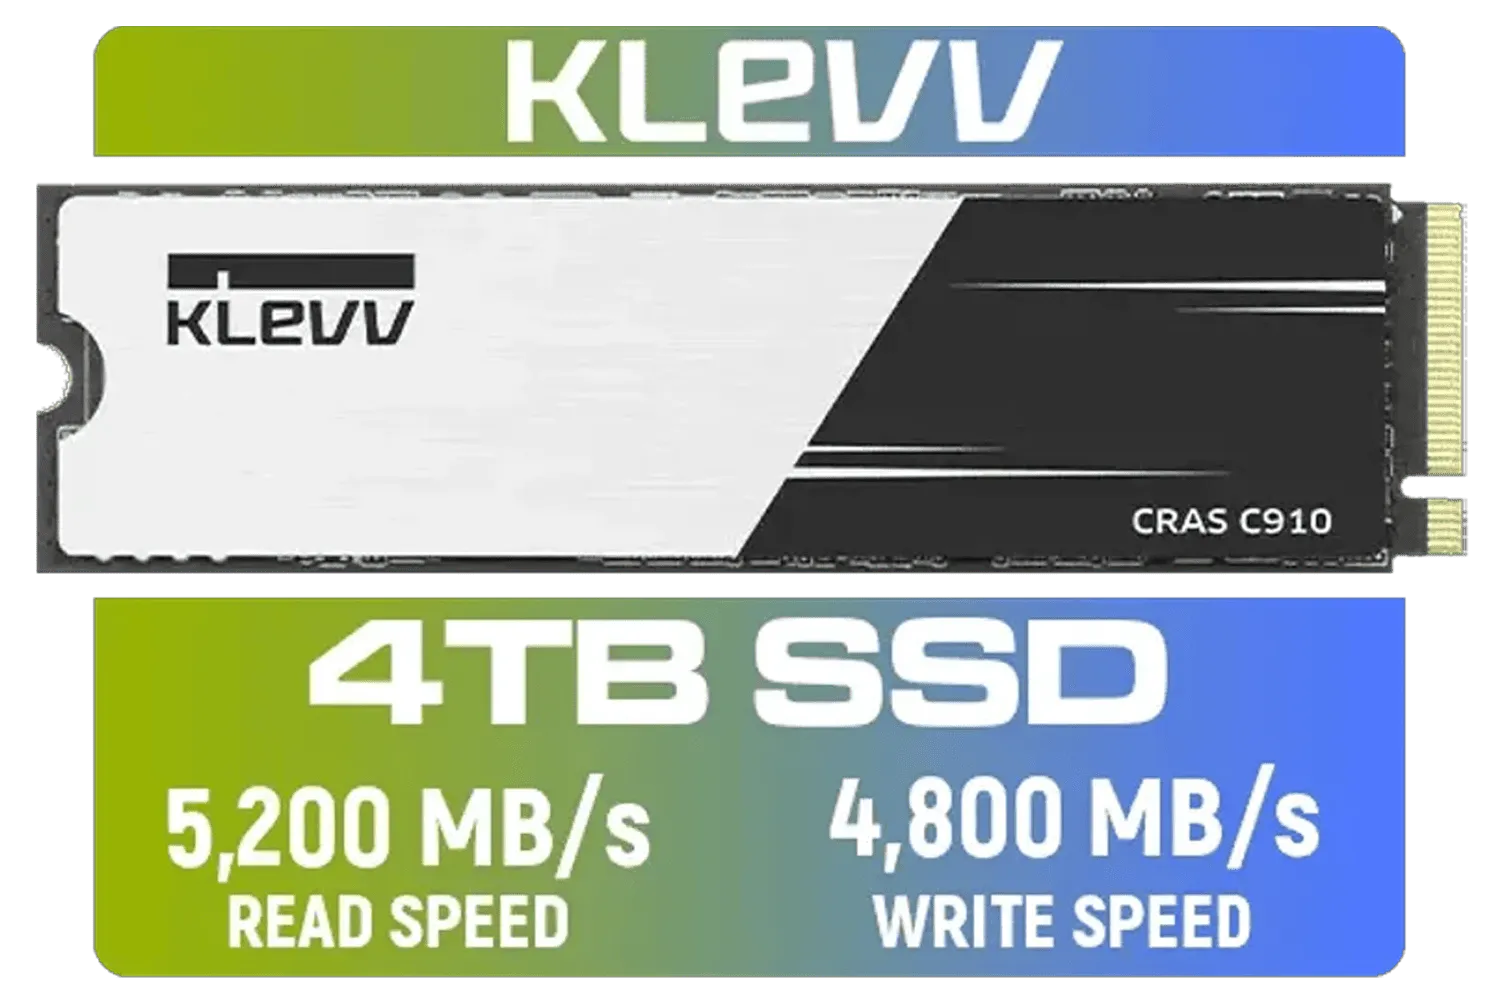
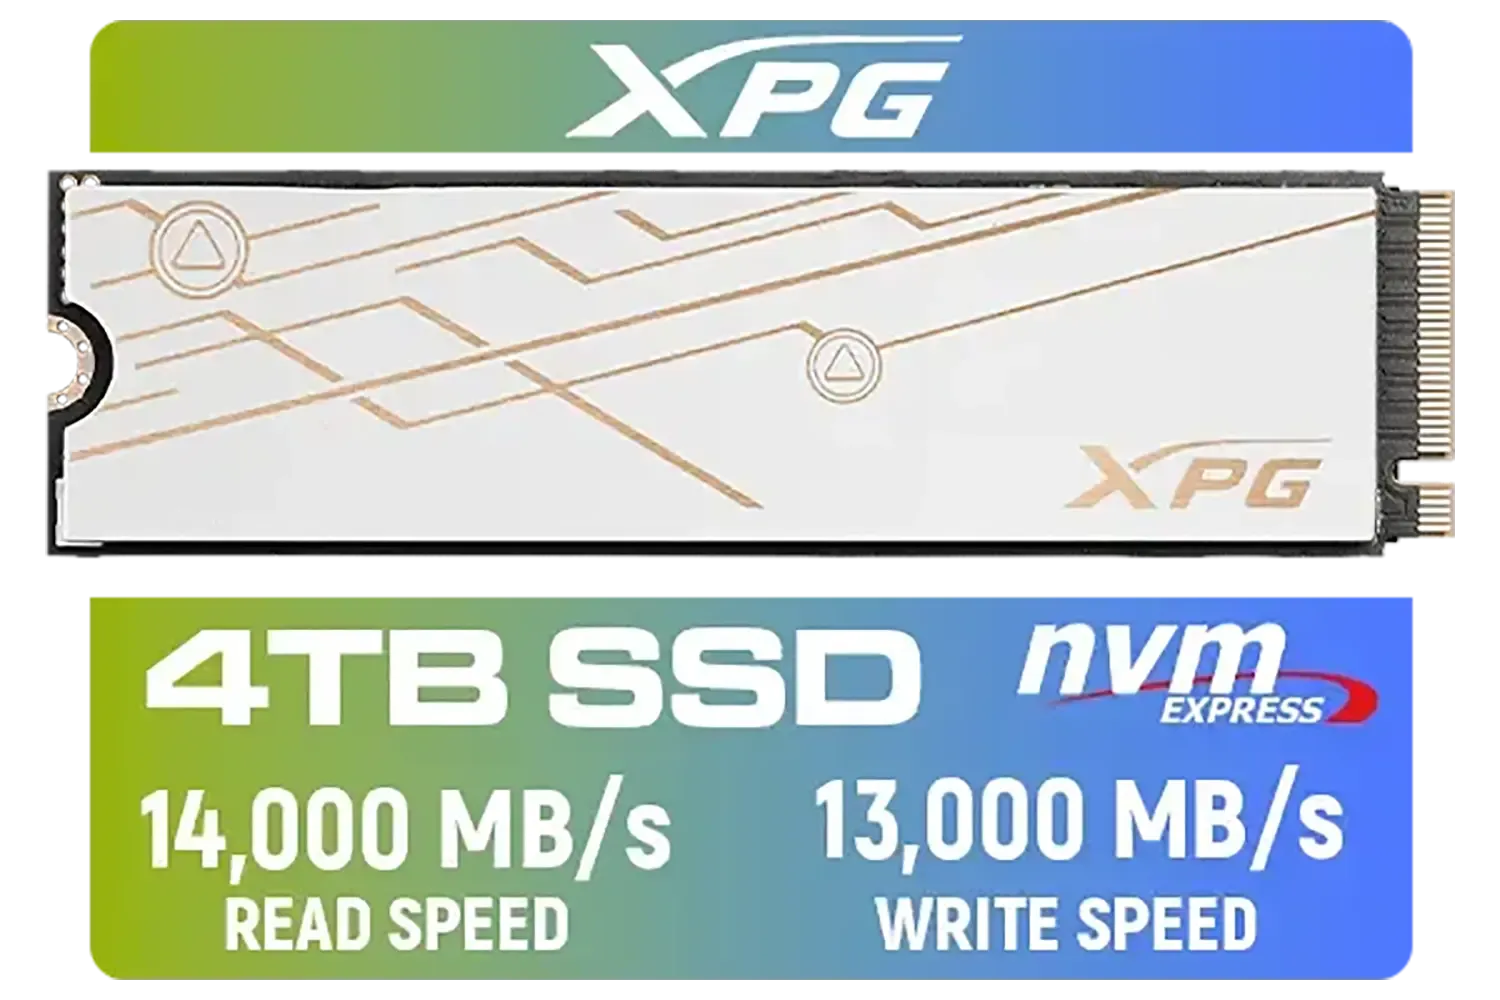
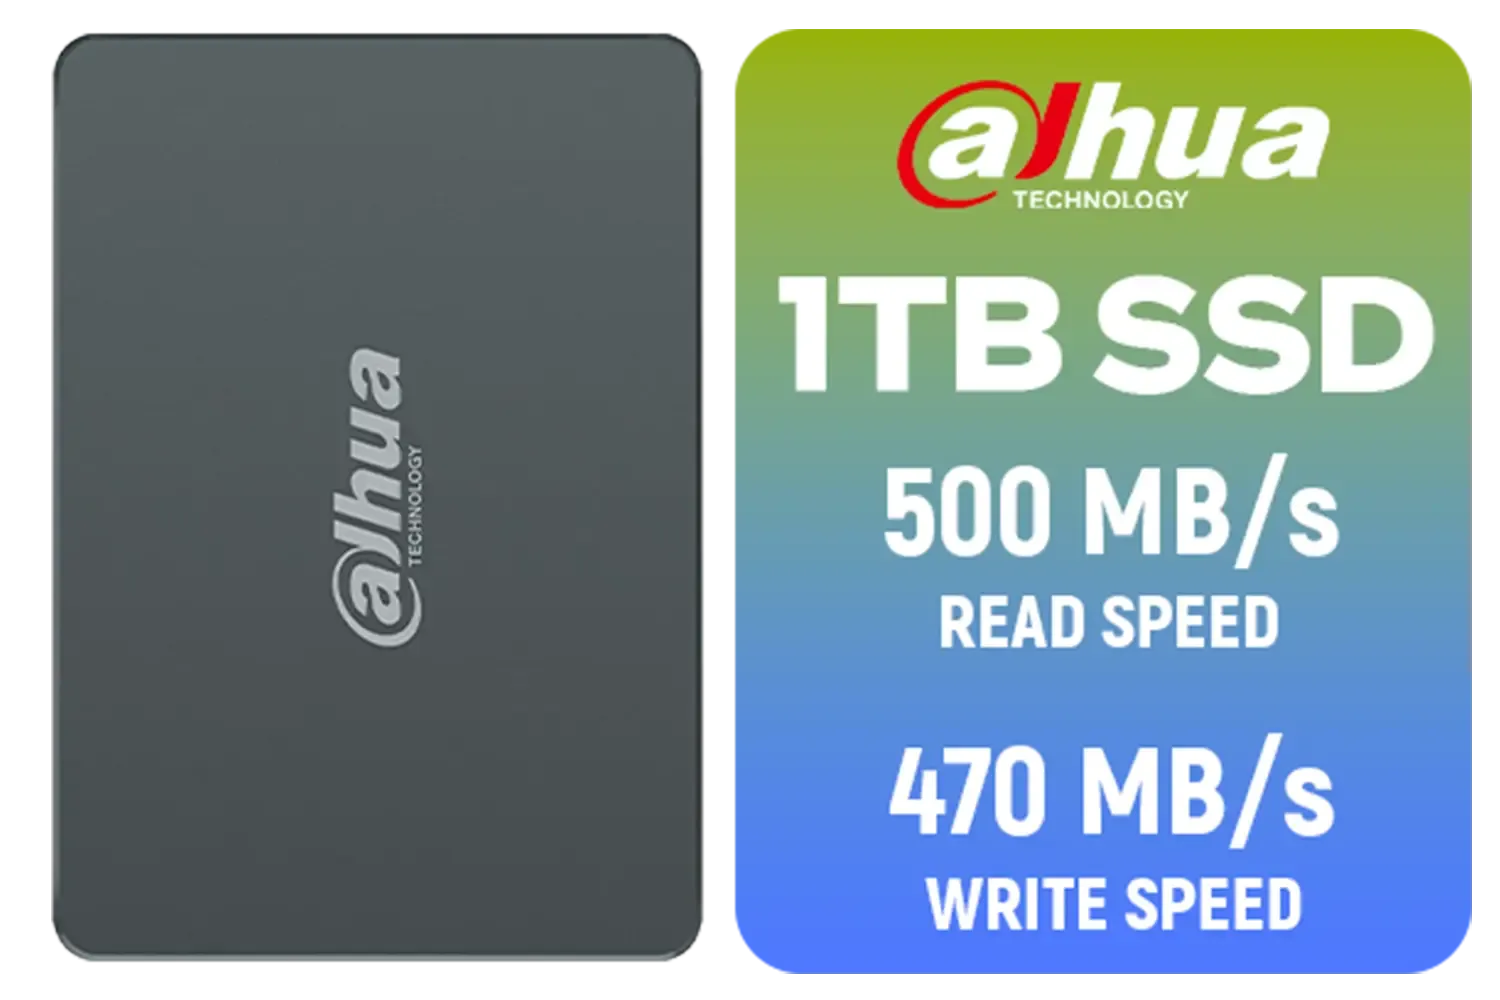
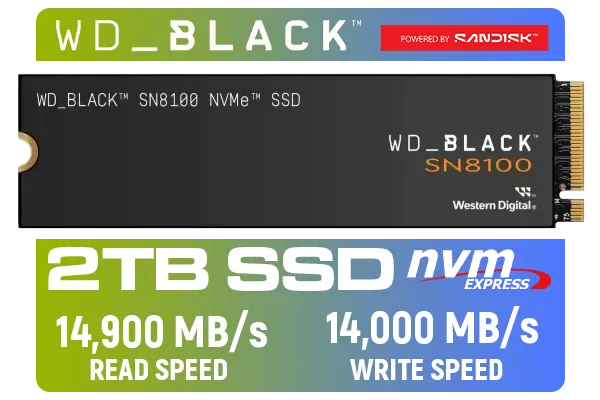
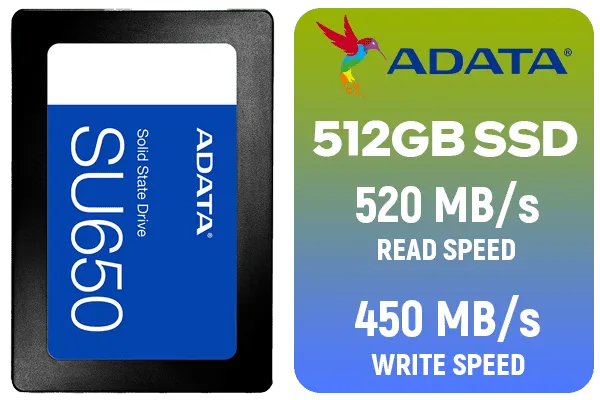
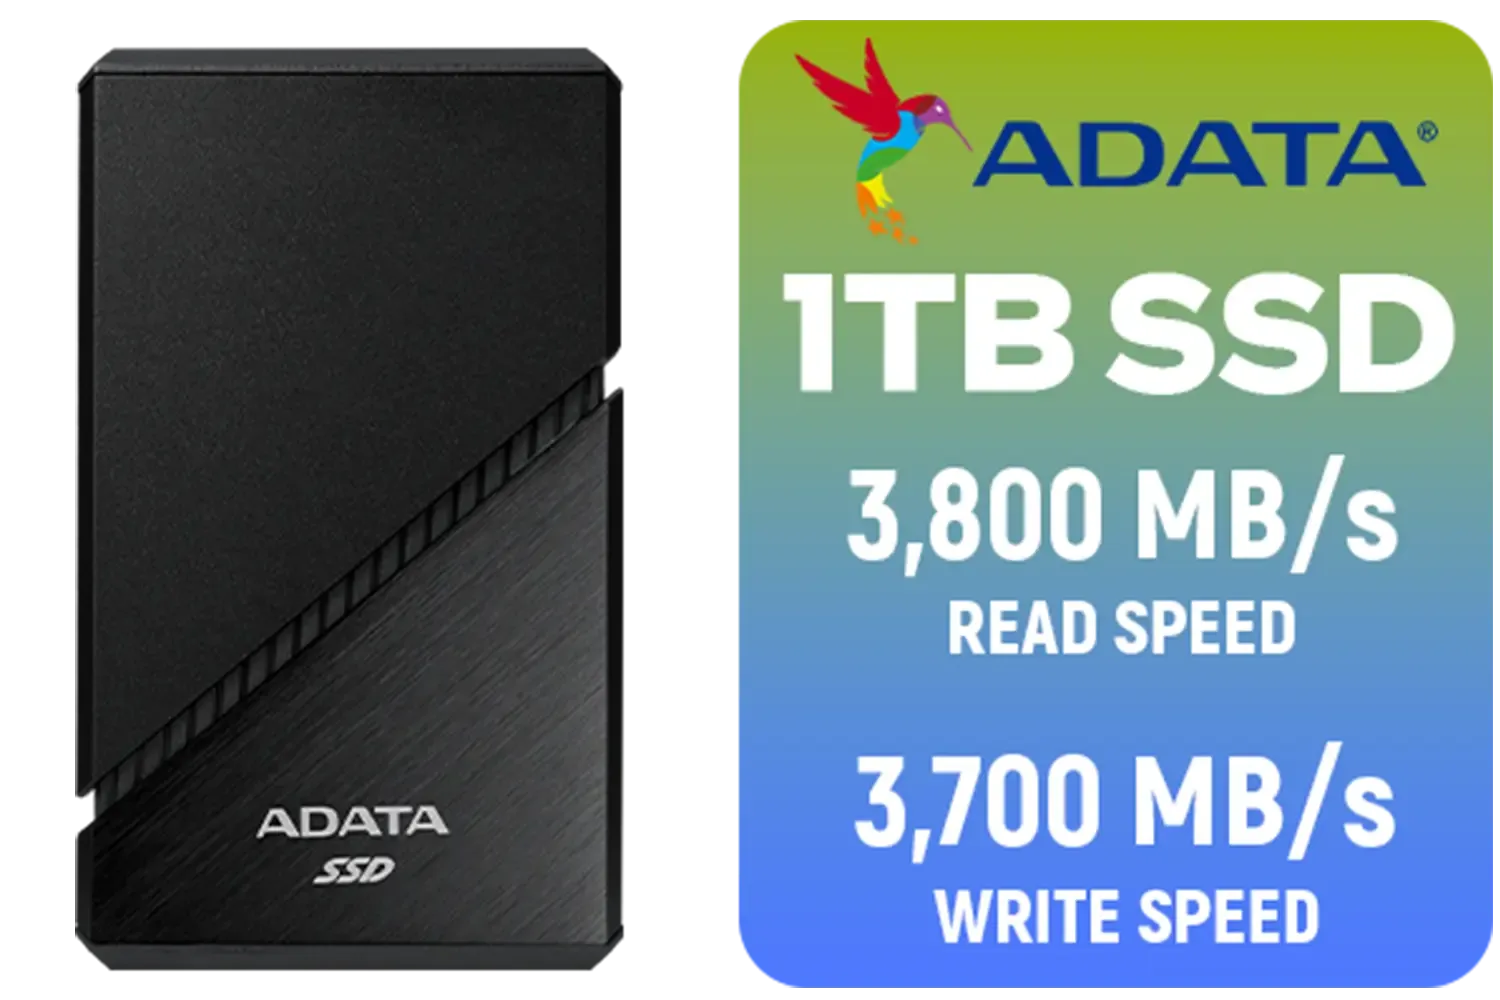
Now your drive will appear in "This PC", ready for games and files! For many gamers, a solid-value option from a brand like ADATA provides the perfect balance of speed and affordability for a secondary games drive. If you plan on making this your main drive for your OS and a library of massive open-world games, investing in one of our popular 2TB M.2 SSDs is a smart move for future-proofing your rig.
Ready to Unleash Warp Speed? Upgrading to an M.2 NVMe SSD is the single biggest performance boost you can give your rig. From instant boot times to non-existent loading screens, the difference is night and day. Explore our massive range of M.2 SSDs and find the perfect drive to supercharge your PC today.

Power off, remove battery if possible, access the M.2 slot, slide in the M.2 NVMe SSD at an angle, screw it down, then enable in BIOS. See how to install m.2 nvme ssd in laptop.
Yes; enable the NVMe drive in BIOS/UEFI, set it as the primary boot device, and ensure NVMe or AHCI mode is active for nvme bios boot.
Yes. Use cloning software, connect both drives, clone the system partition to the NVMe, then set the NVMe as the boot drive to clone hdd to nvme.
Not always. High-performance NVMe drives and sustained gaming loads benefit from a heatsink; follow m.2 heatsink installation if temps spike.
Use the primary M.2 slot directly connected to the CPU for best performance; consult your motherboard manual for the best m.2 slot for nvme.
No. Some M.2 slots only support SATA M.2. Check slot specs; nvme vs sata m.2 compatibility matters before buying.
A small Phillips screwdriver, anti static precautions, and your motherboard or laptop manual are usually enough for standard m.2 nvme ssd installation.
Discover the perfect storage solution - Explore the benefits of SSD vs HDD and find out which powers your laptop best. 💾🚀

🚀 Discover enterprise-grade docks with built-in boot protection. Safeguard sensitive data and enhance productivity for modern workforces.

Upgrade to the best SSDs for gamers and experience lightning-fast load times, smoother gameplay✅Discover top picks, speed comparisons & savings🔥 | Evetech

Discover mini PCs with expandable storage to match your growing needs. Boost performance and capacity effortlessly! 🚀💾

Boost your build with the best SATA III cables trusted by gamers and builders. 🔥 Discover high-speed, durable options that enhance system reliability and maximize data transfer efficiency.

🚀 Boost your data processing with the Intel Arc A730M PCIe 4 graphics card. Learn efficiency secrets now!

Unlock lightning-fast performance with our guide to motherboard storage speed for gaming. Learn how M.2 slots, PCIe 5.0, and SATA connections impact your load times and overall experience. Stop waiting and start playing faster! 🚀 We break down what you need to know. 🎮

Discover the best gaming motherboard accessories to complete your rig! From high-speed M.2 SSDs to vibrant RGB lighting, we cover the essential gear every South African gamer needs to maximize performance and aesthetics. Don't just build a PC, build a masterpiece. 🚀💻