Tired of watching loading screens more than you play the actual game? In South Africa, where every second of power counts, waiting for your PC to boot or for a Warzone map to load is just painful. Learning how to install an SSD for gaming is the single biggest performance boost you can give your rig. It’s simpler than you think, and the difference is night and day. Let's get your PC feeling brand new. 🚀
Why an SSD is a Must-Have for Your Gaming PC
If your PC still runs on a traditional Hard Disk Drive (HDD), you're living in the past. An HDD is a mechanical drive with spinning platters… think of it like a record player. An SSD (Solid-State Drive), on the other hand, uses flash memory, like a massive USB stick.
This fundamental difference means an SSD offers:
- Lightning-Fast Boot Times: Power on and be on your desktop in seconds, not minutes.
- Drastically Reduced Game Loading: Jump into your favourite games like Apex Legends or Elden Ring almost instantly.
- A Snappier System: Everything from opening applications to transferring files feels incredibly responsive.
For any serious gamer, upgrading your storage isn't a luxury; it's a necessity for a modern gaming experience.
Choosing the Right SSD for Your Rig
Before you start the installation, you need the right drive. There are a few main types to consider, and what you choose depends on your motherboard and budget.
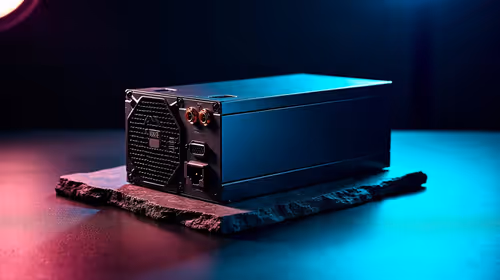
- SATA SSDs: These look like small, 2.5-inch rectangular boxes. They use the same cables as a traditional HDD, making them a super easy drop-in replacement for older systems. They are a massive leap from an HDD and offer fantastic value. You can find a wide range of traditional solid-state drives that fit this category.
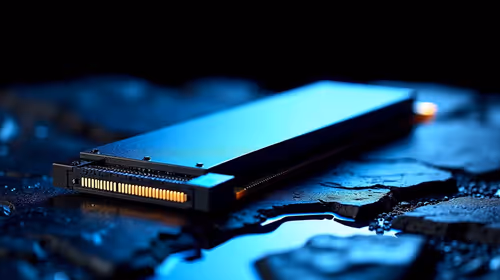
- NVMe M.2 SSDs: These are the speed demons. ⚡ Shaped like a stick of RAM, they plug directly into a special M.2 slot on your motherboard, eliminating cables and delivering the fastest possible speeds. Most modern gaming motherboards have at least one M.2 slot. If speed is your priority, browse these blazing-fast NVMe SSDs.
- External SSDs: Don't want to open your case? An external SSD is a fantastic plug-and-play solution, perfect for storing your Steam library or for gaming on a laptop. They connect via USB and offer great speeds without any fuss. Check out these convenient external SSDs for an easy boost.
Check Your Motherboard Manual! 🔧
Before buying an NVMe M.2 drive, quickly check your motherboard’s manual or product page online. Look for "M.2 Slot" or "NVMe support". Some slots are SATA-only, while others support the faster NVMe protocol. Knowing this ensures you buy a compatible drive and get the performance you paid for.
A Simple Guide to Installing Your New Gaming SSD
Got your new drive? Lekker. Let's get it into your machine. This SSD installation guide covers the basics for an internal drive.
Step 1: Preparation is Key
- Back-Up Your Data: Before you touch anything, back up your important files to an external drive or cloud service. Better safe than sorry!
- Ground Yourself: Static electricity can damage PC components. Touch a metal part of your unplugged PC case before you begin to discharge any static buildup.
- Gather Your Tools: All you really need is a Phillips head screwdriver.
Step 2: The Physical Installation
- Power Down & Unplug: Shut down your PC completely and unplug it from the wall.
- Open Your Case: Remove the side panel of your PC case.
- For a SATA SSD: Find a spare drive bay (usually a metal cage). Secure the SSD in the bay with screws. Connect one end of a SATA data cable to the SSD and the other to a spare SATA port on your motherboard. Then, connect a SATA power cable from your power supply to the SSD.
- For an NVMe M.2 SSD: Locate the M.2 slot on your motherboard. It's a small horizontal slot, usually with a tiny screw next to it. Unscrew the standoff screw, gently insert the M.2 drive into the slot at a slight angle, then press it down and secure it with the screw. That's it… no cables! ✨
Step 3: Setting Up Windows
Once the drive is physically installed, close up your case, plug everything back in, and power on. You have two main options:
- Fresh Install (Recommended): Install a fresh copy of Windows onto your new SSD. This gives you a clean, fast system free of old clutter. You'll need a Windows installation USB. During setup, make sure you select the new SSD as the installation target.
- Clone Your Old Drive: Use software like Macrium Reflect or Clonezilla to copy everything from your old drive to your new SSD. This is convenient but can sometimes carry over old issues.
After Windows is up and running on the new SSD, you can format your old HDD and use it for mass storage for photos, videos, or less-played games.
Ready to Banish Loading Screens? Installing an SSD is one of the most satisfying PC upgrades you can make. Find the perfect drive for your budget and rig, and get ready for a faster, smoother gaming experience. Check out the latest SSD deals at Evetech for performance that leaves lag in the dust.