MSI Pro B840-P BIOS Settings: Maximize PC Performance
Discover the best MSI Pro B840-P BIOS settings to unlock hidden speed. We guide you through XMP profiles, fan curves, and power limits to ensure your rig runs faster and cooler. 🚀 Boost FPS and system stability today! ⚡

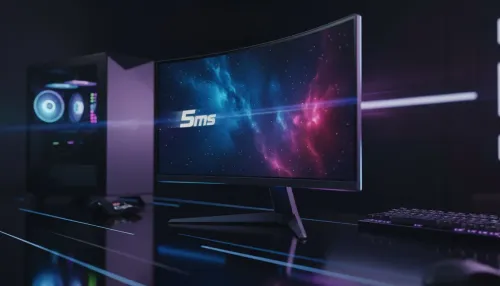
So, you’ve just unboxed and assembled your shiny new rig, powered by an MSI Pro B840-P motherboard. Lekker! But before you jump into your first game of Apex or Valorant, there’s a crucial step many South African builders skip. Your PC is likely running on safe, default settings, leaving a serious amount of performance on the table. Let's fix that by diving into the MSI Pro B840-P BIOS settings and unleashing your hardware's true potential. 🚀
Getting Started: Accessing Your BIOS
First things first, you need to get into the BIOS. It sounds technical, but it’s dead simple.
- Restart your computer.
- As it boots up, repeatedly tap the
Deletekey on your keyboard. - You'll soon land on the MSI Click BIOS screen.
You’ll likely start in "EZ Mode," which is great for a quick overview. For the real magic, press F7 to switch to "Advanced Mode." This is where we'll make the key adjustments to optimise your MSI Pro B840-P BIOS settings. Don't worry, we'll guide you through the essentials.
The Must-Change BIOS Settings for Peak Performance
You don't need to be a pro overclocker to get a noticeable speed boost. These three settings are the low-hanging fruit for maximum performance and are perfectly safe to change.
1. Enable XMP (A-XMP for AMD)
This is the most important setting to change. Your high-speed RAM is probably running at a sluggish default speed (like 2133MHz) out of the box. Enabling its Extreme Memory Profile (XMP) lets it run at the speed you actually paid for.
- Navigate to the OC (Overclocking) section.
- Find the "Extreme Memory Profile (XMP)" setting.
- Click it and select Profile 1.
- Press
F10to Save & Exit.
That's it! This single tweak can improve frame rates and system responsiveness dramatically. Ensuring your motherboard and CPU can handle your RAM speed is vital, which is why carefully matched motherboard and CPU combos are such a great starting point for any build.
2. Activate Resizable BAR (Re-Size BAR)
Resizable BAR is a feature that allows your CPU to access your graphics card's entire memory buffer at once, rather than in small chunks. For modern games, this can provide a free FPS boost of 5-10%. ⚡
- Go to Settings > Advanced.
- Find and enable "Re-Size BAR Support".
- Ensure "Above 4G memory/Crypto Currency mining" is also enabled (this is often a prerequisite).
This feature works best with newer hardware, making it a fantastic reason to consider upgrading. The latest platforms found in modern Intel barebone kits are built to take full advantage of technologies like this.
3. Optimise Your Fan Curves
Is your PC roaring like a jet engine under load, or getting a bit too toasty? A custom fan curve is the answer. The default settings are often too aggressive or too passive.
- In the BIOS, look for the "Hardware Monitor" section.
- Here, you can see each connected fan. Select a fan (like your CPU fan) and you'll see a graph.
- You can drag the points on the graph to tell the fan how fast to spin at certain temperatures. A good starting point is to keep it low and quiet at idle (below 40°C) and have it ramp up aggressively past 70°C.
A well-cooled machine is a happy machine, and a quiet one is even better. It's a key part of building a balanced system, whether you're starting with one of our AMD barebone kits or building from scratch.
TIP FOR YOU
Cooling Pro Tip 🔧
Once you're in Windows, you can use software like MSI Center or Fan Control (a free third-party app) to fine-tune your fan curves without having to reboot into the BIOS every time. It's perfect for testing and finding that sweet spot between cool performance and quiet operation.
Advanced MSI Pro B840-P BIOS Settings
For those who want to push things even further, the BIOS holds the keys to overclocking. Adjusting CPU Core Voltage and Ratio can squeeze out extra clock speed, but it requires patience and a good understanding of the risks. If you're running a high-end chip like those in our powerful AMD Ryzen 7 bundles, learning to undervolt or apply a slight overclock can yield fantastic results. However, for most gamers, sticking to XMP and Resizable BAR provides 90% of the benefit with none of the risk. ✨
Optimising your BIOS is one of the most satisfying parts of building a PC. With just a few clicks in your MSI Pro B840-P BIOS settings, you can go from stock performance to a fully optimised machine ready to crush the latest titles.
Ready to Build Your Ultimate Rig? A powerful PC starts with the right foundation. Whether you're upgrading or starting fresh, getting the core components right is everything. Explore our massive range of PC components and bundles and build the machine that will conquer your world.
Press the 'Delete' key repeatedly immediately after powering on your PC. If Fast Boot is enabled, use Windows Advanced Startup options to access the UEFI firmware.
Enable XMP (Extreme Memory Profile) immediately. This ensures your RAM runs at its advertised speed, significantly boosting FPS and system responsiveness.
The B840 chipset primarily supports memory overclocking via XMP. CPU core overclocking is limited compared to Z-series boards; focus on optimizing power limits instead.
Use M-FLASH. Download the latest BIOS file from the MSI website to a USB drive, reboot into BIOS, select M-FLASH, and choose the file to update safely.
By default, RAM runs at standard JEDEC stock speeds. You must access the Overclocking (OC) menu in BIOS and enable XMP Profile 1 to reach the advertised MHz.
Navigate to the Hardware Monitor section in BIOS. Set a custom Smart Fan curve to keep RPMs low when the CPU is idle and ramp up only under heavy thermal load.
Related Articles