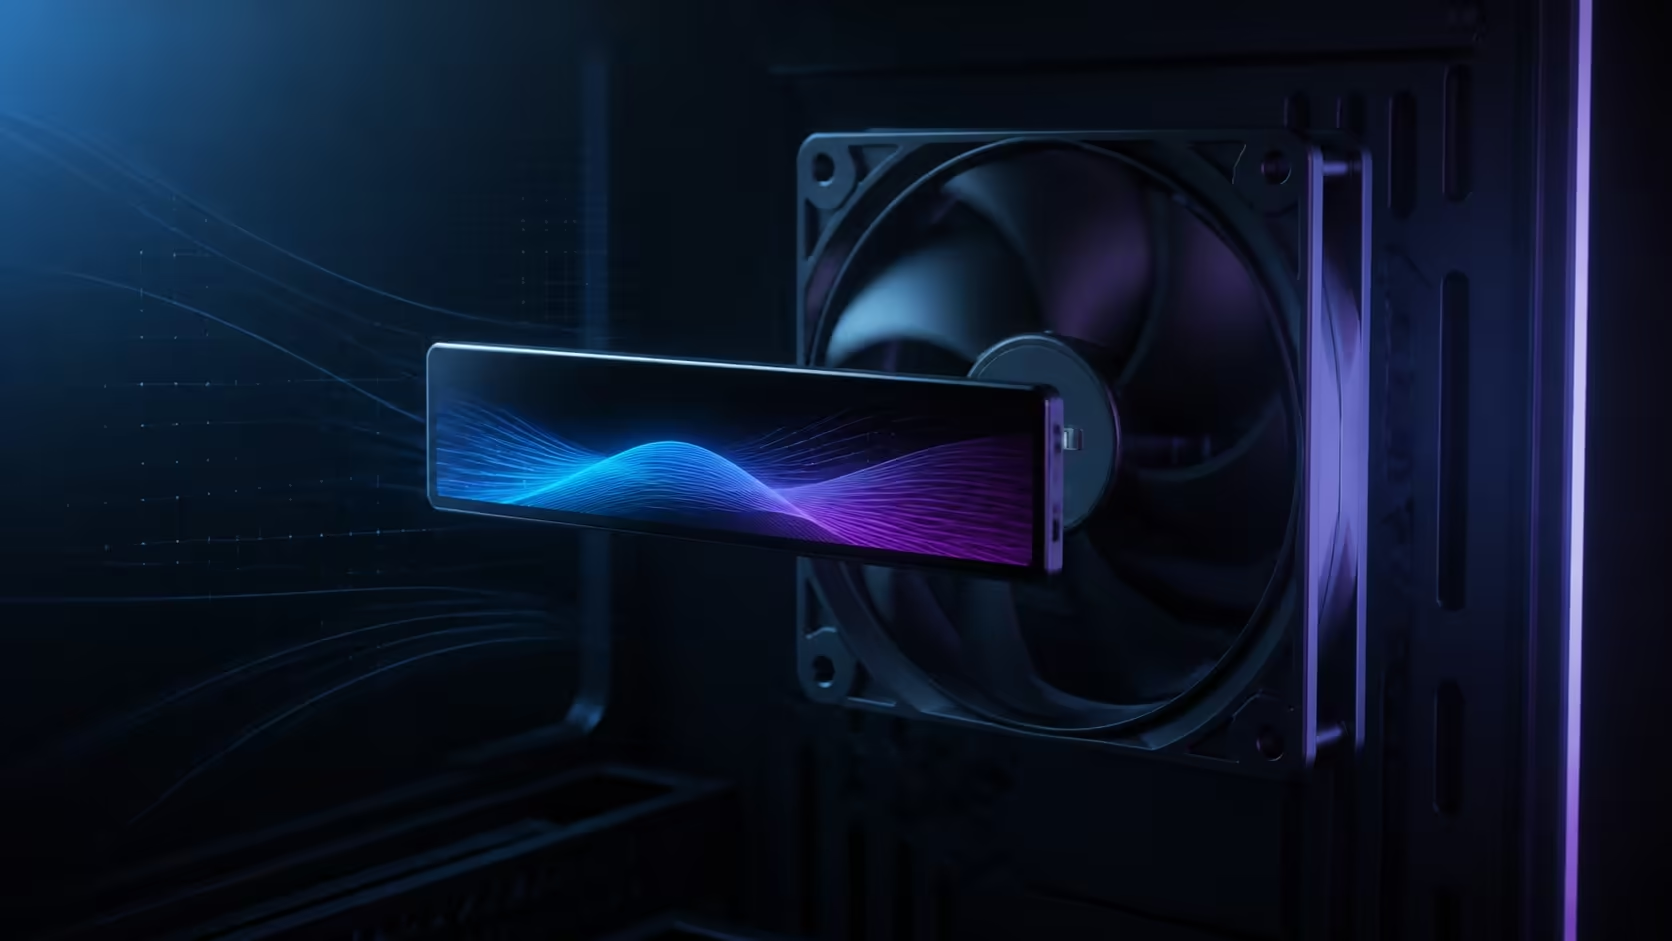
Thermalright's Fan Frame Vision-1 turns a standard 120mm fan position into a small system-information display. The frame is a separate accessory rather than a fan, so the buying question is less about airflow and more about space, connection routing and whether the screen will remain visible in the finished build. South African builders should wait for confirmed local pricing instead of converting an overseas listing.
Quick Answer
The Fan Frame Vision-1 is a magnetic 120x120x15mm display frame with a 3.69-inch, 640x172 screen rated at 500 nits. It connects through an internal USB 2.0 header and can show monitoring data or custom themes. The exact Evetech catalogue snapshot on 23 August found in-stock fans from R89 and a fan hub at R199, but no confirmed listing for this new screen accessory.
🧲 The magnetic mount makes fit the first test
The square frame clips onto a standard 120mm fan and supports horizontal or vertical placement. That sounds universal, but the extra 15mm depth changes the space around the fan. A front intake may sit close to a graphics card or cable channel. A top exhaust can share clearance with a motherboard heat sink, memory modules or an EPS power cable. A radiator installation adds another layer of thickness before the display is attached.
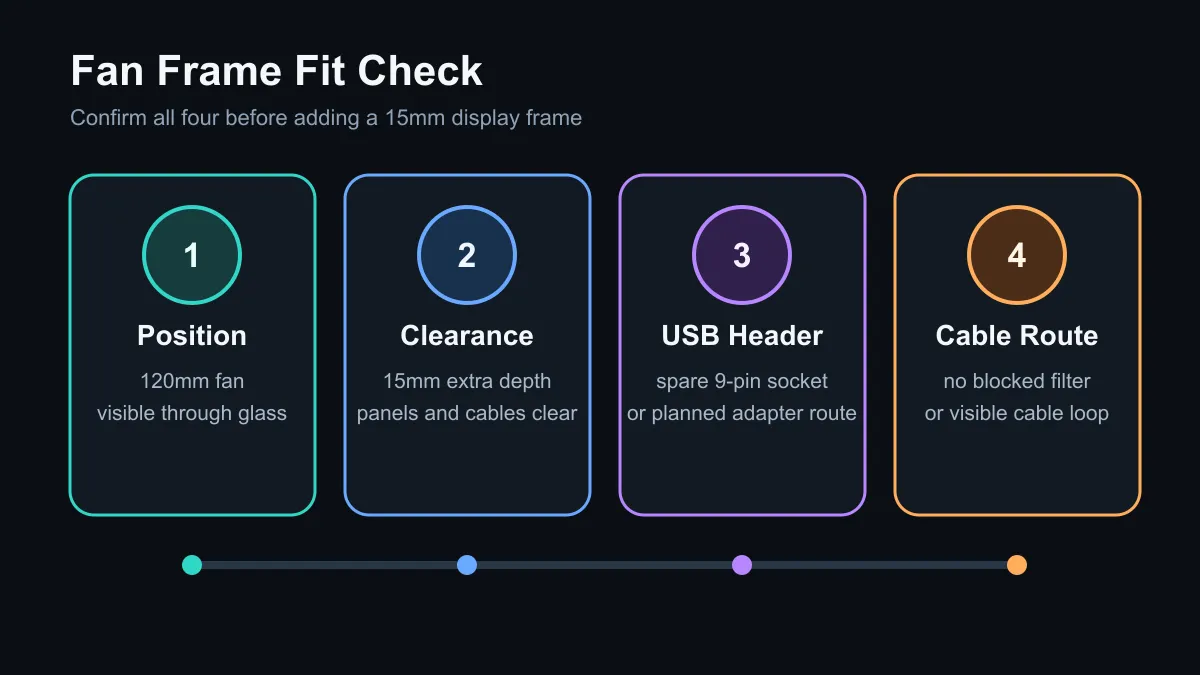
Measure the intended fan position with the side panel closed. Check that the screen face will remain visible through the case window and that its edge will not block a screw, removable filter or panel latch. The case fan range helps identify the correct 120mm base fan, but the frame does not replace that fan or improve its rated airflow.
The magnetic mounting also deserves a practical cable check. A clean display can look untidy if its lead has to cross the visible side of the motherboard tray. Plan the route to the nearest pass-through before buying, especially in a compact case where the top and rear fan cables already compete for one opening.
🔌 USB routing can be the real compatibility limit
Thermalright lists a motherboard 9-pin USB 2.0 header as the primary connection. Many current boards have only one or two internal headers, and those may already serve an AIO controller, case lighting hub, front-panel card reader or wireless accessory. Count the occupied headers rather than assuming an unused socket exists.
An internal hub can expand that capacity, while an external USB route may be possible through the supplied adapter. Either choice adds cables and another device for Windows to manage. Current fan controller options show why a display accessory should be planned as part of the wider control layout, not clipped in after every header is allocated.
The screen is software-driven. It can present system data and custom themes, but the usefulness depends on the software starting reliably and exposing the sensors a builder wants. Treat the display as optional information, not the only way to notice unsafe temperatures. Motherboard safeguards and proper monitoring remain more important than a decorative readout.
📊 A small screen needs a clear purpose
At 640x172, the panel is wide and shallow. That format suits a few large values, a compact graph, an animation or a themed image. It is not a substitute for a full secondary monitor. Place CPU or GPU temperature, fan speed and load in large type, then confirm the figures can be read from the normal seating position.
Avoid turning the display into another source of distraction. Fast animations and bright white themes can dominate a dark build, while too many sensor values become unreadable. A restrained layout with two or three important numbers is more useful during a game or stress test. The listed 500-nit brightness provides headroom, but software control and case glass tint will determine the final appearance.
The accessory carries a one-year listed warranty, although a South African warranty path and local stock are not yet confirmed. That distinction matters because an imported display adds shipping, support and replacement risk to what is fundamentally a cosmetic upgrade.
💰 Compare the complete build cost, not the frame alone
The captured local sample included a 140mm ARGB fan at R89, 120mm PWM fans at R149 and a fan hub at R199. Those rows are not direct alternatives to the Vision-1. They show how quickly the full cost changes when a build still needs the fan, hub, cable routing and display frame.
If cooling performance is the goal, spend first on suitable fans, unobstructed intake space and a balanced fan curve. The cooling best sellers provide a better starting point for that job. Consider the display only after temperatures, noise and cable management are already under control.
Buy when the frame fits a clearly visible 120mm position, an internal USB header is available and a confirmed local offer includes acceptable support. Wait if the case is tight, the screen would be hidden or an imported price is the only reference. The Vision-1 is an interesting finishing part, but it should not displace a functional cooling upgrade.
Frequently Asked Questions
Does the Fan Frame Vision-1 include a fan?
No. It is a separate magnetic display frame designed to attach to a standard 120mm fan.
Will it make a PC run cooler?
No cooling improvement is claimed. It can display monitoring information, but airflow still comes from the fan and case layout.
Can it connect without an internal USB header?
An external USB route is possible through the listed adapter, although that can make cable management less tidy.
Is local pricing available?
No confirmed South African listing or rand price was available in the captured catalogue snapshot.
Planning a cleaner showcase build? Confirm the fan size, spare USB header and 15mm clearance before adding a display accessory.