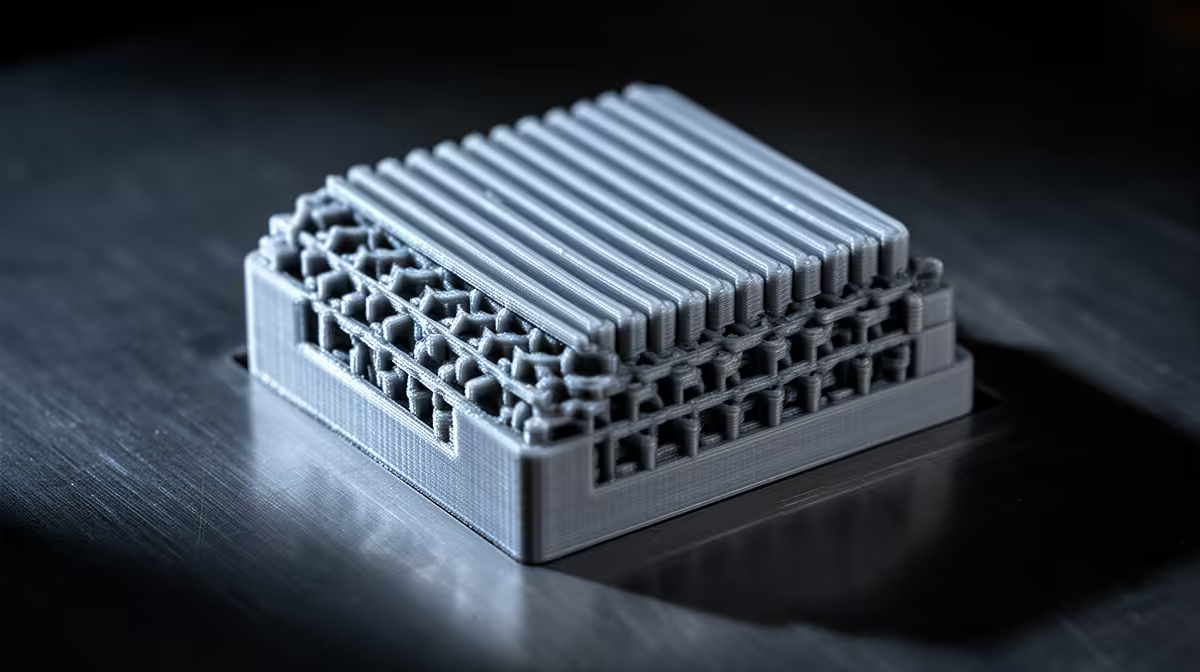
You print a box, the walls look great, and then the lid surface comes out looking like a ploughed field: faint ridges, little gaps, a rough feel under your thumb. That texture is ribbed or under-filled top layers, and it has one core cause: too few solid top layers are trying to stretch across sparse infill underneath. Add more top layers and feed them more plastic and the surface closes up.
Quick Answer
Ribbing and gaps on a top surface mean your solid top layers cannot bridge the gaps in the infill below them. Set at least four to five solid top layers and raise top-surface flow toward 100%, and the surface fills in smooth. More layers and more material is the fix, not a hotter nozzle.
Why the top surface ribs and gaps
Infill is deliberately sparse to save plastic and time, so under your top surface there is a lattice with open spaces between the lines. The solid top layers have to bridge across those open spaces. If there are too few of them, the first solid layer sags slightly into each gap and the layers above never fully recover, so you see the infill pattern telegraphing through as ribs, with little unfilled pinholes where the plastic could not span the gap.
It is a coverage problem. Each added solid top layer gives the surface another chance to even out over the infill below it, and a little extra flow makes each of those layers lay down fuller and close the gaps rather than leaving them open.
The two-setting fix
Start with top solid layers. Many slicer profiles default to three, which is marginal over sparse infill. Raise it to four or five and the surface has enough stacked solid passes to bridge the lattice and present flat. Thicker top surfaces need a touch more, so scale up if you print at fine layer heights.
Then raise the top-surface infill flow toward 100%. Some slicers underfill the top surface by default to avoid a slightly proud finish, but that is exactly what leaves the small gaps. Pushing top flow to full ensures each solid line touches its neighbour with no thin spots. If you want to know whether your machine's extrusion is the limit, browse current printers and upgrade parts through the popular printer accessories on the Evetech bestsellers shelf to rule out a tired hotend.
Supporting tweaks that help
A denser infill also helps, because tighter infill lines give the top layers a smaller gap to span. Going from a low infill percentage to a moderate one shortens every bridge the top surface has to make. Slowing the top-surface speed a little lets each solid line settle flat instead of being dragged. And if ribbing persists despite all this, check for under-extrusion generally, since a partly clogged nozzle starves every layer. For a machine that handles fine top surfaces more predictably out of the box, compare models in the desktop 3D printer range at Evetech.
Frequently Asked Questions
How many top solid layers should I use?
Four to five is a safe target for most prints. Three is often too few over sparse infill and lets the pattern show through. If you print at very fine layer heights, lean toward the higher end so the total solid thickness stays adequate.
Does raising infill density fix top-layer gaps?
It helps, because denser infill gives the top layers a smaller gap to bridge. It is not the whole answer on its own, though. Pair more infill with enough top solid layers and full top-surface flow for a clean, closed finish.
Why does the infill pattern show through my top surface?
Because too few solid layers are spanning the open infill below, so the first layer sags into each gap and the texture telegraphs upward. Adding top layers and increasing top flow gives the surface enough material to even out.
Should I increase the nozzle temperature to smooth the top?
Not as a first step. The ribbing is a coverage and flow issue, not a heat one. More top solid layers and higher top-surface flow address the actual cause, whereas extra heat risks new problems like stringing.
Chasing a smooth, closed top surface instead of a ribbed one? Explore 3D printers and upgrade parts in the FDM printer range at Evetech and dial in the top layers that finish every print clean.