So, you’ve dived into the wild world of AI art with Stable Diffusion, only to find your PC groaning under the strain. Waiting minutes for a single image feels like downloading a song on dial-up back in the day, hey? Don’t stress. Proper Stable Diffusion GPU optimization isn’t some dark art reserved for tech wizards. It’s about smart tweaks that can slash generation times and unlock higher-quality images, right here in South Africa. 🚀
Why GPU Optimisation is Key for Stable Diffusion
Before we jump into the command-line arguments and settings, let's quickly cover why this matters. Stable Diffusion is incredibly demanding on your graphics card, specifically its Video RAM (VRAM). Think of VRAM as your GPU's dedicated workspace. The bigger and faster it is, the more complex the AI model and the larger the image it can handle without choking.
Effective Stable Diffusion GPU optimization directly translates to:
- Faster Image Generation: Less time waiting, more time creating.
- Higher Resolution Outputs: Move beyond 512x512 pixels without "out of memory" errors.
- Ability to Run More Complex Models: Use the latest, most powerful AI models.
- A Cooler, Quieter PC: An optimised process is an efficient one, putting less strain on your hardware.
Core Techniques for Stable Diffusion GPU Optimisation
Ready to get your hands dirty? These foundational tweaks will give you the biggest performance gains right off the bat. Most of these changes happen in the command-line arguments you use to launch your Stable Diffusion interface, like AUTOMATIC1111's web UI.
Start with Your Drivers
This sounds basic, but it’s the most common oversight. Outdated graphics drivers can cause unexpected errors and poor performance. Before you do anything else, make sure you have the latest drivers installed. For NVIDIA users, this means the newest Game Ready or Studio Driver. For Team Red, ensure AMD's Adrenalin software is up to date. A fresh driver install can often solve performance issues before they even start.
Master the Command-Line Arguments 🔧
These are simple flags you add to your launch script that tell Stable Diffusion how to manage its resources.
--xformers: This is the big one for NVIDIA users. It enables a memory-efficient attention implementation that can significantly speed up image generation, often by 20-50%, without sacrificing quality. If you have an NVIDIA card, this should be your first port of call.--medvram: Got a GPU with around 8GB of VRAM? This argument is for you. It optimises VRAM usage by offloading some models from the GPU to your system RAM when they aren't actively being used. It’s a fantastic balance between speed and memory conservation.--lowvram: If you're working with a card that has 4GB or 6GB of VRAM, this is your lifeline. It’s much more aggressive in its memory-saving, which will slow things down, but it will at least let you generate images without constant crashes.
Pro Tip: Finding Your Launch Script ⚡
AUTOMATIC1111 users on Windows, the file you need to edit is usually called webui-user.bat. Right-click it and choose 'Edit'. You'll see a line that says set COMMANDLINE_ARGS=. This is where you'll add your flags, for example: set COMMANDLINE_ARGS=--xformers --medvram. Save and restart!
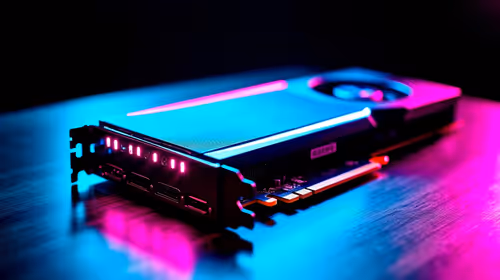
The Hardware Reality Check
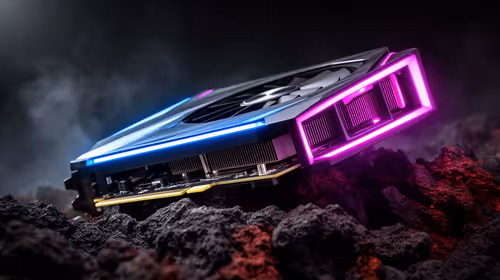
While software tweaks work wonders, there's no substitute for raw power. The amount of VRAM is the single most important factor for AI work. A card with 8GB is a decent starting point, but if you're serious about generating high-resolution art or training your own models, you'll feel the benefit of 12GB, 16GB, or more. The latest NVIDIA GeForce cards like the RTX 4070 SUPER or 4080 SUPER offer a brilliant balance of VRAM and processing power for enthusiasts.
Advanced Optimisation Tricks ✨
Once you've got the basics sorted, you can eke out even more performance.
Batch Size vs. Batch Count
In your UI, you'll see options for "Batch size" and "Batch count".
- Batch count: Generates a set number of images one after another. This is light on VRAM.
- Batch size: Tries to generate multiple images simultaneously in a single pass. This is much faster but consumes a huge amount of VRAM.
For most setups, keeping the Batch size at 1 and increasing the Batch count is the most stable approach. For those with high-end hardware, like the 24GB found on an RTX 4090 or professional-grade workstation graphics cards, experimenting with a larger batch size can dramatically speed up your workflow.
Choose Your Models and Samplers Wisely
Not all models are created equal. Some are larger and more VRAM-intensive. Using pruned models, often in the .safetensors format, can save space and load faster. Similarly, certain samplers are quicker than others. Samplers like Euler a or DPM++ 2M Karras often provide excellent results in just 20-25 steps, making them much faster than older samplers that might need 50+ steps.
Ultimately, achieving peak Stable Diffusion GPU optimization is a journey of balancing software tweaks with the capabilities of your hardware. By applying these tips, you'll be well on your way to a faster, smoother AI art experience. And if you find you've hit the ceiling of what your current hardware can do, remember that the right graphics card is the most powerful upgrade you can make.
Ready to Unleash Your AI Creativity? Optimisation can take you far, but the right hardware is the heart of any AI powerhouse. Explore our massive range of powerful GPUs and find the perfect engine to bring your visions to life.