
Best Wireless Gaming Headset in South Africa - Updated July 2026
Wireless gaming headsets are available at Evetech from R499 including VAT, with 75 models in stock. The range runs to R999 for console-specific PDP Phantom Air models.
Read moreReady to build your dream flight simulator cockpit in South Africa? This guide compares the journey of a DIY build against the convenience of a pre-built setup. We'll help you weigh the costs, effort, and customization options to find the perfect flight experience for you. Take off now! ✈️🛠️

So, you've spent hours soaring over a digital Drakensberg in Microsoft Flight Simulator, and the keyboard and mouse just aren't cutting it anymore. You're dreaming of a proper flight simulator cockpit, a setup that makes you feel the pull of the yoke and the rumble of the landing gear. But here in South Africa, what’s the best approach? Do you roll up your sleeves for a DIY project or invest in a ready-made rig? Let's break it down.
The DIY path is a rewarding journey for the hands-on simmer. It’s about more than just saving a few Rand; it’s about creating a flight simulator cockpit that is uniquely yours, tailored to your exact preferences, from the button layout to the seat position.
The biggest advantage is customisation. You choose every single component. You can start small, perhaps by mounting a yoke to your desk and upgrading your seat to something more ergonomic from a solid range of gaming chairs available in South Africa. Over time, you can add rudder pedals, a throttle quadrant, and instrument panels. This phased approach makes the cost more manageable.
However, be prepared for a significant time investment. Sourcing parts, ensuring compatibility, and the actual construction can take weeks, if not months. You’ll need some basic technical skills and a fair bit of patience. The initial satisfaction of getting your first set of Thrustmaster controls working is immense, but troubleshooting a non-responsive switch can be equally frustrating.
If your time is limited or you prefer a guaranteed, polished experience, a ready-made flight simulator cockpit is the perfect solution. These rigs are engineered for immersion and compatibility right out of the box. Everything just… works.
The primary benefit is convenience. You get a professionally built, stable platform designed specifically for flight simulation hardware. The ergonomics are sorted, the cable management is clean, and you can go from unboxing to your first flight in a fraction of the time it takes to build from scratch. This plug-and-play approach lets you focus on flying, not fixing.
Of course, this convenience comes at a higher initial price. You're paying for the research, development, and assembly done by experts. While less customisable than a full DIY build, many ready-made systems are modular, allowing for future upgrades. The most crucial part, the PC powering it all, needs to be top-notch. A dedicated Microsoft Flight Simulator gaming PC is the heart of any serious setup, ensuring smooth frame rates even over detailed cityscapes.
your display is one of the most critical decisions for your flight simulator cockpit. A triple-monitor setup offers an incredible panoramic view, but can be complex to align perfectly. For a seamless, wrap-around experience without the hassle of bezels, consider a single ultrawide. A high-quality [curved monitor](https: www.evetech.co.za buy-curved-monitors x 1588.aspx) can make you feel like you're truly sitting in the pilot's seat.
Whether you build or buy, every great flight simulator cockpit relies on the same core components. Getting these right is the key to a truly believable experience.
Ultimately, the choice between a DIY or a ready-made flight sim setup comes down to your personal priorities: time, budget, and your desire for customisation. Both paths can lead to an incredible home cockpit that will provide countless hours of airborne adventure.
Ready for Take-Off? Whether you're sourcing individual components for a custom build or looking for a powerful PC to be the heart of your rig, the journey starts here. Explore our massive range of Flight Simulator PCs and components and build the cockpit of your dreams.
Generally, yes. A DIY flight simulator cockpit can be significantly cheaper as you can source materials and components over time, but it requires technical skill and effort.
A basic setup needs a PC, flight simulation software, a monitor, and flight controls (yoke or stick and throttle). A dedicated seat and frame are the next big upgrade.
Build time varies greatly based on complexity. A simple frame might take a weekend, while a full-scale replica with integrated electronics could take months of dedicated work.
Pre-built cockpits offer convenience, professional construction, and guaranteed compatibility. For those short on time or DIY skills, they are an excellent investment.
Yes, many sim racing chassis are adaptable for flight simulation with the right mounts for a yoke, throttle quadrant, and rudder pedals, making them a versatile choice.
Online communities, forums, and specialized websites are fantastic resources. Many enthusiasts share detailed plans, parts lists, and step-by-step instructions for a custom build.
Wireless gaming headsets are available at Evetech from R499 including VAT, with 75 models in stock. The range runs to R999 for console-specific PDP Phantom Air models.
Read more
Gaming keyboards are available at Evetech from R399 including VAT, with 41 models in stock. The best keyboards run from R3,999 analog and Hall-effect boards up to R6,699 flagships.
Read more
Gaming headsets are available at Evetech from R329 including VAT, with 120 models in stock. The best headsets open at R6,499 and run to R15,499 for the Arctis Nova Elite.
Read more
Gaming mice are available at Evetech from R199 including VAT, with 105 models in stock. The best mice start at R3,699 for the Razer DeathAdder V3 Pro and run to R4,199.
Read more
Gaming headsets are available at Evetech from R329 including VAT, and within a R1,000 ceiling the best options run from R899 wired up to R999 for wireless PDP Phantom Air.
Read more
Gaming mice are available at Evetech from R199 including VAT, with 25 models in stock under R500. The strongest options run from R399 up to R499 wireless tri-mode mice.
Read more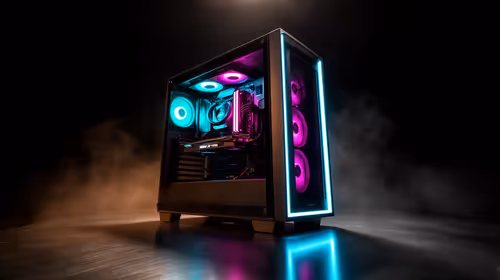
The great PC refresh of 2026 is driven by Windows 11 requirements: millions of machines lack TPM 2.0 or a supported CPU, forcing replacement over a simple upgrade. SA home and office users on 2017-era PCs are in this global wave with Windows 10 now unpatched.

Searching for a universal smartphone mount in South Africa? 📱 Discover the essential features to ensure your device stays secure, stable, and perfectly positioned during your daily commute. 🚗
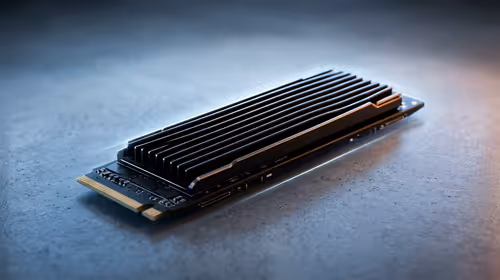
Pre-Black Friday NVMe SSD buying advice for SA should be shortlisted around the job it must do. South African buyers should compare capacity, speed, thermals, and motherboard support, warranty path, and upgrade room before treating any pick as best.

Wi-Fi 7 vs Wi-Fi 6e for cinematic story games comes down to router support, latency goals, device compatibility, and coverage. SA buyers should match the choice to the real network setup.
Wireless gaming headsets are available at Evetech from R499 including VAT, with 75 models in stock. The range runs to R999 for console-specific PDP Phantom Air models.

FPS drops blamed on a wireless mouse often point to input, driver, USB, network, or system-load checks. Use a quick SA-friendly troubleshooting flow to isolate software, firmware, thermals, storage, and game settings before replacing hardware.

How to fix fps drops on steam deck starts with power profile, shader cache, storage health, and per-game settings. For South Africa, check charger quality, heat, and download stability before assuming the handheld needs repair. Retest after updates.

How to fix low FPS after an RTX 5080 build upgrade starts with driver cleanup, display settings, thermals, and power mode. For SA gamers, verify GPU usage, PCIe speed, RAM profile, and CPU limits before changing parts.
Wireless gaming headsets are available at Evetech from R499 including VAT, with 75 models in stock. The range runs to R999 for console-specific PDP Phantom Air models.
Gaming keyboards are available at Evetech from R399 including VAT, with 41 models in stock. The best keyboards run from R3,999 analog and Hall-effect boards up to R6,699 flagships.
Gaming headsets are available at Evetech from R329 including VAT, with 120 models in stock. The best headsets open at R6,499 and run to R15,499 for the Arctis Nova Elite.
Gaming mice are available at Evetech from R199 including VAT, with 105 models in stock. The best mice start at R3,699 for the Razer DeathAdder V3 Pro and run to R4,199.