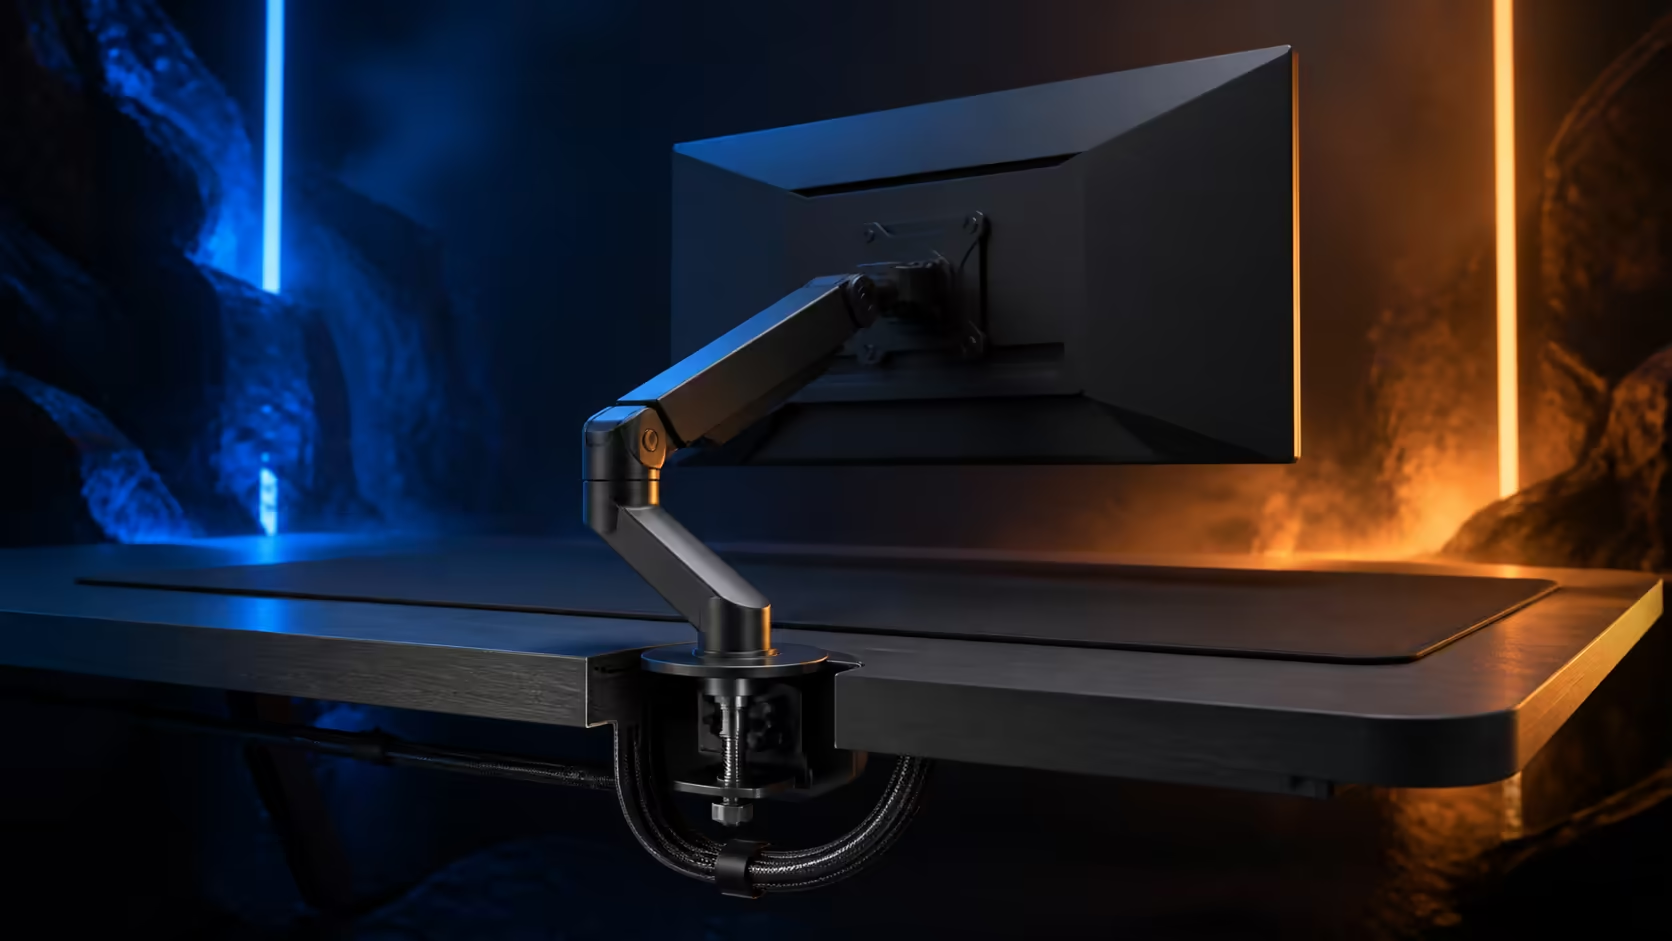
A monitor arm is compatible only when the screen, mount, desk and installation point all agree. Grommet monitor mounts monitor arms and desk compatibility require more than finding a round opening. The R5,099 Arozzi Arena includes monitor attachment and three cable cut-outs on a 160x82cm worktop, providing a useful planning reference without making every arm interchangeable.
Quick Answer
Match the arm to the screen's supported weight, size and mounting interface, then confirm the base fits the intended desk thickness, opening and underside contact area. Keep frame parts and cables clear of the lower plate. The Arena costs R5,099 and supports monitor-attachment planning, but each chosen grommet or clamp solution must pass its own measurements and installation directions.
🧾 Check screen and arm together
Start with the exact monitor model. Record its mounting interface, weight without the original stand where applicable, panel dimensions and any cable connectors that move with the display.
Match those values to the arm's supported range. Do not use panel width alone, and do not assume a mount that holds one screen will hold another with similar branding or appearance.
For dual arms, consider the combined base load and each panel's movement arc. The screens should not collide at their normal positions or when one is adjusted forward.
Plan how the display will be lifted onto the arm. Large panels may require another person and a clear temporary holding area. Never balance a monitor on the Arena's edge during installation.
Compare gaming desks with monitor options with the chosen arm specification beside the desk plan.
📏 Inspect the desk interface
Grommet bases typically use an opening and a lower plate; clamp bases use an edge. Each has required dimensions, contact surfaces and clearances defined by its hardware.
Measure the intended Arena position from above and below. The worktop's three cable cut-outs are useful for routing, but no opening should be treated as a mount point until its size and surrounding area meet the arm requirements.
The lower plate needs flat contact without overlapping frame parts, adjustment controls or an underside organiser. Check that tightening hardware remains reachable for assembly and later inspection.
Keep the huge full-surface mousepad clear during installation. Protect the surface from loose metal parts and never cut or drill it as an improvised compatibility fix.
The Arena includes monitor attachment as a desk feature. Use that planned provision in accordance with the desk and chosen hardware directions rather than substituting random plates or fasteners.
Review Arozzi gaming layouts for potential display positions, then measure the particular base and screen.
🔧 Install and balance methodically
Remove nearby electronics and organise every supplied part. Follow the mount sequence exactly. A plate that rocks, a bolt that does not engage correctly or an opening outside the required range is a stop condition.
Tighten evenly to the instructed level. Extra force does not resolve poor alignment and may damage components. A rocking base is a stop condition; improvised spacers cannot create a compatible interface.
Add the monitor through the arm maker's safe method. Support the screen until the attachment is fully secured. Set tension or balance using the documented adjustment procedure.
Move the panel slowly through left, right, forward, back and tilt positions. Check wall, second-screen and accessory clearance at every point. A safe resting position is not enough if ordinary adjustment creates a collision.
Set the Arena's height around the keyboard and mouse posture, then align the monitor to the gaze. Desk height and arm height solve separate body relationships.
If a panel drifts, unload it safely and revisit the correct balance process. Repeated arbitrary tightening while the screen hangs can hide an incompatibility or incorrect setup.
🧵 Plan cables for movement and service
Display power and signal leads must reach through the full arm range without tightening. Create controlled service loops near joints and avoid pinching cables inside covers or beneath plates.
Use a suitable Arena cut-out for the display bundle while keeping other openings available for PC and input groups. Do not pack cables around a grommet base where they interfere with contact or inspection.
Support adapters beneath the worktop rather than hanging their weight from the monitor. Watch every cable during the first arm movement and height adjustment.
Label both ends. An arm makes ports less visible, so readable tags reduce tugging when a signal lead needs replacement.
Inspect the attachment after initial use, a room move or a screen change, following the hardware guidance. A new panel means compatibility must be checked again.
Browse complete gaming setup options once the arm and desk relationship is stable. Added lights, webcams and speakers must remain outside the display sweep.
Clamp and grommet mounts solve attachment differently. A clamp grips a compatible desk edge and needs clear upper and lower contact. A grommet system passes hardware through a suitable opening. Neither method should be substituted for the other without the mount supporting that configuration.
Rear clearance matters for clamps and arm movement. A desk close to a wall may leave insufficient space for the clamp body, tools or a screen moved backwards. Include that gap in the room plan before centring the surface.
Consider the user's reach when moving the panel. Adjustment handles or the screen edge should be accessible without leaning across equipment. A theoretically wide movement range has little value when daily repositioning strains the shoulder.
Shared users should save separate monitor and desk references. One person may need the panel closer or at a different height. Move the arm through its approved controls, never by pulling on cables or using the panel as a lever.
For portrait orientation, map the taller screen envelope and connector direction. The panel can collide with the desk, webcam or light even when landscape mode cleared those objects. Recheck cable slack in the new orientation.
Dust and cleaning around the mount require access. Protect electronics, use the Arena's easy-care surface routine and never allow liquid to collect near the grommet, cut-outs or lower plate.
Store unused mounting parts and the arm instructions together, labelled for the exact installation, so a later screen change begins with the correct hardware history.
Frequently Asked Questions
What makes a desk compatible with a grommet mount?
The opening, worktop thickness, surrounding contact area and underside clearance must all meet the mount's requirements.
Which monitor details determine arm compatibility?
Check supported weight, screen dimensions, mounting interface and the arm's intended number of displays.
Can any cable cut-out double as a mount opening?
No. A cable route becomes a mount point only when exact dimensions and contact requirements match the hardware.
Why is cable clearance important around an arm?
Leads must follow the screen through its movement without pinching, pulling ports or blocking the mount base.
Does the Arozzi Arena support monitor attachment?
Yes. The chosen arm and screen still require an independent compatibility and installation check.
How should the mount be tested after installation?
Move the panel slowly through its intended range, observe the base, check cable slack and repeat normal typing at the working height.
What is the Arena Dark Grey price?
The 160x82cm desk costs R5,099.
Ready to make four compatibility checks before tightening the first mount plate?
Explore Evetech's monitor-ready desks, match screen, arm, worktop and underside, and preserve cable clearance through the complete display sweep.