A reliable podcast studio is less about owning a dramatic room than making one ordinary room behave predictably. A spare bedroom can produce clear, repeatable episodes when speech reflections, fan noise, cable routes and file handling are considered before the first guest arrives. In South Africa, hard masonry surfaces and summer heat make those practical choices especially noticeable.
Quick Answer
Design a podcast studio around controlled speech, comfortable monitoring and a routine that can be repeated every recording day. A simple microphone can be the beginning of the setup at R199, but the useful investment is a quiet room and a workflow that protects the recording after the conversation ends. Pick the calmest available space, tame reflections around the speaker and keep mains power away from audio leads where practical.
\ud83c\udfa4 Choose a room you can use consistently
The ideal room is often the one whose noise you already understand. Listen for road sound, a refrigerator cycling nearby, plumbing, neighbours and a computer fan before deciding where the desk should live. A room that is slightly smaller but available at the same time every week can be easier to manage than a large shared lounge.
Bare plastered brick, concrete and tile can throw a voice straight back towards the microphone. Start with the useful soft surfaces already in the room: curtains, a rug, a filled bookshelf and upholstered furniture. They do not turn a home into a professional control room, but they can stop a close voice from acquiring an obvious hollow edge. Place the speaker away from a bare wall where possible and make a short test recording after every layout change.
For recording hardware, compare streaming essentials according to how many people need to be heard, not according to the most impressive-looking accessory.
\ud83d\udd0c Keep sound and power from competing
South African homes use 230V power, so safety deserves the same attention as sound. Use sound fixed power distribution in good condition rather than running loose adapters across a doorway. Keep signal leads and mains cables apart when the route allows it; if they must meet, crossing them rather than following the same path can reduce the chance of unwanted interference.
Cable labels pay off after the first equipment move. Mark the microphone end, recorder end and any adapter that stays with a specific device. It saves time when a guest arrives, and it makes fault-finding calmer than unplugging everything at once. A suitable microphone selection should be matched with the right connection path, stand and monitoring arrangement.
\ud83d\udcf6 Plan for hot days and digital files
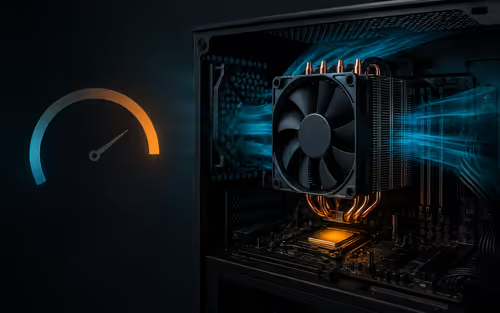
Cooling is a recording decision. If a room becomes hot during the day, cool it before the session, then pause airflow that is audible on the take. Between segments, open the room again and clean computer vents regularly so a dust-loaded fan does not become part of every episode. Avoid chasing silence by making the host uncomfortable; a slightly different recording time can be the better answer.
If video is part of the show, think about sightlines before buying a camera. The subject needs a consistent position, the background needs to make sense, and files will take more storage than audio alone. Review webcam options only when the format genuinely benefits from a picture.
\ud83e\udde9 Build a repeatable episode routine
Record a brief room-tone clip before the conversation. It provides a useful reference for editing and reveals new hums or fans before a full interview is underway. Where the equipment permits it, isolated tracks give more flexibility when one voice needs work later.
Keep the original session intact, make a second copy before editing and name files so a future search is obvious: date, guest or subject, and version. Fibre makes an off-site copy convenient for many households, while a limited connection may call for overnight uploading or a local backup first. The important part is having a second copy before any edit becomes irreversible.
Frequently Asked Questions
Which room is most suitable for a home podcast studio?
Use the quietest room with dependable access and fewer hard, reflective surfaces. A predictable small room is often more useful than a grand space full of interruptions.
Do brick walls make podcast audio worse?
They can create strong reflections when they are paired with tile and empty floor area. Furniture, curtains and carefully placed absorption can make speech easier to manage.
How should microphone and power cables be arranged?
Keep audio leads separate from 230V runs where practical, and use safe power distribution. Avoid loose adapters and trip hazards around the recording position.
Does an audio podcast need a webcam?
No. Add a camera only when video supports the format, because it also adds lighting, framing, storage and editing work.
What should be backed up after recording?
Keep the untouched session and make another copy before editing or uploading. Clear file names make a later recovery much less stressful.
Ready to make the next episode easier to record?
Explore microphone and streaming essentials that fit your room, connection plan and show format.