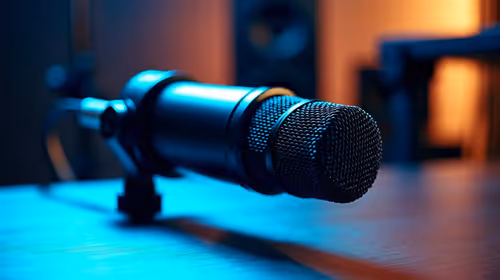
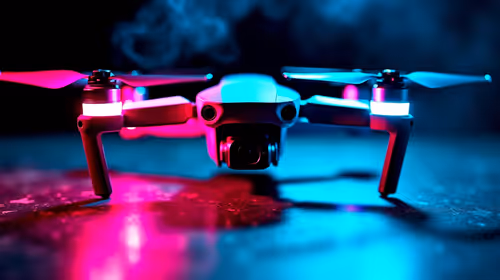
A microphone that drifts downward halfway through a recording, or an arm that bounces every time you knock the desk, ruins more sessions than any cheap capsule ever will. The right boom arm for a studio microphone holds your mic exactly where you put it, hides the cable, and stays put for the length of a stream or a podcast episode. Get the weight rating and the build wrong and even an expensive mic sounds amateur.
Quick Answer
The best studio boom arm uses calibrated spring tension to hold a 1kg mic steady at any angle and routes the cable internally to keep your desk clean. The non-negotiable rule: pick an arm whose load rating beats your microphone's weight by at least 200g. Most quality steel arms cope with around 1kg, and well-known options include the Rode PSA1+ and the broadcast-grade Heil Sound PL2T.
The Spring Is The Whole Game
Almost every complaint about boom arms traces back to one part: the spring. A poorly tensioned arm sags slowly under the weight of a heavy mic over a session, leaving you constantly nudging it back up. A good arm holds firm at whatever angle you set, which is the entire reason you bought it instead of a desk stand.
This is why the upgraded Rode PSA1+ matters. Its predecessor's most common failure point was exactly this spring sag, and the newer version uses an improved spring that keeps consistent tension through the full range of motion while carrying up to 1kg. For heavier dynamic mics, the all-steel Heil Sound PL2T uses a dual-pivot tension system rated to roughly 1kg that resists drift, which is why it became a broadcast staple.
Match The Load Rating To Your Mic
This is the single number people ignore, and it causes most arm failures. Your arm's maximum load should sit at least 200g above your microphone's actual weight. A heavy dynamic mic plus a shockmount and pop filter can add up faster than you expect, and an arm running at its limit will sag and wobble no matter how good the spring is.
So weigh your full setup, not just the mic, then choose an arm with headroom above that figure. A 1kg-rated steel arm handles the large majority of studio and streaming mics with margin to spare. If you run something unusually heavy, step up to a broadcast arm built for the load rather than hoping a lighter one copes.
Internal Cable Routing Is Worth Paying For
An exposed cable does two annoying things: it clutters your desk and it drags on the arm, fighting the spring and adding tension noise. Arms with internal cable channels thread the XLR or USB lead through the body of the arm, so it stays tidy and out of the way. Beyond looks, contained cabling can cut vibration-induced noise meaningfully compared to a cable flapping against the arm.
Look for an arm that routes the cable fully inside, with clean entry and exit points near the clamp and the mic mount. It makes repositioning smoother and keeps the whole setup looking deliberate rather than improvised, which matters if you appear on camera.
Clamp vs Grommet Mount: Which to Choose
How the arm attaches to your desk is a decision people skip until it causes problems. Desk clamp mounts grip the edge from above and below, fit most standard desk thicknesses, and require no tools or holes. They work on virtually any desk and come off cleanly when you move. Most quality arms handle edges up to around 55mm, but check your desk before buying.
Grommet mounts, also called insert or in-desk mounts, pass a threaded post through a hole in the desk surface and tighten from below. They are more stable than a clamp, with no risk of the arm rocking on a thick or rounded edge. The trade-off is that you need an existing grommet hole or you drill one yourself. The Rode PSA1+ ships with both options in the box, which is one reason it holds its value as a go-to option. If you plan to leave the arm in place permanently and want maximum rigidity, the grommet route is the stronger choice. If the desk moves with you, or you rent your space, the clamp wins.
Clamp, Reach And Desk Fit
The mount is the last piece people check and the first to cause grief. A desk clamp needs to fit your desk's edge thickness, and many quality arms handle edges up to around 55mm, but verify yours before buying. A clamp too shallow for a thick desk simply will not bite securely.
Reach matters too. A long arm with full rotation, such as the roughly 820mm horizontal reach and 360-degree swing on the PSA1+, lets you bring the mic in close for recording and swing it clear when you are done. Pair the arm with closed-back headphones so you can monitor without bleed, and the headphones and headsets at Evetech cover that side of the chain. When you want a quick read on what creators are actually buying, the best-selling headsets at Evetech point you toward proven monitoring options to sit alongside the arm.
Positioning For Best Sound
Where the arm puts your mic is just as important as how well it holds it there. The ideal position for most cardioid mics is slightly off-axis: angle the capsule so your mouth speaks across the diaphragm rather than directly into it. That simple adjustment reduces plosive impact and lets you keep a pop filter as a safety net rather than a crutch.
Arm height matters for camera work. If you appear on screen, a long arm lets you drop the mic in from above or bring it in from the side, keeping it out of the frame while still landing it close enough for a clean signal. Setting the arm at the correct height before a session rather than tweaking it live also keeps movement noise out of the recording. Most broadcast-grade arms have enough reach to position the mic correctly in any of these configurations without forcing you to adjust mid-take.
Tension Adjustment and Long-Term Maintenance
Most quality arms have an adjustment screw or knob that lets you dial in spring tension to suit the weight of your specific mic. Set it when you first mount your microphone and leave it. If the arm starts to drift slowly over months of use, tighten the tension slightly before assuming the spring has failed. Springs do wear, but a well-made arm from a reputable brand should hold its calibration for years under normal use.
One thing to check periodically: the pivot points. A boom arm that develops any lateral wobble at the joints usually just needs the pivot bolt tightened. It takes thirty seconds and is the most common reason a previously solid arm starts to feel loose. Keeping the joints snug is the entire maintenance routine for a quality arm.
Frequently Asked Questions
How heavy a mic can a boom arm hold?
Most quality steel arms are rated to around 1kg, which covers the large majority of studio and streaming microphones. For heavier broadcast dynamic mics, choose an arm specifically rated for the load, such as a dual-pivot steel model.
Why does my boom arm keep drooping?
The spring tension is either too weak or your mic plus accessories exceed the arm's rating. Pick an arm rated at least 200g above your full mic weight, and on adjustable models tighten the tension to suit the load.
Is internal cable routing actually necessary?
It is not strictly necessary, but it is well worth it. Internal routing keeps the desk tidy, stops the cable dragging on the arm, and can reduce vibration noise compared to an exposed cable rubbing against the arm body.
What clamp size do I need?
Measure your desk edge first. Many arms clamp onto edges up to around 55mm thick, but a thicker desk needs an arm rated for it. A clamp that does not fully grip the edge will never hold the arm steady.
Should I use a clamp mount or a grommet mount?
Use a clamp if you move the arm often or cannot drill your desk. Use a grommet mount if the arm stays in place permanently and you want maximum rigidity. The Rode PSA1+ ships with both, so you can choose after installation.
Building out a recording or streaming corner? Pair the right arm with proper monitoring from the headset range at Evetech and keep your whole audio chain working together.