
Clean Gaming Keyboard: Guide for Dusty & Humid Conditions
Clean gaming keyboard quickly and safely in dusty or humid conditions with step-by-step tips, tool checklist, and maintenance routines to prevent corrosion and switch failure. 🧼💨
Read moreDIY dash cam installation — Checklist: 1) Plan cable route 2) Choose mount 3) Hide power runs 4) Test and secure 🚗🔧 Quick pro tips for a tidy, professional finish.

Driving in South Africa is an extreme sport. Between the early morning taxi gauntlet and those surprise potholes, having a witness on your dashboard is essential for insurance and peace of mind. But nothing ruins a sleek interior like messy cables dangling over your infotainment system. A proper DIY dash cam installation gives you that clean, professional look without the expensive workshop fees. It is about safety, aesthetics, and protecting your car 🚗.
Before you start sticking mounts to your windscreen, you need to find the "sweet spot." Ideally, you want the camera tucked behind the rearview mirror. This ensures the device does not obstruct your view while capturing the full width of the road. If you are still browsing for the right hardware, checking out a comprehensive car tech selection is the best place to start. A smaller footprint camera is much easier to hide than a bulky unit.
The secret to a professional finish is hiding the power cable. Most modern cars have a small gap between the headliner and the windscreen. You can gently tuck the cable into this space, moving toward the passenger side A-pillar. Be careful around side-curtain airbags... you never want to route a cable across them. Using reliable Promate car gear often provides longer cables that make this routing much easier in larger SUVs or double-cabs.
Avoid using a metal screwdriver to pry your car panels. Instead, use a plastic trim tool or even an old credit card. This prevents scratches on your dashboard and ensures you don't snap the fragile plastic clips holding your interior together.
Most users start with the standard 12V cigarette lighter socket. It is simple, but it leaves a plug visible. If you want the ultimate clean look, consider a hardwire kit that taps directly into your fuse box. This frees up your charging ports and allows for "parking mode" features. If you are looking for high-definition dash cams under R2000, many of these units include the necessary hardware for a more permanent setup ⚡.
Once the wires are tucked into the weather stripping along the door frame, pull the excess slack through to the floor mat area. Use cable ties to bundle any remaining wire under the dash where it cannot interfere with the pedals. Even if you are working with budget-friendly solutions under R500, taking an extra ten minutes to secure the wires makes a massive difference in the final result. A clean install is a distraction-free install 🛡️.
Ready to Secure Your Ride? Don't let a messy installation distract you from the road. Whether you need a high-end 4K witness or a reliable budget setup, we have the gear to keep you safe. Explore our full range of Car Tech and Dash Cams and upgrade your driving experience today.
Route cables along the headliner and A-pillar, use trim tools and cable clips, and tuck wires under trim to keep them out of sight.
Yes. Use a fuse tap to access accessory or constant power, ground to chassis, test voltages and add a low-voltage cut-off if needed.
Trim pry tools, multimeter, fuse tap, cable clips, zip ties and a screwdriver are essential for neat, secure installs.
Place the cam near the rearview mirror, centered top of the windshield, clear of sensors and wipers for unobstructed recording.
Gently lift trim with pry tools, tuck the cable between headliner and roof rail, run along A-pillar then down to the fuse box.
Avoid routing wires across airbags or sensors. Keep cables outside airbag deployment paths and secure with clips for safety.
Start the ignition, confirm the dash cam boots and records, check parking mode and constant power if hardwired with a fuse tap.
Clean gaming keyboard quickly and safely in dusty or humid conditions with step-by-step tips, tool checklist, and maintenance routines to prevent corrosion and switch failure. 🧼💨
Read more
Best gaming keyboard features to prioritize when building a high-end setup: mechanical switches, low latency, hot-swap, RGB, macros, durability and ergonomics 🎮⌨️
Read more
Custom actuation point keyboard setup guide: learn to set per-key actuation on your analog gaming keyboard for faster, precise inputs and better control 🎮⚙️
Read more
Cable management for home entertainment helps you eliminate cable clutter quickly and safely. Learn routing, concealment, and product picks to tidy your setup fast 📺🔌
Read more
conference room setup Microsoft Teams Zoom: Upgrade AV, camera, mic, and network to ensure seamless meetings, clear audio, and crisp video 🎯🔧
Read more
• Audit setup • Link accounts • Configure ViewBoard • Test workflows Integrate Google Workspace with ViewSonic ViewBoard to enable secure SSO, calendar and Drive sync, and smooth collaborative whiteboarding 🔗📋
Read more
Discover webcams that automatically adjust light and color for crystal-clear video calls 🎥✨. Boost your streaming quality today!
Read more
Discover webcams that blend into your workflow 🎯 Capture moments while you work, stream, or create. Upgrade your setup with smart, multitasking tech!
Read more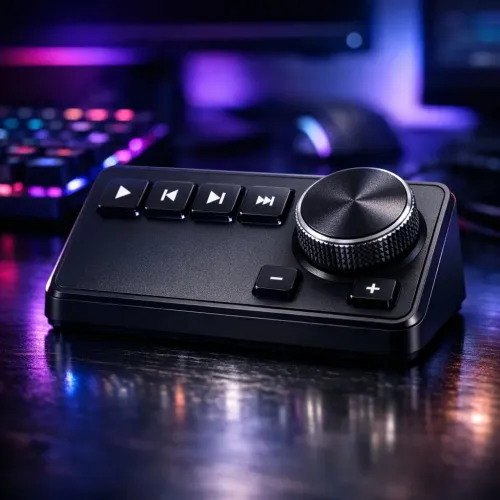
Dedicated media keys give streamers one-touch control to mute, switch scenes, clip highlights, and adjust audio — cutting task time and boosting consistency 🎛️⚡
Read more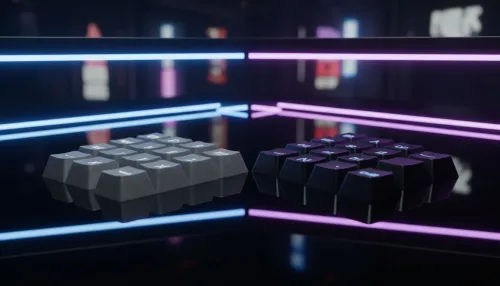
PBT vs ABS keycaps: Clear, local guide for South African gamers—compare feel, sound, durability and where to buy. Find the best material for your budget and playstyle 🎮🇿🇦
Read more
- Multi-Function Digital Dial: define benefits - Show gamer setups and macros - Offer buying and setup tips Multi-Function Digital Dial puts programmable control at your fingertips for faster actions and smoother streaming. 🎮⚙️
Read more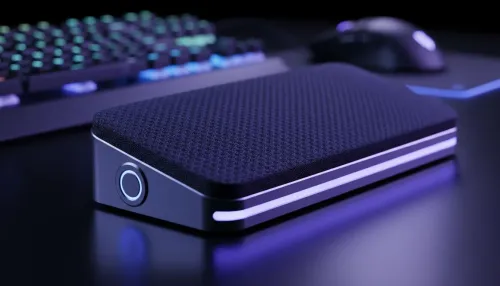
- Explain benefits; - Show the science; - Compare options; - Recommend picks. Magnetic wrist rest for gaming cuts wrist strain and boosts comfort during long sessions 🕹️✨
Read more