
Clean Gaming Keyboard: Guide for Dusty & Humid Conditions
Clean gaming keyboard quickly and safely in dusty or humid conditions with step-by-step tips, tool checklist, and maintenance routines to prevent corrosion and switch failure. 🧼💨
Read moreLearn how to apply thermal paste correctly with our step-by-step guide for South African conditions. Proper application is key to preventing overheating and maximizing your PC's performance and lifespan. Get pro tips on cleaning old paste and choosing the right compound for our climate. ❄️🖥️

So, you’ve got a beastly new CPU, ready to crush frames and conquer lobbies. But there’s one small, crucial step standing between you and victory: applying a tiny blob of thermal paste. Get it right, and your rig runs cool and quiet. Get it wrong, and you risk throttling your performance... or worse. Don’t stress! This guide on how to apply thermal paste will walk you through the process, ensuring your South African PC build is ready for anything.
Think of thermal paste (or thermal compound) as a critical bridge. The surface of your CPU and your cooler’s baseplate might look perfectly flat, but on a microscopic level, they're full of tiny imperfections. These create air gaps, and air is a terrible conductor of heat.
Thermal paste is a special substance designed to fill these gaps, ensuring an efficient transfer of heat from your processor to your heatsink. Without it, your CPU would overheat in seconds. A proper application is the secret to unlocking your PC's full potential, whether you're building one of our awesome budget gaming PCs or just doing routine maintenance. 🌡️
Ready to get hands-on? Learning how to apply thermal paste is a rite of passage for any PC builder. It’s easier than you think if you follow these simple steps.
Before you even open the tube, make sure you have everything you need.
First, make sure both the CPU surface (the Integrated Heat Spreader or IHS) and the cooler's baseplate are perfectly clean. Apply a small amount of isopropyl alcohol to your cloth and gently wipe away any old paste, dust, or oils from your fingers. Let it evaporate completely.
There are many theories online, but for 99% of builds, the "pea method" is foolproof and effective.
The mounting pressure from the CPU cooler will spread the paste evenly across the surface, pushing out any air bubbles. This method ensures great coverage without making a mess, which is ideal for anyone building one of the many powerful rigs under R20,000 available today.
A common mistake is using too much thermal paste. A thick layer actually insulates the CPU instead of helping conduct heat away from it. A single, small dot about the size of a grain of rice or a small pea is all you need for a standard desktop processor.
Carefully align your CPU cooler with the mounting holes on your motherboard. Place it straight down onto the CPU. Try not to twist or slide it around, as this can introduce air bubbles.
Secure the cooler by tightening the screws in a crisscross or "X" pattern, a bit at a time. This applies even pressure across the CPU, ensuring a perfect spread of the thermal paste underneath.
Even seasoned builders can slip up. Here are a few classic blunders to watch out for:
Getting this right is especially vital for high-end systems over R20k, where powerful components generate significant heat that needs to be managed perfectly.
So, how often should you repeat this process? For most users, high-quality thermal paste will last for years. A good rule of thumb is to check your temperatures annually. If you notice your CPU is running hotter than it used to under load, it might be time for a fresh application. Of course, if you'd rather skip the maintenance, choosing from our expertly assembled pre-built PC deals ensures a perfect build from day one. ✨
Mastering how to apply thermal paste is a satisfying skill that puts you in total control of your PC's performance and health. It’s a small detail that makes a massive difference, ensuring you get the most out of whichever rig you're running from our selection of the best gaming PC deals. Happy building! 🚀
Ready for a Flawless Build? While DIY is rewarding, sometimes you just want a perfectly assembled machine without the hassle. Our expert technicians ensure every component, including the thermal paste, is applied with precision for optimal performance. Explore our range of pre-built PC deals and get a rig that’s cool, quiet, and ready to dominate.
You only need a small, pea-sized dot (about 4-5mm in diameter) in the center of the CPU. Too much paste can spill over, reduce effectiveness, and make a mess.
The most common and reliable methods are the single dot in the center, the five-dot pattern, or spreading a thin, even layer with a spatula. The dot method is simplest.
Most modern thermal pastes don't require a long curing time. However, thermal performance may improve slightly over the first few hours or days of use as it fully settles.
Use a lint-free cloth or coffee filter with high-percentage isopropyl alcohol (90%+) to gently wipe away the old, dried paste from both the CPU and the cooler base.
In a warmer climate like South Africa, it's good practice to reapply thermal paste every 2-3 years, or sooner if you notice consistently high CPU temperatures.
Key signs include your PC running hotter than usual, fans spinning loudly at all times, and unexpected shutdowns or performance throttling due to overheating.
Clean gaming keyboard quickly and safely in dusty or humid conditions with step-by-step tips, tool checklist, and maintenance routines to prevent corrosion and switch failure. 🧼💨
Read more
Best gaming keyboard features to prioritize when building a high-end setup: mechanical switches, low latency, hot-swap, RGB, macros, durability and ergonomics 🎮⌨️
Read more
Custom actuation point keyboard setup guide: learn to set per-key actuation on your analog gaming keyboard for faster, precise inputs and better control 🎮⚙️
Read more
Cable management for home entertainment helps you eliminate cable clutter quickly and safely. Learn routing, concealment, and product picks to tidy your setup fast 📺🔌
Read more
conference room setup Microsoft Teams Zoom: Upgrade AV, camera, mic, and network to ensure seamless meetings, clear audio, and crisp video 🎯🔧
Read more
• Audit setup • Link accounts • Configure ViewBoard • Test workflows Integrate Google Workspace with ViewSonic ViewBoard to enable secure SSO, calendar and Drive sync, and smooth collaborative whiteboarding 🔗📋
Read more
Discover webcams that automatically adjust light and color for crystal-clear video calls 🎥✨. Boost your streaming quality today!

Discover webcams that blend into your workflow 🎯 Capture moments while you work, stream, or create. Upgrade your setup with smart, multitasking tech!
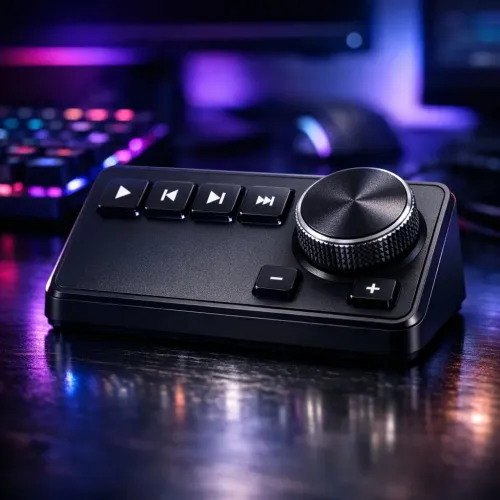
Dedicated media keys give streamers one-touch control to mute, switch scenes, clip highlights, and adjust audio — cutting task time and boosting consistency 🎛️⚡

PBT vs ABS keycaps: Clear, local guide for South African gamers—compare feel, sound, durability and where to buy. Find the best material for your budget and playstyle 🎮🇿🇦

- Multi-Function Digital Dial: define benefits - Show gamer setups and macros - Offer buying and setup tips Multi-Function Digital Dial puts programmable control at your fingertips for faster actions and smoother streaming. 🎮⚙️
- Explain benefits; - Show the science; - Compare options; - Recommend picks. Magnetic wrist rest for gaming cuts wrist strain and boosts comfort during long sessions 🕹️✨