
Clean Gaming Keyboard: Guide for Dusty & Humid Conditions
Clean gaming keyboard quickly and safely in dusty or humid conditions with step-by-step tips, tool checklist, and maintenance routines to prevent corrosion and switch failure. 🧼💨
Read moreLearn how to calibrate your monitor for gaming to unlock vibrant colors, deep blacks, and a competitive edge. Our guide covers everything from built-in OS tools to advanced software, ensuring your display is perfectly tuned for any game. Get ready for peak visual performance! 🎮✨

Ever been wiped out by an enemy lurking in a shadow that was just a black blob on your screen? Or felt the vibrant world of your favourite RPG looks a bit… washed out? You’re not alone. Your monitor's factory settings are rarely optimised for the rich, detailed visuals of modern games. That's where learning how to calibrate your monitor for gaming comes in, giving you a serious competitive edge and a much more immersive experience. 🚀
Before we dive into the "how," let's talk about the "why." A properly calibrated screen isn't just about making colours pop. It’s a fundamental step to unlocking your hardware's true potential.
For the best results, you need a panel that can keep up. Many of all the latest gaming monitors come with excellent colour accuracy out of the box, but a quick calibration session will always take them to the next level.
Before you start tweaking settings, follow these simple steps to set the stage for a perfect calibration.
You don't need fancy software to get a great result. Both Windows and macOS have built-in tools that work wonders. We'll focus on the Windows "Display Color Calibration" tool, as it's most common for PC gamers in SA.
On Windows 10 or 11, simply press the Windows key, type dccw or "Calibrate display color," and hit Enter. The wizard will pop up and guide you through the process.
Gamma affects the luminance of mid-tones. The tool will show you a circle with dots in the middle. Your goal is to move the slider until the dots are as invisible as possible. This ensures that shades of grey don't get crushed into black or blown out to white.
Next, you'll adjust brightness and contrast using your monitor's physical buttons.
you're using one of the increasingly popular [curved monitors](https: www.evetech.co.za buy-curved-monitors x 1588.aspx), do your calibration from your direct, central seating position. The curve is designed to fill your peripheral vision, and calibrating from this spot ensures colour and brightness are consistent across the entire panel from your point of view. It makes a huge difference for immersion!
This is the final step in the wizard. You'll see several grey bars with sliders for red, green, and blue. The goal is to move the sliders to remove any noticeable colour cast, making the bars a neutral grey. It can take a bit of fine-tuning, but it's worth it for accurate colours.
Once you're happy, the tool will ask you to save the new calibration. You can compare the "before" and "after" to see the difference. If you want to fine-tune it further, you can always run the tool again.
While the built-in Windows tool is a fantastic start for how to calibrate your monitor for gaming, enthusiasts might want to go a step further.
Lagom LCD monitor test pages provide a suite of test patterns that can help you fine-tune your settings with more precision than the Windows tool.A few minutes spent on monitor calibration can transform your entire gaming experience. You'll see the game worlds as they were meant to be seen and maybe even gain a slight edge on the competition. Give it a try!
Ready for a Visual Upgrade? Proper screen calibration can work wonders, but sometimes the hardware itself is the limit. If you're ready to see your games in their full glory, a new display is the ultimate upgrade. Explore our incredible range of PC monitors and find the perfect panel to dominate the competition.
For consistent performance, calibrate your gaming monitor every 1-2 months. This ensures colors and brightness remain accurate as the display ages.
While a hardware colorimeter offers the most accuracy, you can make significant improvements using your operating system's built-in tools, like Windows 11 monitor calibration.
The best settings vary by panel, but aim for a brightness of 120-150 cd/m², a 6500K color temperature, and a gamma of 2.2 for a balanced and accurate image.
No, calibrating color and brightness does not directly affect input lag. To minimize lag, always enable your monitor's specific 'Game Mode' or low-latency setting.
A gamma setting of 2.2 is the industry standard for Windows PCs and most digital content. It provides the best balance between shadow detail and overall contrast for games.
NVIDIA and AMD control panels offer more granular control over saturation and hue. It's best to perform a base Windows calibration first, then use GPU settings for fine-tuning.
Clean gaming keyboard quickly and safely in dusty or humid conditions with step-by-step tips, tool checklist, and maintenance routines to prevent corrosion and switch failure. 🧼💨
Read more
Best gaming keyboard features to prioritize when building a high-end setup: mechanical switches, low latency, hot-swap, RGB, macros, durability and ergonomics 🎮⌨️
Read more
Custom actuation point keyboard setup guide: learn to set per-key actuation on your analog gaming keyboard for faster, precise inputs and better control 🎮⚙️
Read more
Cable management for home entertainment helps you eliminate cable clutter quickly and safely. Learn routing, concealment, and product picks to tidy your setup fast 📺🔌
Read more
conference room setup Microsoft Teams Zoom: Upgrade AV, camera, mic, and network to ensure seamless meetings, clear audio, and crisp video 🎯🔧
Read more
• Audit setup • Link accounts • Configure ViewBoard • Test workflows Integrate Google Workspace with ViewSonic ViewBoard to enable secure SSO, calendar and Drive sync, and smooth collaborative whiteboarding 🔗📋
Read more
Discover webcams that automatically adjust light and color for crystal-clear video calls 🎥✨. Boost your streaming quality today!
Read more
Discover webcams that blend into your workflow 🎯 Capture moments while you work, stream, or create. Upgrade your setup with smart, multitasking tech!
Read more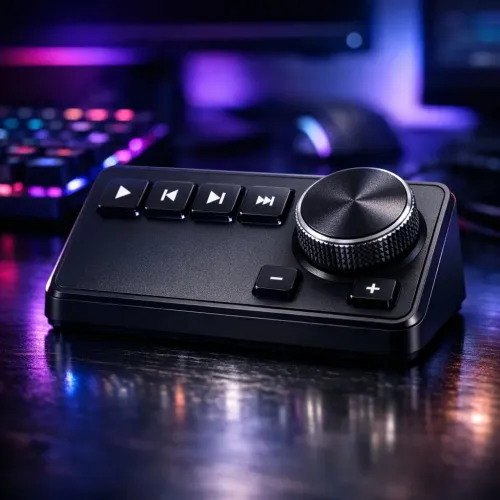
Dedicated media keys give streamers one-touch control to mute, switch scenes, clip highlights, and adjust audio — cutting task time and boosting consistency 🎛️⚡
Read more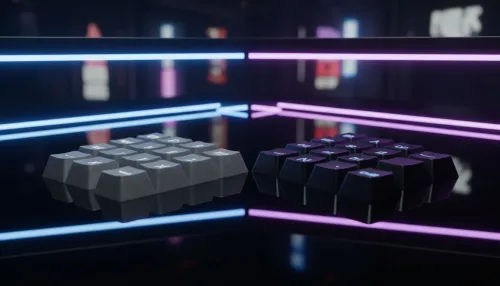
PBT vs ABS keycaps: Clear, local guide for South African gamers—compare feel, sound, durability and where to buy. Find the best material for your budget and playstyle 🎮🇿🇦
Read more
- Multi-Function Digital Dial: define benefits - Show gamer setups and macros - Offer buying and setup tips Multi-Function Digital Dial puts programmable control at your fingertips for faster actions and smoother streaming. 🎮⚙️
Read more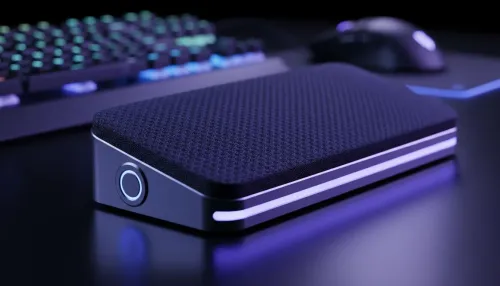
- Explain benefits; - Show the science; - Compare options; - Recommend picks. Magnetic wrist rest for gaming cuts wrist strain and boosts comfort during long sessions 🕹️✨
Read more