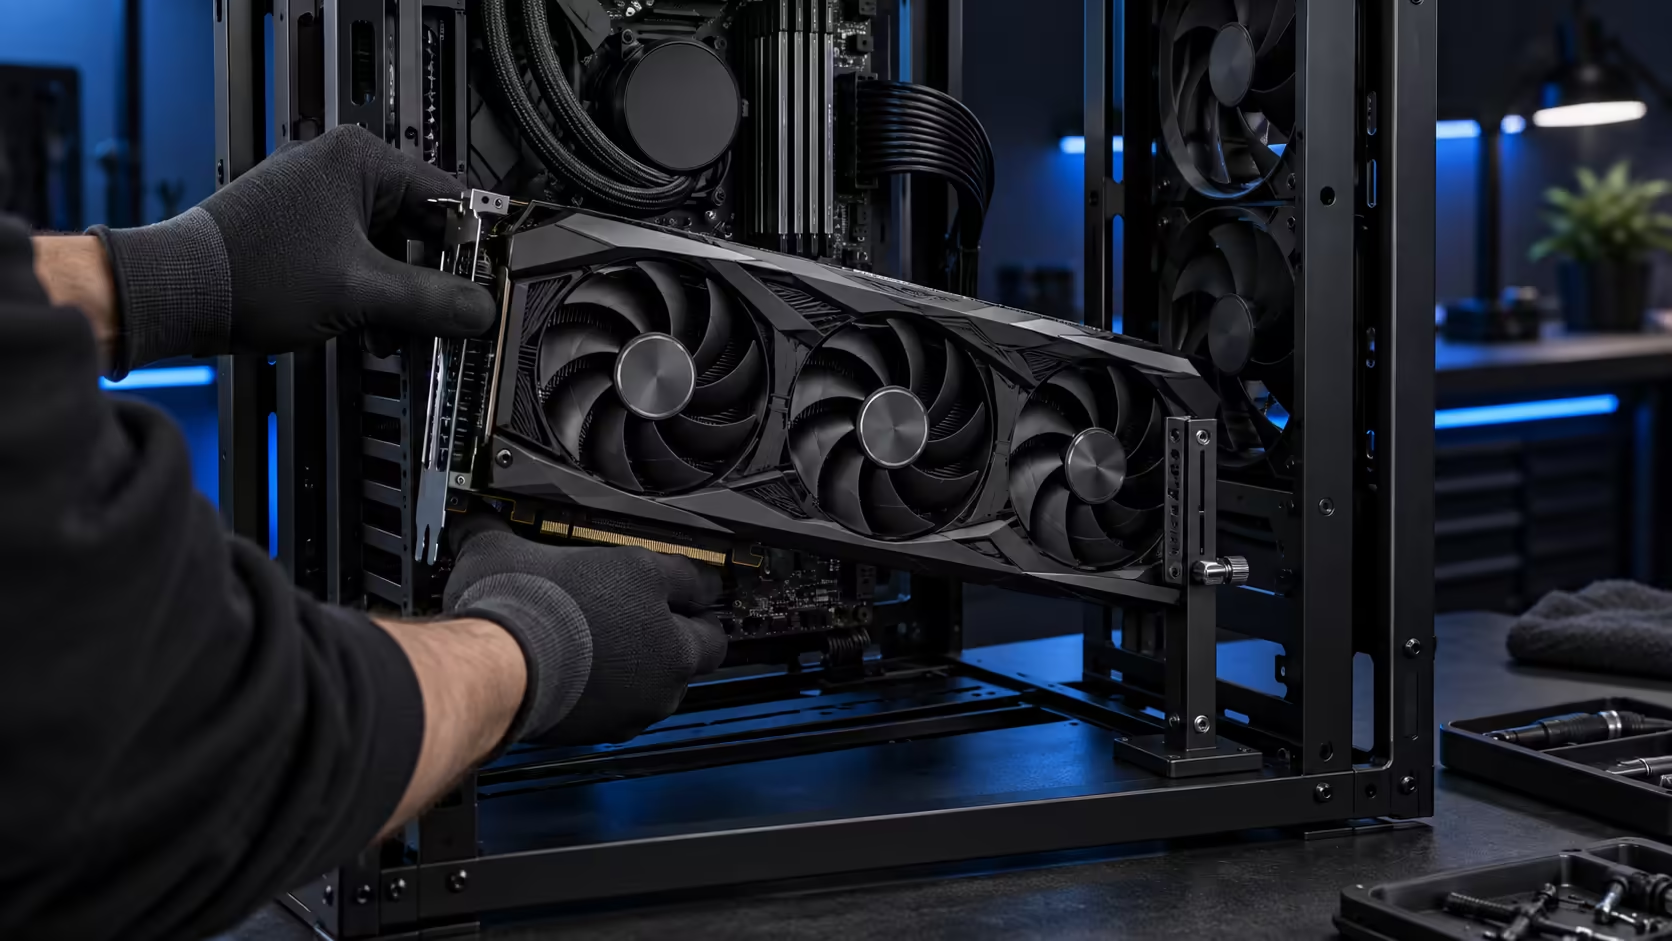
A 368mm graphics card is close to the longest thing you can buy for a desktop, and fitting one into a chassis with no side panel to brace it changes the order you do things in. Installing a 368mm graphics card in an open frame is not harder than a normal case, but three steps that are optional in a tower stop being optional here.
Quick Answer
Measure the card from bracket to backplate tip before you buy anything else, fit a support arm or brace at the same time as the card rather than afterwards, and seat the PCIe latch as the very last step once the card is already carrying its own weight. The ROG GR20 Edition 20 clears cards to 368mm and costs R15,999, and an open frame gives that card no case floor to fall back on if you skip the support step.
📏 Measure the real number, not the marketing number
Card length on a spec sheet is measured to the end of the shroud, and the end of the shroud is rarely the longest point once the card is actually installed. The 8-pin or 12-pin power connectors add their own depth once cables are plugged in, and a right-angle adapter changes that figure again.
Measure your specific card with its power cables attached and its connector fully seated, from the bracket that screws to the case to the furthest point sticking out, cable included. Compare that number to the 368mm the frame allows, not the number printed on the card's retail box. A card that is 355mm on the spec sheet and pulls a straight 12-pin plug can land within a centimetre of the limit once the cable is accounted for.
🛠️ Fit the support before the card, not after
In a normal case, a sagging card is mostly a cosmetic problem, because the case floor and the drive cage give the front edge somewhere to rest. An open frame removes that floor, so the card's own weight is carried entirely by the PCIe slot and whatever bracket you fit.
Buy the support arm or brace at the same time as the card, and mount it before the card goes in, adjusted roughly to where the card's underside will sit. Fitting a support after the card is already seated means removing it again to get the arm underneath, which on a card near 368mm is an extra unseating and reseating of a connector you would rather touch once. The graphics card accessories range covers adjustable arms and rigid braces, and either works; a rigid brace suits a fixed vertical stance, while an adjustable arm is easier to redo if you later change orientation.
🔩 The install sequence that avoids a bent connector
Slide the card in at a slight angle first, clearing the I/O shield before you drop the bracket edge down, then lower it straight into the slot. Do not push down on the far end of the card to seat it, because that far end is exactly where the leverage does the most damage to the PCIe connector if the card is not sitting flat.
Screw the bracket to the frame before you touch the power cables. A card held only by its slot and an unscrewed bracket can shift while you route a stiff 12-pin cable behind it, and that shift is how a slot gets bent on an otherwise careful build.
Bring the support arm up to meet the card last, once the bracket is screwed down and the cables are routed. The arm's job is to take load off the slot over time, not to hold the card in place during installation, and adjusting it before the card is fully seated usually means adjusting it again once everything settles.
⚖️ Orientation changes how much this matters
A 368mm card mounted vertically puts its full weight on the slot from the moment the last screw goes in until a support arm is doing its job properly. The same card mounted horizontally lies with its length running level, and the case frame beneath it takes far more of that weight through simple contact rather than through the connector.
If you have not committed to a stance yet, a card near the clearance limit is a reasonable argument for building flat rather than upright. Check the listed length against the graphics card selection before it arrives, since confirming the figure there saves a return that a normal courier collection handles easily, rather than a redesign of the build after the fact. Not every mid-tower case publishes a clearance figure this generous, so confirm the number before you assume any chassis will take a card this size.
Frequently Asked Questions
What is the actual clearance on this chassis?
368mm, measured from the PCIe bracket to the furthest point of the card including any power cable that protrudes past the backplate.
Do I need a support bracket for every card?
No. A short, light card carries its own weight without issue. The concern is specifically cards approaching the 368mm limit, which are almost always the heaviest cards sold.
Should I fit the support arm before or after the card?
Mount the arm's base before the card goes in, then bring it up to meet the card once the bracket screws and cables are done, so it is adjusted to the card's finished position.
Can I check my exact card's length before buying the case?
Yes. Measure the card with its power connector attached, or check the listed length in the graphics card range and add roughly 20mm for a straight cable if the spec does not include it.
Is a vertical mount ever fine for a long card?
It can be, provided a support arm is fitted from the start. Without one, a card near the clearance limit is safer mounted horizontally.
Ready to fit a long card without stressing the slot?
Measure the real length with cables attached, fit the support first, and seat the latch last.