
Clean Gaming Keyboard: Guide for Dusty & Humid Conditions
Clean gaming keyboard quickly and safely in dusty or humid conditions with step-by-step tips, tool checklist, and maintenance routines to prevent corrosion and switch failure. 🧼💨
Read moreLearn how to clean your gaming pc safely and effectively to boost performance and extend its lifespan. Our step-by-step guide covers everything from dusting fans to cleaning components without causing damage. Keep your rig running cool and fast! 🧼✨

Is your gaming PC starting to sound more like a jet engine than a high-performance machine? Here in South Africa, dust is a constant battle. It sneaks into every nook and cranny of your rig, choking fans and suffocating components. This isn't just about looks; it's about performance. A dirty PC runs hotter, slower, and louder. This ultimate safety guide will show you exactly how to clean your gaming PC to restore its quiet, cool power. 💨
Ignoring dust is like forcing your PC to run a marathon in a fleece jacket during a Durban summer. Components generate heat, and the cooling system's job is to get rid of it. When dust clogs heatsinks and blocks fan blades, that heat gets trapped.
This leads to "thermal throttling," where your CPU and GPU intentionally slow down to avoid overheating. Suddenly, you're experiencing frame drops in the middle of a clutch play. Regular cleaning ensures optimal airflow, protects your investment, and keeps your machine running at its peak for years. It's especially crucial for getting the most out of today's powerful yet affordable budget-friendly gaming PCs.
Before you start, gather the right tools. Using the wrong ones can cause irreparable damage, especially from static electricity.
Your Essentials:
What to AVOID:
Having the right kit is half the battle, whether you're maintaining one of the many powerful options under R20k or a top-tier beast.
Ready to get that "brand new PC" feeling back? Let's dive in. This process is the same whether you built it yourself or got one of our expertly assembled pre-built gaming PCs.
This is the most critical safety step. Shut down your PC completely through the operating system. Then, switch off the power supply unit (PSU) using the switch at the back and unplug the main power cable from the wall. Unplug all peripherals like your monitor, keyboard, and mouse. Move your PC to a well-lit, ventilated area for cleaning.
Start with the easy part. Use a slightly damp microfibre cloth to wipe down the outside of your case. Pay attention to the top and front panels where dust tends to settle. Make sure all mesh filter
s are clear.
Open your side panel. Before you touch anything inside, ground yourself by touching a large metal object (like the metal part of the case chassis) to discharge any static electricity.
Hold the can of compressed air upright and use short, controlled bursts to blow dust out of the case. Start from the top and work your way down. Focus on the graphics card, CPU cooler, and motherboard. Always blow the dust out of the case, not deeper into it. For even the most complex high-performance rigs over R20k, this basic principle remains the same.
To clean your fans properly, use one finger to gently hold the fan blades in place while you blow them with compressed air. This prevents the fan from spinning too fast, which can damage the fan motor's bearings. Use a cotton swab with a tiny bit of isopropyl alcohol to wipe away any stubborn grime from the blades.
Use your soft brush and cotton swabs to gently clean any remaining dust from fan blades and heatsink fins. Once you're satisfied, replace the side panel and reconnect all your cables.
So, how often should you perform this ritual?
This can change depending on your environment. If you have pets, live in a dusty area, or smoke indoors, you'll need to clean more frequently to protect the components in your machine, especially if you've invested in one of our best gaming PC deals.
Ready For a Dust-Free Upgrade? A clean PC is a happy PC. But if your rig is still struggling to keep up with the latest titles, it might be time for an upgrade. Explore our massive range of custom-built PCs and find the perfect machine to dominate your game.
As a general rule, perform a light dusting every 3-6 months to manage dust buildup. We recommend a deeper clean, including cleaning components, at least once a year.
Use a can of compressed air for dust, isopropyl alcohol (90%+) and microfiber cloths for components, and cotton swabs for tight spots. Avoid using a standard vacuum cleaner.
No, never clean your PC while it is on or plugged in. Always shut it down completely, unplug all cables, and press the power button to discharge any residual electricity.
Hold the fan blades gently to prevent them from spinning and use short bursts from a can of compressed air to blow dust away. You can use a cotton swab for stubborn grime.
It is not recommended. Vacuums can create a static electricity discharge that can permanently damage sensitive PC components. Always use compressed air for safe pc cleaning.
Dust buildup insulates components, causing them to overheat. This leads to thermal throttling (reduced performance), system instability, and can shorten your hardware's lifespan.
Clean gaming keyboard quickly and safely in dusty or humid conditions with step-by-step tips, tool checklist, and maintenance routines to prevent corrosion and switch failure. 🧼💨
Read more
Best gaming keyboard features to prioritize when building a high-end setup: mechanical switches, low latency, hot-swap, RGB, macros, durability and ergonomics 🎮⌨️
Read more
Custom actuation point keyboard setup guide: learn to set per-key actuation on your analog gaming keyboard for faster, precise inputs and better control 🎮⚙️
Read more
Cable management for home entertainment helps you eliminate cable clutter quickly and safely. Learn routing, concealment, and product picks to tidy your setup fast 📺🔌
Read more
conference room setup Microsoft Teams Zoom: Upgrade AV, camera, mic, and network to ensure seamless meetings, clear audio, and crisp video 🎯🔧
Read more
• Audit setup • Link accounts • Configure ViewBoard • Test workflows Integrate Google Workspace with ViewSonic ViewBoard to enable secure SSO, calendar and Drive sync, and smooth collaborative whiteboarding 🔗📋
Read more
Discover webcams that automatically adjust light and color for crystal-clear video calls 🎥✨. Boost your streaming quality today!
Read more
Discover webcams that blend into your workflow 🎯 Capture moments while you work, stream, or create. Upgrade your setup with smart, multitasking tech!
Read more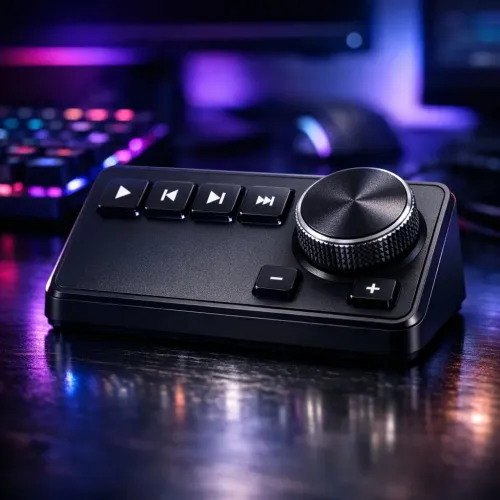
Dedicated media keys give streamers one-touch control to mute, switch scenes, clip highlights, and adjust audio — cutting task time and boosting consistency 🎛️⚡
Read more
PBT vs ABS keycaps: Clear, local guide for South African gamers—compare feel, sound, durability and where to buy. Find the best material for your budget and playstyle 🎮🇿🇦
Read more
- Multi-Function Digital Dial: define benefits - Show gamer setups and macros - Offer buying and setup tips Multi-Function Digital Dial puts programmable control at your fingertips for faster actions and smoother streaming. 🎮⚙️
Read more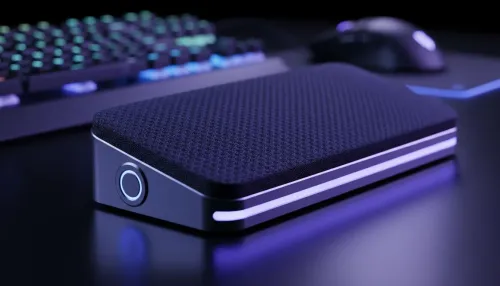
- Explain benefits; - Show the science; - Compare options; - Recommend picks. Magnetic wrist rest for gaming cuts wrist strain and boosts comfort during long sessions 🕹️✨
Read more