
Clean Gaming Keyboard: Guide for Dusty & Humid Conditions
Clean gaming keyboard quickly and safely in dusty or humid conditions with step-by-step tips, tool checklist, and maintenance routines to prevent corrosion and switch failure. 🧼💨
Read moreInstalling a new graphics card is easier than you think. Follow this step-by-step guide to safely remove the old GPU, check compatibility, install drivers, and boost performance. 🛠️⚡

Is your PC starting to feel a bit... sluggish? Are the latest games stuttering when you crank up the settings? It’s a classic sign that your trusty graphics card is due for an upgrade. But the thought of opening your PC case can be intimidating. Don’t worry! Installing a new graphics card is one of the easiest and most rewarding DIY PC upgrades you can do. This guide will walk you through every step, from unboxing to victory. 🚀
A little preparation goes a long way to ensure a smooth GPU installation. Before you even think about buying, let’s quickly cover the essentials to guarantee your new card will fit and work perfectly in your South African rig.
You don't need a massive workshop. For most installations, all you'll need is:
This is a pro move. Before you start the physical installation, go to the manufacturer's website and download the latest drivers for your new card. Whether you've chosen from the latest NVIDIA GeForce cards or are siding with Team Red's powerful AMD Radeon options, having the driver file ready on your desktop will save you time later.
Alright, you’ve done your homework, and your shiny new GPU is on your desk. Let's get to the fun part. Follow these steps carefully for a flawless installation.
Shut down your PC completely. Don't just put it to sleep. Switch the power supply off using the little switch at the back and then unplug the main power cable from the wall. This is a critical safety step.
Before removing your old hardware, it's best practice to completely wipe the old graphics drivers. Use a free tool called Display Driver Uninstaller (DDU) in Safe Mode to remove every trace of your old drivers. This prevents conflicts and ensures a clean slate for your new GPU, leading to better stability.
Place your PC on its side on a stable surface. Remove the side panel (usually held by two screws at the back). Locate your old graphics card. First, unscrew it from the case bracket. Then, find the small plastic clip at the end of the PCIe slot holding the card in place. Gently press this clip down to release the card, and then pull the card straight out of the slot.
Time for the main event! Line up your new graphics card with the same PCIe x16 slot. Gently but firmly press it down until you hear a satisfying click. This sound confirms it's securely seated. Once it's in, use the same screws to secure the card's metal bracket to the PC case. This prevents the heavy card from sagging. From sleek popular MSI models to the new contenders in Intel's Arc series, the physical installation process is nearly identical.
Most modern gaming graphics cards need more power than the motherboard slot can provide. Find the PCIe power cables coming from your PSU and plug them firmly into the power sockets on your new GPU. They are designed to only fit one way, so you can’t get it wrong.
With the hardware part of your graphics card upgrade complete, it's time to bring your rig back to life.
Put the side panel back on, plug everything in, and boot up your PC. Your screen resolution might look strange at first—this is normal. Now, run the driver installation file you downloaded earlier. Follow the on-screen prompts (a "Clean Installation" is usually the best option) and restart your PC when it's done.
Once you're back in Windows with the correct resolution, you're ready to go! Fire up your favourite game, crank those settings to Ultra, and enjoy the buttery-smooth frame rates you've just unlocked. Even if you're installing specialised workstation graphics cards for creative work, running a benchmark test is a great way to confirm everything is performing as it should.
Ready to Unleash True Power? Now that you know how simple installing a new graphics card can be, the only thing left is choosing the right one. From entry-level cards to 4K beasts, we've got the perfect GPU for your rig and budget. Explore our massive range of graphics cards and give your PC the upgrade it deserves.
Power down, unplug, ground yourself, remove the old GPU, check PSU wattage and PCIe slots, and gather tools needed to install a graphics card like a screwdriver and antistatic strap.
Confirm a free PCIe x16 slot, case clearance, required power connectors, and PSU wattage. Use an installing graphics card compatibility checklist before buying.
Yes. Install or update GPU drivers after installing a new graphics card to ensure stability and optimal performance.
Yes. Follow a clear step-by-step guide, take safety precautions, and use proper tools for the best way to install GPU for beginners.
Reseat the card, check power cables, update BIOS and drivers, try a different slot, and follow troubleshooting new graphics card not detected steps.
Power down, unplug, disconnect power cables, unscrew the bracket, unlock the PCIe latch, and pull the card straight out to replace graphics card safely.
Yes. A Phillips screwdriver, antistatic strap, cable ties, and optional thermal paste are common tools needed to install a graphics card.
Clean gaming keyboard quickly and safely in dusty or humid conditions with step-by-step tips, tool checklist, and maintenance routines to prevent corrosion and switch failure. 🧼💨
Read more
Best gaming keyboard features to prioritize when building a high-end setup: mechanical switches, low latency, hot-swap, RGB, macros, durability and ergonomics 🎮⌨️
Read more
Custom actuation point keyboard setup guide: learn to set per-key actuation on your analog gaming keyboard for faster, precise inputs and better control 🎮⚙️
Read more
Cable management for home entertainment helps you eliminate cable clutter quickly and safely. Learn routing, concealment, and product picks to tidy your setup fast 📺🔌
Read more
conference room setup Microsoft Teams Zoom: Upgrade AV, camera, mic, and network to ensure seamless meetings, clear audio, and crisp video 🎯🔧
Read more
• Audit setup • Link accounts • Configure ViewBoard • Test workflows Integrate Google Workspace with ViewSonic ViewBoard to enable secure SSO, calendar and Drive sync, and smooth collaborative whiteboarding 🔗📋
Read more
Discover webcams that automatically adjust light and color for crystal-clear video calls 🎥✨. Boost your streaming quality today!
Read more
Discover webcams that blend into your workflow 🎯 Capture moments while you work, stream, or create. Upgrade your setup with smart, multitasking tech!
Read more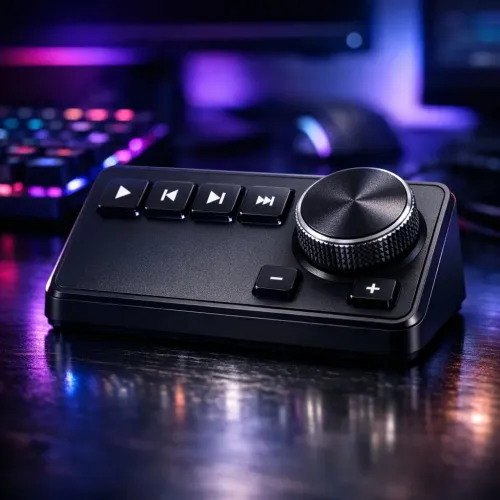
Dedicated media keys give streamers one-touch control to mute, switch scenes, clip highlights, and adjust audio — cutting task time and boosting consistency 🎛️⚡
Read more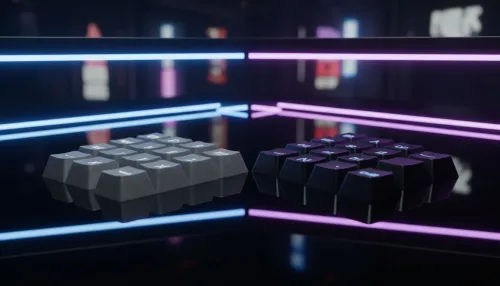
PBT vs ABS keycaps: Clear, local guide for South African gamers—compare feel, sound, durability and where to buy. Find the best material for your budget and playstyle 🎮🇿🇦
Read more
- Multi-Function Digital Dial: define benefits - Show gamer setups and macros - Offer buying and setup tips Multi-Function Digital Dial puts programmable control at your fingertips for faster actions and smoother streaming. 🎮⚙️
Read more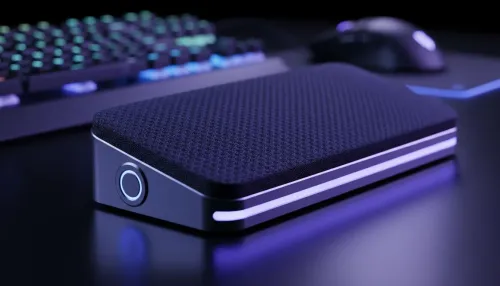
- Explain benefits; - Show the science; - Compare options; - Recommend picks. Magnetic wrist rest for gaming cuts wrist strain and boosts comfort during long sessions 🕹️✨
Read more