Onboard audio crackle can begin in the source file, Windows audio stack, analogue jack, USB headset, radio link or the PC's electrical environment. A new DAC helps only when the fault is tied to the existing output hardware. First move the same sound through two outputs and see where the crackle follows.
Quick Answer
Test a known local audio file through the rear motherboard jack and another output. Disable audio enhancements for the affected device, match its format to a common supported sample rate and update the motherboard audio driver from its official support page. For USB audio, try a direct rear port and test selective-suspend behaviour only after the simpler checks.
Evetech's gaming PC systems help identify the motherboard and connection layout. The PC best sellers provide platform context before an external audio purchase becomes part of the fix.
Prove the Source Is Clean
Use a local file you know is clean. Streaming glitches, a damaged recording or voice-chat network loss can sound like hardware crackle. Test Windows system audio and one game.
Close recording tools, voice changers, virtual surround and broadcast filters. They can add buffer or sample-rate problems. Keep one normal playback path for the baseline.
If the noise exists in one game only, restore that title's audio defaults and verify its output device.
Compare Rear and Front Analogue Jacks
Plug the same known headset into the rear motherboard output. Then compare the front-panel jack. If only the front crackles, inspect its internal HD Audio cable routing and connector with the PC unplugged.
Front-panel analogue wiring can pick up interference or suffer a loose connection. Keep it away from high-current cables where the case layout permits, and reseat it according to the motherboard manual.
If both analogue outputs crackle while USB audio is clean, the onboard driver, codec path or analogue environment deserves attention.
Reset the Windows Audio Path
Open Settings, System, Sound and select the output device. Turn Audio enhancements off for the test and disable spatial processing. Set a normal format supported by the device, then match the application's setting where it offers one.
Exclusive mode can let an application take control and switch format. Compare with it off when the crackle starts as a game opens. Change one option, then restart the audio application.
Do not choose the highest sample rate because the number is bigger. Stable matching across the source, application and device matters.
Install the Correct Driver
Identify the exact motherboard or prebuilt model and download its supported audio package. Remove or reinstall only through the maker's documented process. Generic driver sites add risk and can omit control components.
Update chipset and BIOS only when their official release notes or support path apply to the fault. Restart after the audio installation.
Check Device Manager for duplicate, disabled or warning-marked audio devices. A graphics card can also add HDMI audio, so select the output you are testing.
Diagnose USB Audio Separately
Connect a USB headset or interface directly to a rear motherboard port. Remove hubs and front-panel extensions. Test another supported USB controller group if the board diagram identifies one.
USB selective suspend allows Windows to reduce power to idle devices. Disabling it for a test can help identify a resume or power-state problem, but it is not a universal first fix. Restore the normal policy if nothing changes.
Disconnect other high-traffic USB devices. A faulty hub, webcam or storage device can affect the bus without making the codec guilty.
Check DPC Latency and System Load
Audio needs data delivered on time. A network, storage or graphics driver that blocks too long can cause pops while the audio hardware remains healthy.
Use a reputable latency diagnostic during the fault and note the named driver, workload and exact time. Treat the result as a lead. Update that device through its maker and repeat.
Watch Task Manager for CPU saturation, storage activity and a game compiling shaders. Increase the application buffer where a professional audio tool provides one.
Check for Ground and Interference Noise
Hum or buzz that changes with GPU load can enter an analogue path through grounding or interference. Test the PC and powered speakers on a properly earthed outlet arrangement without unsafe adapters.
Do not defeat the earth pin. A USB isolator or external DAC is not a remedy for faulty building wiring. Ask a qualified electrician when mains earthing is suspect.
Decide Whether a DAC Helps
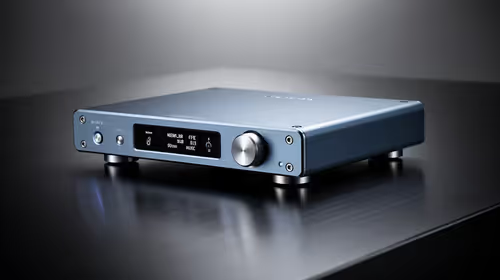
An external DAC or USB interface can bypass a noisy or faulty onboard analogue stage. It will not repair a bad source file, DPC latency, USB power problem or damaged headset cable.
Borrow or test a known-good device before buying. If it stays clean through the same workload and ports, you have evidence for the upgrade.
FAQ
Should I disable audio enhancements?
Yes for a controlled test. If crackle stops, re-enable features one at a time to find the offender.
Does USB selective suspend always cause crackling?
No. Test it when a USB device crackles after idle or resume, then restore it if the result does not change.
When is a DAC justified?
When the same source is clean through another path and the fault remains tied to the onboard analogue output.
Follow one known audio file across rear, front and USB outputs, then spend money only where the crackle stays attached to the hardware path.