You've just dropped a fortune on a beastly rig, but your games look... flat. That epic sunset in Elden Ring looks washed out, and you can't spot that pesky camper hiding in the shadows in Warzone. Sound familiar? Your monitor is likely running on factory settings, which are rarely optimised for gaming. Learning how to properly calibrate your gaming monitor is the single biggest (and free!) upgrade you can make to your setup in South Africa. 🚀
Why You Need to Calibrate Your Gaming Monitor
Think of an uncalibrated monitor like a sports car stuck in first gear. You have all that potential, but you're not using it. Proper gaming monitor calibration unlocks the true performance of your panel, giving you a serious competitive edge and a more immersive experience.
The benefits are huge:
- See Your Enemies: Correctly adjusted brightness and contrast reveal details in dark areas, making it harder for opponents to get the drop on you.
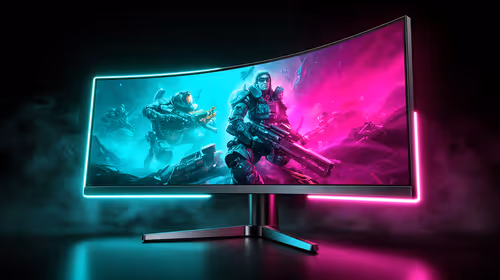
- Experience True Colour: See games exactly as the developers intended. From the vibrant streets of Night City to the lush landscapes of Toussaint, accurate colours make worlds come alive.
- Reduce Eye Strain: A screen that's too bright or has a weird colour cast can cause headaches and fatigue during those long gaming sessions. A calibrated screen is far more comfortable to look at.
Getting this right ensures you're getting every rand's worth of performance, whether you snagged one of the best PC monitor deals or invested in a top-tier panel.
Your Pre-Flight Checklist Before Calibrating
Before you start fiddling with settings, take a few minutes to set the stage for success. A little prep work goes a long way to getting an accurate result.
- Warm It Up: Let your monitor run for at least 30 minutes to ensure its colours and brightness have stabilised.
- Find a Neutral State: Dive into your monitor's on-screen display (OSD) using the buttons on the monitor itself. Look for a "Factory Reset" or "Standard Mode" option and select it. This gives you a clean slate.
- Control Your Lighting: Calibrate in the lighting conditions you usually game in. Close the curtains to avoid direct sunlight, as this can throw off your perception of colour and brightness. This is a vital step for all PC monitors, from entry-level to professional grade.
The Step-by-Step SA Guide to Monitor Calibration 🔧
You don't need fancy, expensive hardware for a basic but effective calibration. Your operating system has built-in tools that will get you 90% of the way there.
### Step 1: Use Online Test Patterns
Before diving into OS settings, open a full-screen calibration image in your browser. Websites like Lagom LCD monitor test pages or EIZO Monitor Test are fantastic free resources. Keep one of these open as you adjust. We'll focus on the black level, white saturation, and gradient tests.
### Step 2: Adjust Brightness and Contrast
Use the physical buttons on your monitor for this step.
- Brightness: This controls the backlight. On the Lagom black level test, lower the brightness until the first few dark squares are indistinguishable from black, then raise it just enough so you can barely see square number 1.
- Contrast: This controls the intensity of the white levels. On a white saturation test, raise the contrast until the brightest squares start blending together, then lower it just a touch until you can distinguish the last few shades of white.
Pro Tip: Use Your GPU Software ⚡
NVIDIA Control Panel and AMD Software: Adrenalin Edition have built-in colour adjustment settings. These often provide more granular control than the standard Windows tool, allowing you to tweak digital vibrance and hue for a personalised look after your main calibration is complete.
### Step 3: Run the Built-in OS Calibration Tool
Now it's time to fine-tune things with software.
- On Windows: Hit the Windows key and search for "Calibrate display color". This wizard will guide you through setting gamma, brightness, contrast (which you should skip as you've set it on the monitor already), and colour balance.
- For Gamma: Adjust the slider so the small dots in the middle of the circles are barely visible. This ensures mid-tones aren't too dark or washed out.
- For Colour Balance: The goal here is to make the grey bars look neutral, without any red, green, or blue tint. This step is crucial for getting the most out of the vibrant panels found in modern crisp 4K monitors.
Once you're done, the tool will save your new settings as a colour profile. You can toggle between the before and after to see the difference... it's often dramatic! The process is the same whether you're using a flat panel or one of the latest immersive curved monitors.
When Calibration Can't Fix It
Sometimes, after a thorough calibration, you might find your monitor still isn't up to scratch. Older panels can lose their brightness and colour accuracy over time. If the colours still look muddy or you're seeing significant backlight bleed, it might be a sign that the hardware itself is the limiting factor.
Technology has moved fast, and many of today's gaming monitors offer incredible out-of-the-box colour accuracy, higher refresh rates, and features like HDR that simply can't be replicated on older tech. Even handy portable monitors now boast impressive specs. If you've done your best to calibrate your monitor and still feel like you're missing out, an upgrade might be on the cards. ✨
Ready for a Visual Upgrade?
A perfectly calibrated monitor is key, but it can only go as far as the hardware allows. If you're ready to see what you've been missing, explore our massive range of gaming monitors and find the perfect display to dominate the competition.