



Fix Wrong Refresh Rate on a RX 9070 XT Build Setup
Wrong Refresh Rate on a RX 9070 XT Build setup is usually a display chain, driver, cable, or settings issue. Check monitor mode, GPU output, OS settings, and game settings first.
Read moreUse a mount rated for the monitor and a plate matching its 100 x 100mm VESA pattern. Secure the desk clamp or wall bracket first, verify screw depth from the manual, and have one person support the screen while another fastens it.
Use a monitor mount rated for the screen and a plate that matches its 100 x 100mm VESA pattern. Secure the desk clamp or wall bracket before lifting the display, confirm screw depth from the mount and monitor documentation, and have one person support the screen while another fastens it. A controlled two-person installation is safer than trying to hold, align, and tighten a monitor alone.
Read the mount's rating and installation instructions first. A mount is not suitable simply because its plate has four holes that look close enough. Check that it supports the monitor's VESA pattern, is rated for the monitor's weight, and is designed for the way you plan to attach it: desk clamp, grommet, wall, or another approved surface.
The Lenovo L24-4e lists a 100mm VESA mount in its product specification. That identifies the mounting-hole pattern on the monitor. It does not identify a particular arm, screw length, desk thickness, or wall fixing method, so those details need to come from the mount maker and the installation surface.
Lay out the plate, screws, washers, spacers, and tools on a clear table. Keep similar screws separate until you know which set the instructions require. Using a screw that is too long can damage the mounting area; using one that is too short can leave the screen insecure.
Compare office monitors and monitor accessories before choosing a mounting setup.
For a desk clamp, inspect the edge where the clamp will sit. It should be solid, flat, and within the thickness range stated by the mount manufacturer. Avoid a weak fibreboard lip, a cable tray, a drawer frame, or a surface that is already damaged. Tightening a clamp against an unsuitable edge can crack the desk or let the mount shift later.
For a wall bracket, identify the construction of the wall and use hardware approved for that material. A wall mount is not a place to guess at anchors. If you cannot confirm the surface or fixing method, stop and ask a qualified installer or building professional. The monitor is valuable, but the larger risk is a failed fixing over a desk or walkway.
Clear the work area. Remove the keyboard, laptop, drinks, and other items below the intended mounting position. This gives you room to work and reduces the chance of dropping a tool onto equipment.
Place the monitor face down on a clean, soft, stable surface if the manufacturer permits this position. Do not put pressure on the panel. Align the VESA plate with the four mounting holes, keeping it square so the arm will not sit crooked after installation.
Use the screw depth and hardware specified by the monitor or mount instructions. Start each screw by hand to prevent cross-threading, then tighten evenly. Do not over-tighten in an attempt to make the connection safer. The correct screw, correct depth, and even fastening matter more than brute force.
If spacers are included, use them only when the instructions call for them. They are often intended to create clearance around a recessed mounting area. Improvising with random washers can change the screw engagement and compromise the fit.
This is the moment to use a second person. One person should hold the monitor steadily while the other guides the plate or quick-release mechanism onto the arm or bracket. Communicate before either person lets go. The person supporting the screen should keep both hands on it until the other person confirms that the locking feature is engaged.
Once it is attached, check every visible lock, safety screw, latch, or retaining pin that the mount uses. Gently test for movement without pulling hard on the display. A little arm adjustment may be normal, but the monitor should not wobble at the plate or slide out of its receiver.
Keep the protective film on the screen until the fitting work is complete if practical. It is easier to clean a few fingerprints than to repair a scratched panel, but preventing unnecessary contact is still worthwhile.
Connect power and video cables with enough slack for the arm's full intended movement. Do not leave them tight at the highest or farthest reach. Move the screen slowly through the range you plan to use and watch for a cable that catches, stretches, or presses against a hinge.
The L24-4e has HDMI 1.4 and VGA connections in its listed specifications. Connect the cable you will use, power on the monitor, and make sure the image is stable before arranging the cable covers or ties permanently. It is much easier to correct a route before everything is bundled.
Finally, set the viewing height, distance, and tilt from your normal seated position. Recheck the mount after the first day of use and after any significant desk move. A quick inspection is a sensible part of a safe setup.
Its listed specification includes a 100mm VESA mount, commonly called a 100 x 100mm pattern. Choose a mount plate that matches it.
It is safer to have one person support the screen while another fastens or locks the plate. That reduces the chance of a dropped or badly aligned display.
Follow the monitor and mount documentation for screw size and depth. Do not guess or substitute a longer screw because it seems more secure.
No. The clamp needs a solid, flat section within the mount maker's stated thickness range. Inspect the desk construction before tightening anything.
Choose a compatible mount, secure the surface first, and make your monitor installation a calm two-person job.
Its listed specification includes a 100mm VESA mount, commonly called a 100 x 100mm pattern. Choose a mount plate that matches it.
It is safer to have one person support the screen while another fastens or locks the plate. That reduces the chance of a dropped or badly aligned display.
Follow the monitor and mount documentation for screw size and depth. Do not guess or substitute a longer screw because it seems more secure.
No. The clamp needs a solid, flat section within the mount maker's stated thickness range. Inspect the desk construction before tightening anything.
Wrong Refresh Rate on a RX 9070 XT Build setup is usually a display chain, driver, cable, or settings issue. Check monitor mode, GPU output, OS settings, and game settings first.
Read more
Screen Flickering on an RX 9070 XT is usually a setup, driver, cable, firmware, display, or configuration check. Work through safe steps before replacing parts or blaming one component in an SA build.
Read more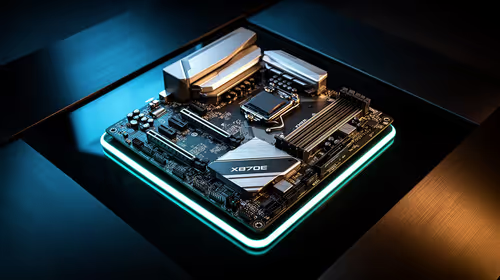
X870E motherboard crashing can involve BIOS, RAM, chipset drivers, storage, power, heat, or device conflicts. Check logs and repeatable load patterns before replacing the board in a South African gaming PC.
Read more
OLED gaming monitor crashing after a GPU driver update needs a careful rollback path. Start with recent changes, safe boot options, driver or BIOS settings, logs, cables, and restore points before replacing hardware. Change one thing at a time.
Read more
Computer Science laptop + Bishopscourt digs should be shortlisted around the job it must do. South African buyers should compare CPU, GPU, RAM, and screen quality, warranty path, and upgrade room before treating any pick as best.
Read more
Wits Information Systems student in Waterkloof? needs a balanced parts plan, not a random basket. Map the CPU, GPU, RAM, SSD, cooling, and monitor target to the budget so SA builders know where to spend first.
Read more
Steam game recording black screen needs a fresh capture and export test before a hardware upgrade. Check the recording mode, free space and whether another game records correctly. Community reports suggest testing broadcasting settings, but that is not a universal fix.
MSI Stealth 16 RTX 5070 specs need an exact SKU check because current listings disagree on GPU memory. One UK listing says 12GB while MSI's family table says 8GB. Confirm the supplied configuration rather than assuming either describes every machine.
SHIELD TV Pro price increase means a higher US price for the existing streaming box. NVIDIA confirmed the change starts on 2 October and cited component costs. Compare playback needs, regional service access and the full local quote before buying.

Is a transparent phone mount the key to clearer windshield views? 🚗 We analyze if these see-through accessories actually reduce obstruction while driving or if they’re just a clever marketing gimmick. Find out which mount keeps your dash clean. 📱
Steam game missing from library usually needs an account and filter check before a reinstall. Match your receipt to the signed-in account, clear library filters and inspect hidden games. Installed files do not establish ownership on the account you are using.
Steam game recording black screen needs a fresh capture and export test before a hardware upgrade. Check the recording mode, free space and whether another game records correctly. Community reports suggest testing broadcasting settings, but that is not a universal fix.
Windows 11 two finger scroll not working needs a gesture and driver check first. Test pointer movement and scrolling in more than one app, inspect Touchpad settings and use Windows Update or the laptop maker's driver. A new mouse is only a workaround.
Windows 11 Insider 26220.9587 is a Beta preview released on 2 October. Microsoft lists Unicode text support, Settings performance work and a Cloud Rebuild entry point. These are preview changes, not a reason to move your only working PC onto a test build.
Steam Linux ARM support is not provided for general ARM hardware in Valve's 4 October reply. An experimental client running is different from official support. Check processor architecture, operating system and exact games before buying.
Windows 11 taskbar auto hide not working needs a setting and app check first. Confirm auto-hide, test the screen edge and compare apps. A saved-work Explorer restart is a troubleshooting trial, not a guaranteed fix or reason to buy a laptop.
Outlook mouse pointer disappears is a documented classic Outlook issue under investigation. Try the listed workarounds and test other apps. Hover reactions can show input still works; an invisible pointer alone does not prove mouse failure.

MediaTek Filogic 8800 is a router platform in the 6 October Network X announcement. The showcase covers mixed-generation networking and energy management. It does not establish a finished local router SKU, stock or faster fibre.