Staring at a loading screen while your squad is already dropping in? We’ve all been there. That agonizing wait is often caused by an old, slow hard drive. The good news for South African gamers is that the fix is easier and more affordable than you think. A super-fast PCIe NVMe SSD is the single biggest speed boost you can give your PC, and this guide will show you how a quick PCIe SSD install can get you back in the game… faster.
Why a PCIe SSD Install is a Must for Your Rig
The difference between a traditional hard drive (HDD) and a modern solid-state drive (SSD) is like night and day. While HDDs use spinning platters, SSDs use flash memory, making them monumentally faster. This means your PC boots in seconds, your applications snap open instantly, and most importantly, your game levels load before you can even grab a snack.
For gamers, this upgrade eliminates stuttering and texture pop-in, creating a much smoother experience. The process of installing a PCIe SSD is straightforward, and the performance leap you get from even a budget-friendly drive is massive. If you're ready to see what you've been missing, it's worth browsing the wide world of available NVMe SSDs to find one that fits your budget.
Pre-Flight Check: What You Need Before You Start 🔧
Before you open up your PC case, let’s get everything in order. A successful PCIe SSD install is all about preparation.
Here’s your checklist:
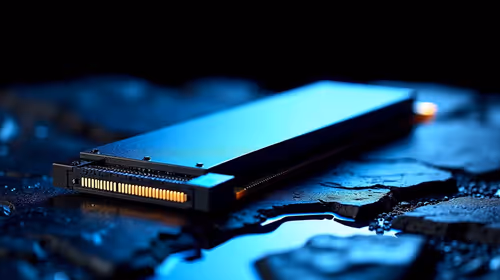
- Your New PCIe NVMe SSD: The star of the show!
- A Phillips-head Screwdriver: For the M.2 screw and possibly your case panels.
- Your Motherboard Manual: Your best friend for locating the M.2 slot. If you don't have the paper copy, a quick search for your motherboard model online will bring up a PDF.
- An Anti-static Wrist Strap (Recommended): To protect your components from static electricity.
Crucially, you need to confirm your motherboard has a compatible M.2 slot. Most modern boards do, but it's vital to check what "generation" they support. While a newer drive will work in an older slot, you'll be limited to the slot's speed. For maximum performance, matching a blazing-fast Gen 4 NVMe SSD with a Gen 4 slot is the sweet spot for most gamers right now.
The Main Event: Your Step-by-Step Installation Guide
Ready? Let’s do this. It’s simpler than it looks.
Step 1: Power Down and Prep Your Workspace
Fully shut down your PC. Not sleep, not hibernate… a full shutdown. Unplug the power cable from the back and press the power button one more time to discharge any residual electricity. Lay your PC case on its side on a flat, stable surface like a table.
Step 2: Open the Case and Locate the M.2 Slot
Remove the side panel of your PC case. Now, consult your motherboard manual (or the PDF you found) to find the M.2 slot(s). It’s a small, horizontal slot, usually located below the CPU or between the PCIe slots where your graphics card sits.
Step 3: Install the NVMe SSD ✨
Notice the small screw opposite the M.2 slot—unscrew it, but don't lose it! Take your new SSD and, holding it by the edges, slide it into the slot at a slight angle (around 20-30 degrees). It's "keyed," so it will only fit one way. Gently press the other end of the SSD down towards the motherboard. It should line up perfectly with the screw hole.
Pro Move: Clone, Don't Reinstall! 🚀
Want to skip reinstalling Windows and all your games? Use free software like Macrium Reflect or Clonezilla to clone your old drive to your new NVMe SSD. Just install the new drive, run the software to copy everything over, then go into your BIOS to set the new SSD as the primary boot drive. It saves hours of setup!
Step 4: Secure the Drive and Close Up
Use that tiny screw you removed to secure the SSD in place. Don't overtighten it—just snug is fine. With the drive installed, you can now put your case’s side panel back on, plug everything in, and get ready for the final software step. For those building a top-tier rig for the future, the same process applies to cutting-edge Gen 5 NVMe SSDs, which offer the next frontier of storage speed.
After the Install: Initialising Your New Drive
When you first boot up, Windows won't see your new drive yet. Don't panic! This is normal. You just need to tell Windows how to use it.
- Right-click the Start button and select Disk Management.
- A window will pop up asking you to initialise the new disk. Choose GPT (GUID Partition Table) and click OK.
- You'll now see your new drive listed as "Unallocated." Right-click on the unallocated space and select New Simple Volume.
- Follow the wizard's prompts. You can leave most settings as default, but you will need to assign it a drive letter (like D: or E:).
- Once the format is complete, your new SSD will appear in "This PC," ready for games and files! This final step completes your PCIe SSD install.
The performance boost from this simple upgrade is one of the most satisfying you can make. It truly makes your whole system feel brand new.
Ready for Ludicrous Speed? A PCIe SSD install is one of the most impactful upgrades you can make. Stop waiting and start playing. Explore our incredible range of SSD deals and find the perfect drive to unleash your PC's true potential.