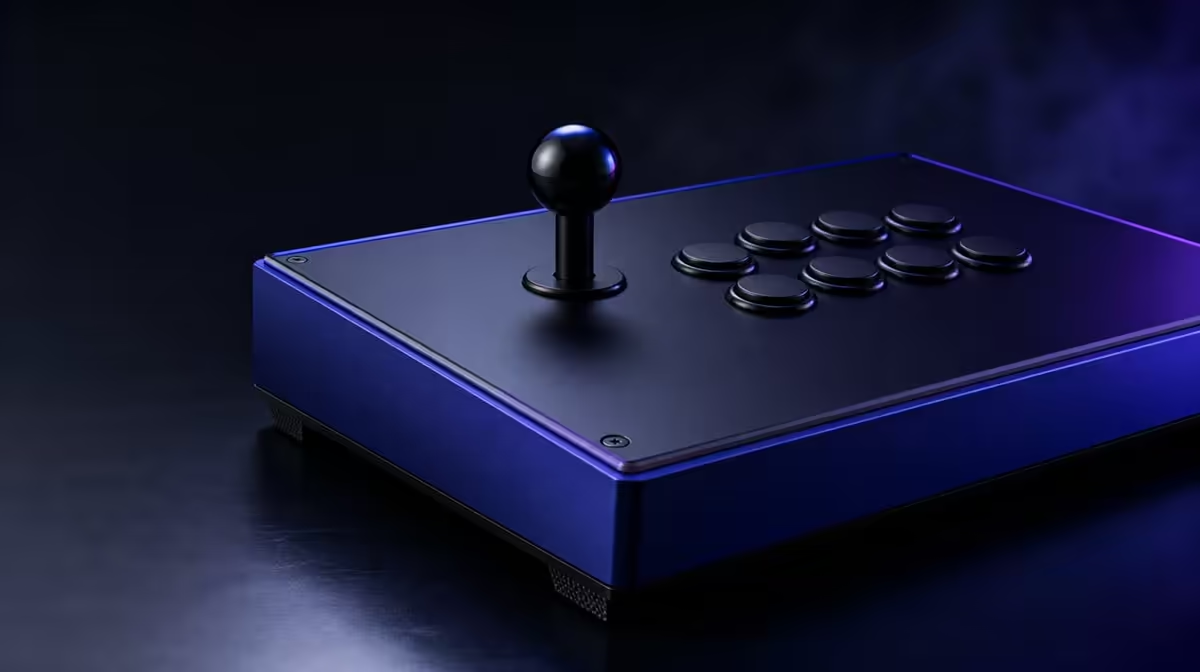
Fightstick artwork succeeds when it respects the controller as an object. A custom fightstick faceplate is interrupted by a lever, button caps, fasteners and the player's hands, so the design, print and installation all need to be planned around those fixed realities.
Quick Answer
Customise the R1,799 GameSir C2 faceplate by obtaining the correct template or dimensions, printing a paper proof and following suitable removal guidance. Its artwork-ready panel is confirmed, but the exact template, materials and disassembly steps must match the product rather than being guessed.
📐 Begin with physical boundaries
Measure or obtain an exact C2 faceplate template before designing. The outer edge is only the beginning; lever and button openings, visible fasteners and any areas covered by the enclosure all affect the usable canvas.
Print a draft at actual size on ordinary paper. Place it against the panel and check whether every opening aligns. A digital ruler or screen preview cannot reveal printer scaling, crop margins and the way button caps cover nearby artwork.
Mark a safe visual zone for important text or faces. Keep critical details away from holes and the areas normally hidden by the player's wrists. Background textures can cross those zones more gracefully than a focal image.
The C2's customisable faceplate provides the opportunity, not the complete production specification. Stop and obtain proper guidance if the panel construction or template remains uncertain.
Decide whether labels belong in the design. If they help a shared setup, make them legible from the seated angle and ensure artwork does not obscure the controller's own state indicators. Decoration should not make configuration harder.
Keep bleed and trim areas separate from the visible design. The printer may crop differently from a home preview, so the paper proof needs to include the complete edge rather than only the central image.
🎨 Design for play, not a flat preview
Choose contrast that still works under ordinary room light. A dramatic dark image can disappear beneath reflections, while busy detail around control labels can make the surface harder to read during setup.
View the paper proof from the seated position. The controller will be angled differently from the design monitor, and the player's hands will cover large portions during play. Make adjustments based on that real sight line.
Keep a clean source file and note the print scale. If the first physical proof needs correction, a documented base makes the second pass precise instead of forcing the design to be rebuilt.
Evetech's gaming controller selection can help buyers compare which complete layout is worth personalising before print costs enter the plan.
Review colour under daylight and evening lighting. A faceplate may appear balanced on a bright monitor but lose detail in the room where it will be used. Adjust the file based on physical proofs, not display brightness alone.
Ask whether the design will still feel personal after months rather than days. A simpler composition can age better and remain easier to revise. Save versions so a later change does not destroy the approved baseline.
🧰 Protect the controller during installation
Disconnect the C2 and prepare a clean, soft work surface. Keep small fittings in labelled containers and photograph the standard exterior and any appropriately accessed internal arrangement before moving parts.
Follow the correct faceplate removal sequence. Do not force a panel, pull an unseen connection or assume that artwork access proves every internal component is intended for casual removal. Stop when the hardware differs from the guidance.
Handle the final print by its edges and keep moisture away from the controls. Check that no material enters button or lever openings, no wire is pinched and the panel sits flat before reconnecting.
The C2 uses Sanwa Denshi controls, but artwork should not interfere with their movement. Press around each cap and move the lever through its travel while the controller remains disconnected, watching for rubbing or trapped edges.
Reinstall fasteners evenly and only according to suitable guidance. An artwork project should not end with a warped faceplate or damaged fitting. If resistance feels unfamiliar, stop and compare the arrangement with the photographs.
Keep the removed original layer or print in a flat, labelled sleeve when possible. That creates a visual rollback and preserves useful dimensions for future proofs without reopening the controller immediately.
🧪 Test function and live with the result
On a supported PS4 or Xbox One setup, establish recognition after reassembly. Test every button, four cardinal directions and four diagonals. Confirm the directional-toggle and Key Lock positions because they may have moved during the work.
Play a normal session before judging the project complete. Look for glare, lifted edges, distracting visual contrast or new difficulty identifying controls. A design can fit perfectly and still be less pleasant in use than it appeared on paper.
At R1,799, the C2 remains a functioning controller first. The artwork adds personal value without changing response, platform support or player technique. Keep expectations in the right category.
Use Evetech's gaming accessories section and accessories best sellers when reviewing the broader station and current availability. Store the final source, template information and installation note for future maintenance.
Clean the completed surface gently. Keep liquids away from openings and avoid abrasive cloths that can haze a protective layer. A custom panel should remain easy to care for, not become too delicate for regular play.
Photograph the final installed artwork and the confirmed switch positions. The image can help identify the controller, preserve the design reference and remind the player how the working setup looked after assembly.
Keep text sparse enough to remain readable around the controls. Long quotes, tiny labels and detailed logos can become visual noise once button caps interrupt them. Use the paper proof to view the design at normal playing distance, not only close to the face.
Plan future revision before applying the first design. Save a clean template layer, artwork layer and print-ready version separately. This makes a small colour or crop change possible without rebuilding control cut-outs.
If the C2 is shared, gather feedback from the people who use it. One player may cover a focal detail with a different hand position or need clearer switch labels. The final faceplate can reflect personal style while remaining legible to everyone who changes its configuration.
Recheck function after the first long session and again after storage. Confirm that the print has not shifted, no edge interferes with a button and lever travel remains clear. A successful artwork project should fade into normal use rather than demand constant attention.
Frequently Asked Questions
Why is an exact template important?
It aligns the print with the faceplate boundary, control openings and visible hardware. A small scale error can spoil the fit.
What should be decided first in the design?
Choose the focal area and safe zones around controls. That decision should happen before detailed artwork fills the canvas.
Can printed art be left unprotected?
Use the material and protective method appropriate to the C2 guidance. Do not assume any print can sit exposed beside active controls.
Should controls be removed without instructions?
No. Follow the proper faceplate procedure and stop if the construction differs from what you understand.
Does artwork improve controller response?
It changes appearance only. The Sanwa controls, direction mode, game handling and player practice determine input.
What does the customisable C2 cost?
The base GameSir C2 reference is R1,799 before artwork production or other optional work.
Ready to make the controller look intentional from the player's seat?
Start with Evetech's controller category, secure the exact C2 template and approve a paper proof before touching the faceplate.